This blog was active until 2022. It is a great example of a project blog:
This blog records the fantastic reading work which takes place at Kirkhill Primary School and Dechmont Infant School. We love to read and encourage all our families to read and share books for enjoyment as much as possible. While our access to books and ability to share books has been limited over the last eighteen months we have found new ways to celebrate reading.
A nice example of a pupil written post and use of embedding google video to show their animation.
What was the mythical creatures called one of them are called penfin and the other is called dogor the animations were like there was a bad guy and a good guy who save the day. and they live happily ever after.
Over the years I’ve often though that video is most useful as a tool for pupils to report on their learning and learn a little about making media. I have not changed my mind but recently I’ve found myself using it to share learning quickly myself quite often.
There are a couple of useful Apps I’ve been using to do this, both have, in my opinion advantages over iMovie and clips.
HyperLapse is one I’ve used for years now. It seems to be called ‘Hyperlapse from Instagram’ now. It is however free and can be used without having an instagram account. Its main purpose is to record speeded up videos. But the main feature I use it for is it smooths out hand held video with automatic stabilisation. This means you quickly move through the classroom videoing activity and get a fairly good result without editing.
Snapthread is another handy choice. It quickly pulls together videos from ‘live photos’ on iOS. You can add music, titles and the like quickly. I’ve found it especially handy in impressing visitors who ask me to tweet photos of their work with my class. I can usually get a video up in just a few minutes. You just need to try and hold the camera still for a moment or two before of after clicking the button. 30 second videos free, but I was delighted to be able to pay for longer ones to support an independent developer.
I’d not claim any artistry or skill in making these videos but they only took a couple of minutes to create. The longest part was probably the upload to twitter.
I also upload these to our class blog. I’d much rather just use the blog but twitter is ubiquitous in Scottish education now:(
Move over Windows Movie Maker – and start making movies on a PC/laptop with the free Microsoft Photos app! If you previously had been used to using Windows Movie Maker to quickly create videos, you may not even have noticed on devices running Windows 10 and later that you have the latest version of the …
Further to this recent post on capturing, processing and captioning video, my colleague, Dr. Audrey Cameron, advised me to try YouTube for capturing the .srt captions file more quickly. I am thankful to her for this, because although I was aware of YouTube’s rapidly improving automatic captioning (I use it myself when I watch with sound off, for example), I didn’t know that the .srt file can be downloaded. Here’s a revised approach I am using today.
Capturing the video and audio
For capturing an old-fashioned lecture-style talk using KeyNote, I use the facility to record a presentation (from the Play menu). The presentation can be exported as a .m4v video file with sound. At the same time as recording the presentation in KeyNote, I also record myself on my Fuji X-T2 camera and capture a high quality audio track separately on a Zoom H-1 recorder. A “pro” tip to is to clap just before you start presenting – it leaves a nice spike in the audio waveforms, making it easy to line up the separate tracks. You can also pretend to be Steven Spielberg or Alfred Hitchcock, according to your genre, by saying, “Action!” at the same time.
Processing
Import the video and audio tracks into iMovie, align them using the spike from your clap, and check that the audio is the same length as in the video track of the speaker. I found that for longer videos, over 15 minutes, they can be different. This difference produces an echo effect, eventually separating the video from the soundtrack, like a Swedish movie. Adjusting the audio to align properly can easily be done in iMovie using the speed adjustment. Once the clips are aligned, you can turn the audio level of the video clips down to zero, so only the high quality track remains.
The next thing I do is to change the video track of the presenter to “Picture in picture”, so viewers can see me presenting within the slides: I think this is a bit of a substitute for one of the features I miss from live presenting, which is managing the attention of the viewer. I normally do this by blanking the display, which has the effect of moving the eyes in the room from the screen to my face – a powerful way to add contrast to your talk. This “mini me” within the slides can be faded in or out, according to what you want the students to focus on at any point. Other effects are possible, like switching to embedding the presentation within the presenter video.
The finished project can be exported via the Share menu to a .mp4 file.
Getting the transcript
The video can be uploaded to YouTube now: you’ll need a verified account to upload clips longer than 15 minutes, which means giving Google your phone number. I baulked at this at first, but expedient is the slayer of principle, and in this case, privacy. Make sure you click “Private” when saving the clip. These lectures are not for public consumption.
After a while – maybe 30 minutes, depending on the length of your video – the automatically-generated captions file can be edited using a really nice editing interface in YouTube Studio designed for the purpose. You will need to add punctuation and if you wish, add comments to your own commentary. Once that has been done, the .srt file is ready to download.
Media Hopper Create
Your video can now be used within your local VLE, in my case, Blackboard Learn, by uploading via the media manager, Media Hopper. Once uploaded, you can then add closed captions by uploading the .srt file alongside it. Students then have a choice whether to access captions within the video sequences or not.
Another Hitch
I was about to post this, all smug, like, as I uploaded the latest video made with this method, when I hit a “file too large” error when uploading to Media Hopper. The video I had made was just short of 18 minutes and had a file size of 1.2GB. Now, mp4 is an efficient container format so I maybe made too many “best quality” choices in making the video: high definition 1080p for the presenter, same for the KeyNote. Rather than go back and do it all again, I resorted to ffmpeg to make me a reduced bitrate version. I thought halving the bitrate might produce a file half the size.
$ ffmpeg -i mybigvideo.mp4 	# find out what the current bitrate is..
...
  Duration: 00:17:28.55, start: 0.000000, bitrate: 9978 kb/s
...
$ ffmpeg -i mybigvideo.mp4 -b 4489k mysmallervideo.mp4
This made (after thrashing my 5-year old MacBook Air for about 25 minutes) a file – as hoped for – half the size (673 MB).
Deployment to a website
To use the video and captions file together within a webpage is straightfroward, except that the captions need to be in a different format. This format is Web Video Text Tracks (VTT), and is easily obtained using ffmpeg:
$ ffmpeg -i srtfile.srt subtitlefile.vtt
The web page needs the following code (adapted to your own file paths, obviously):
<p><videowidth="640"height="360"controls="controls"><sourcesrc="https://www.learn.ed.ac.uk/path-to-video.mp4"type="video/mp4"><tracksrc="https://www.learn.ed.ac.uk/path-to-vtt-file.vtt"kind="captions"srclang="en"label="English"default>
Your browser does not support the video tag.
</video></p>
Conclusion
Video production for ‘digital first’ teaching strategies needed in response to COVID-19 measures or similar, is a non-trivial task. Including closed captions is an additional time multiplier. Personally, I don’t like asynchronous teaching at all: it misses so many important aspects of good pedagogy, aspects which are easily ignored by administrators of education in the pursuit of apparent economies or easy fixes. I am at ease, however, with an established workflow.
I am thankful to my colleague, Audrey, for her patience and support in helping me get to this solution. We both have a lot of videos to make, and now it will not take me as long as it might have done.
I am required to produce video resources for my students who are coming to the University very soon, either in person or digitally: our teaching under the COVID adjustments is “digital first”. We are also particularly keen to support those students who might require captions on their videos. This isn’t just those who might be hearing or visually impaired, it’s all students who might like the ability sometimes to have the extra clarity provided by words on the screen that reflect the words spoken by the presenter.
Here’s my take on a workflow model to make this work well. There are existing facilities to do this semi-automatically – uploaded videos can have an automated transcription generated but this takes a lot of time, and requires the creator to go back on subsequent days to hand-edit any errors or make any other adjustments.
I like to do a task and complete it: I like to get it right and take my time over that. Once it’s done, I like to move on to the next set of tasks. To that end, here is a way I have found of creating video, with quality captioning for those who need it, and the ability to switch it off for those who find it a distraction.
Subtitles are embedded in DVD movies and the like for languages other than that on the audio. Multiple subtitle tracks can be embedded within a title, or switched off if the audio track is in the native language of the speaker. Captions, on the other hand, are a transcription of dialogue in the video. Closed captions are distinguished from open captions by being able to be switched off if required. Open captions are often embedded in the video and cannot be turned off. My intention in this workflow is to provide closed captions.
Capturing the video and audio
I captured my video for the proof-of-concept using a Fuji X-T2 APS-C digital mirrorless camera which takes 1080p (1920 x 1080) video. Although the camera records stereo audio, I prefer to capture audio separately using a Zoom H-1 recorder. The quality is much better, not least because the mic is with the speaker, not the camera.
Processing
I import the video and audio tracks into iMovie, trim out the top and tail and make other edits, and remove the embedded audio track captured by the camera. This is replaced with the Zoom audio, which can be a bit of a fiddle to align well with the video. The audio waveform can help here but that depends on the recording environment. Depending on the exposure settings on the camera, you might want to “enhance” the video in iMovie for a contrastier image. Once you have added any title sequences (or credits) and transitions, export the finished video (via the “share” menu) as an mp4 file.
Getting the transcript
Open the mp4 file in Quicktime and export as an audio file, the default m4a format is OK. This file can be uploaded to a blank Word document in Office 365 via the Dictate drop-down menu (select Transcribe). This will do a pretty decent job of turning your dialogue into text.
Save the .docx file and convert it to a plain text format - I prefer markdown, although this isn’t necessary provided you can finish up with a plain text file. I do the conversion using pandoc:
$ pandoc transcript.docx -o transcript.md
This file can now be edited, correcting any errors in the transcription and chunking the dialogue to make it show at the right time during the video. This is easily done with the video window open on the desktop next to your editor. You should add section markers and timestamps for subtitles as you go through the video. A minimal example:
1
00:00:01,00 --> 00:00:01,30
Welcome to my interesting video.
Finally, you will need this transcript in the correct format for embedding into the video file. This is a simple matter of changing the filetype to .srt (which is a “SubRip Subtitle” file).
Add Closed Captions to the video file
The ffmpeg tool is best for this. This tool (and others you might need) can be installed simply using brew if it isn’t already on your system. I don’t propose to detail how to do this, but in essence, it’s a matter of typing$ brew install ffmpeg in a terminal window. Once you have it, add the captions:
The program accepts input files, which are you video and the srt file containing the captions and timings. Video and audio are merely copied to the output file.
Finished, part one
The video file you have just created is now shareable: users can play it on their machines and opt to switch captioning on or off if they wish. Their computer may choose to control this behaviour automatically if local settings allow it.
I need to distribute this video using resources within the VLE (virtual learning environment, in my case, Blackboard Learn and Media Hopper. This is where it gets sticky.
Media Hopper Create
It’s easy to upload a video to the Blackboard VLE by clicking on Media Hopper Create in the Tools menu. This is very nice but this process strips out the captions track. Embedding the uploaded video offer no CC option to viewers and no captions are visible. This is clearly a fault in the Media Hopper Create system.
You can ask for subtitles to be created for the uploaded video but this is an automated and low-quality service that isn’t really any good. It creates, ironically, a CC track that is inferior to the one included in the uploaded file.
A workaround
I have found a way of getting around this difficulty: within Learn, add a new item. This is effectively a webpage, and using the editing tools, you can upload two files. The first is the mp4 video file (it is not necessary for this file to have the embedded captions track).
The second file contains the captions and timing information in our srt file, but needs to be in a different format. This format is Web Video Text Tracks (VTT), and is easily obtained using ffmpeg:
$ ffmpeg -i srtfile.srt subtitlefile.vtt
Having uploaded these two files to the Learn Item, it is necessary to edit the HTML using the built-in HTML editor (click the double chevron at the right end of the tool bar to reveal it). The item source should be edited to contain a <video> tag:
<p><videowidth="640"height="360"controls="controls"><sourcesrc="https://www.learn.ed.ac.uk/path-to-video"type="video/mp4"><tracksrc="https://www.learn.ed.ac.uk/path-to-vtt-file"kind="captions"srclang="en"label="English"default>
Your browser does not support the video tag.
</video></p>
The path to video and the vtt files is available in the links to them put thee by Learn when you uploaded the files. It is not necessary to keep these links.
Finished, part two
This is a workaround but we now have the facility to make and upload good quality video with closed captioning that can be viewed by students within their Learn course.
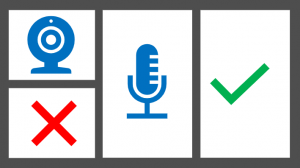
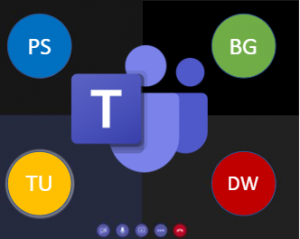
Want to present to your class in a live video meet?
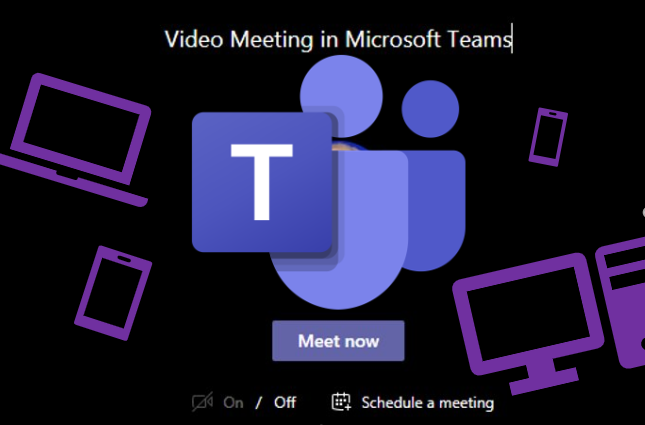
Microsoft Teams in Glow provides the facility for you as the teacher to present live to your class via video meet. This can be useful if you want your pupils to have the familiarity of seeing you and hearing your voice, and to hear each other.
Don’t feel under pressure to use this video meet facility right away. And take on board safeguarding and employer requirements in use of such a tool, as well as being mindful of your professional teaching association advice.
Situations will vary as to what digital resources or facilities learners have access, and when, especially if sharing the same device in a home. And Internet connection available can be highly variable from one location to another, and one home to another. If you are sharing a message or teaching point then an alternative to live video meetings could be to share a recorded video.
If you wish to have only your voice in the video meet then you might instead opt to have the camera pointing at an object (piece of work, paper on which you’ll demonstrate a teaching point, or maybe a piece of writing you’ll discussing together, or for perhaps a class toy/character/mascot figure.
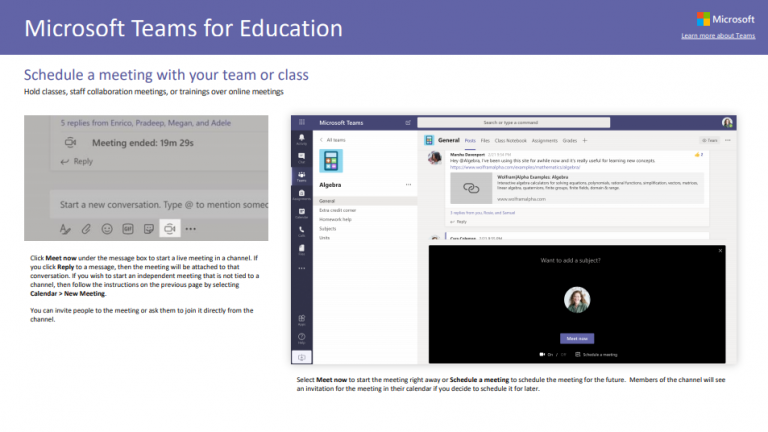
Here’s how to invite everyone in a class Team to a scheduled video meet in Microsoft Teams in Glow, or to invite individuals: video meet in Microsoft Teams can be set up in 3 different ways and here’s a link to a very quick video showing how (just note that the third way is only available for staff-to-staff video meetings as chat is disabled for pupils nationally in Glow)
It’s worth being aware that for safeguarding reasons within Glow nationally currently video meetings permit only the teacher to broadcast video and to have only audio from pupil (which can also be switched on and off by the teacher), there is no access to anyone without a Glow account, and recordings are disabled.
To avoid pupils entering the class video meet before you, then there’s an additional way that you can set up the video meet in your Outlook calendar in Glow, choose to add it as an online meeting, selecting Microsoft Teams option, and then saving and opening the diary entry again before then adjusting meeting options underneath the “Join Meeting” link which is created to make all participants attendees and only you as presenter. Then copy the link for that meeting and only post it in your Team just at the time you are going to have the meeting. Once you have completed the meeting, and all pupils have left the video meet, you can then delete the meeting from the calendar to ensure pupils cannot then return later.
Note that for safeguarding reasons within Glow nationally currently video meetings permit only the teacher to broadcast video and to have only audio from pupil (which can also be switched on and off by the teacher), the chat function between pupils is disabled, there is no access to anyone without a Glow account, and recordings are disabled. These technical settings are in place to provide support to you and your learners but safeguarding is also about actions and behaviours which need to be in effect.
Managing a video meeting involves more than getting technical settings right – it’s about setting expectations around behaviours to make for the most positive experience for everyone. As you might do in a classroom you may build expectations together with your class, such as when someone is talking then others might be encouraged to mute their microphone, or using the meeting conversation box to add questions or comments. There is no single way to manage a classroom, just as there is no single way to manage a video meeting. The following are suggestions by others who have found what was helpful in their situation, so you can adapt to suit what works best for your class.
There’s no hard and fast rules about length of time to be on video. But there are a few considerations to be borne in mind. Live video meetings consume bandwidth so keeping live meetings shorter will be better for everyone taking part. If sharing a PowerPoint presentation (or other digital resource) then uploading first into the video meeting room rather than sharing your desktop will cause less bandwidth strain. Encouraging participants to mute their microphone (and camera if this is a meeting of staff colleagues, since in Glow the camera is not available to enable for pupils) when they are not speaking will help the experience be more productive for everyone.
— 𝚂𝚝𝚎𝚟𝚎𝚗 𝚆. 𝙰𝚗𝚍𝚎𝚛𝚜𝚘𝚗 (@web20classroom) April 7, 2020
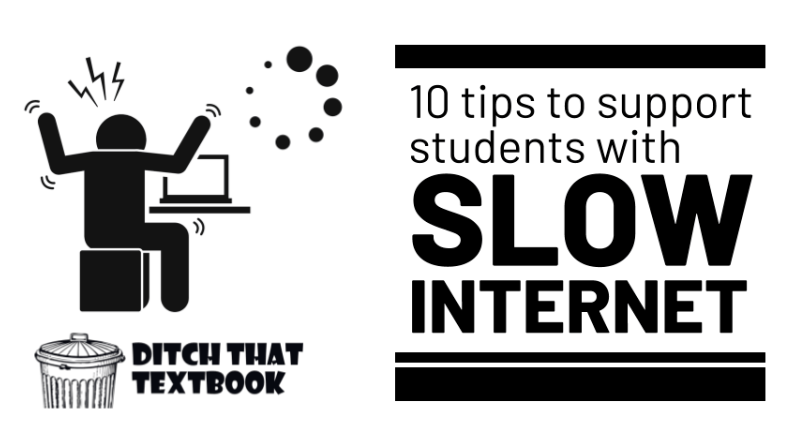
What about slow internet issues?
Video meets eat bandwidth! And not everyone will have superfast broadband Internet connections. So if a video meet is something which is being undertaken then it is essential to consider how to minimise connection difficulties for all participants.
10 Tips to support students with slow Internet – a really helpful post by Matt Miller on his fabulous “Ditch that Textbook” site with lots of practical ideas for making the use of video meets friendlier for everyone, whether slow Internet connection or super fast, including easy to follow visual how-to guides.
Click on this link for the Microsoft Teams for Education support page “Creating, attending, and running meetings while using Teams for distance learning” – this gives detailed help for a teacher for setting up a meeting, guides to how to manage a meeting, and tips and advice for working with your class of learners. The page also lets you toggle to see the advice for a learner in a class, showing what they will see, how it will work from their perspective and some general guidance about being a part of an online class in a video meet in Microsoft Teams. Note that for safeguarding reasons within Glow nationally currently video meetings permit only the teacher to broadcast video and to have only audio from pupil (which can also be switched on and off by the teacher), there is no access to anyone without a Glow account, and recordings are disabled.
If you’re just getting started with #MicrosoftTeams, this blog from @alicekeeler offers a quick breakdown of all the basics. Check it out for her tips on hosting a virtual meeting
If you wish to create a teaching video to share with your class then where do you start?
There are a number of different ways to create a teaching video.
You don’t need lots of fancy filming equipment, specialist lighting, highly scripted text, remote microphones or
a studio set! You can just use what you have available – and be yourself. If you want to be on camera, that’s fine, but if you just want your voice over the activity you are filming then that’s perfectly fine too.
You just need something to record the video (eg phone/tablet) – & your skills and experience as a teacher (and maybe something to edit what you create).
Your choice partly depends on what you are aiming to share – what are you trying to achieve, how much information are you trying to share and in what way will you share the video with your intended audience?
Your choice partly depends on what you want the video to look like – do you want to be on camera, do you wish to include your voice, do you want it to be a video of a PowerPoint presentation (with or without narrated voice), or do you want to make use of animated characters instead of your own image?
Your choice also depends on what device and software/apps you have available to make the teaching videos, whether laptop/desktop, tablet/smartphone and software/apps you can access.
What makes an effective video?
There’s no hard and fast rule about what makes an effective teaching video. Every teacher is different and every class is different so find what works for you and your class. The age of your learners, the way you choose to share a video, whether you wish to have interactivity between shorter videos, and what you are trying to convey in the video, are all considerations to bear in mind. Being clear about what you are trying to share is the biggest consideration! Consider, instead of a long video, chunking a lot of content into perhaps a series of shorter videos each with a specific focus. And try out what you are creating on different devices to see how your learners might view the video. Is it bright enough lighting so that what you are showing is clearly seen, can the sound be clearly heard? You don’t need to make a masterpiece the first time round (or indeed at any time!) so give it a go and make changes in light of your experiences and feedback from your learners.
Camera-Ready Educators: Video As a Learning Staple – a blogpost by Paul Teske and Sarah Brown Wessling which gives food for thought for teachers looking to create a teaching video: “…teachers know it’s not the screen alone that engages students. It’s how teachers use video as part of deliberate instructional design that creates the opportunity for learning and growth. Teachers use video in various ways for various purposes, each thoughtfully constructed.” That blogpost succinctly summarises and provides points for reflection for teachers using video whether it’s for teaching new content, differentiation, scaffolding and support, or for conveying information about such things as class announcements and routines.
The experiences of others can help you make your own judgement about what will work and then you have the feedback from your own class of learners.
Latest blog: What does the research say about designing video lessons? https://t.co/1x7dXs4ct2 Featuring some insights from Richard Mayer's Handbook on Multimedia Learning. pic.twitter.com/aXyhIVwEw6
Engagement with videos begins to drop after the 6-minute mark, and it falls dramatically after 9 minutes. Keep this #BestPractice in mind – chunk instruction such that each video covers a single learning objective or task, and nothing more. #PearlandEdtech#WeArePearlandISDpic.twitter.com/GXKj0Ye5VN
If you are showing something you are writing – whether that’s simple phonics, handwriting formations, numeracy processes or anything else which involves writing – then you can point your phone/tablet camera at the paper or wipe-clean whiteboard, press record on the phone/tablet camera and start talking. Having your phone/tablet affixed to a tripod, a home-made stand or propped up so it won’t move is probably wise!
Keeping your video short is beneficial both for your own sake in not having to redo or edit a long video in which you wish to make a change, but also it’s helpful for sharing online somewhere to have smaller videos as they upload more quickly. If you are sharing on Twitter there is also a restriction on the length which will upload, but if sharing on your classroom digital platform you can add accompanying explanatory text, and perhaps have a sequence of short videos (each labelled with identifying text) so that pupils can more easily watch the parts as often as necessary for what they are doing.
Here’s example of videos shared by teachers where the camera is pointed at the writing area, and with the teacher voice added as narration, or using a class toy or puppet to provide the on-screen persona:
We are practising the parts of the body this week.
1. Practise the words 2. Draw a real or made up person with lots of detail if you can. 3. Label the parts on them in Spanish. 4. Keep your drawing safe, you’ll need it again. pic.twitter.com/ur3Rf1Dvbf
Plastic straws are hard to come by these days I know but if you have a bending piece of tubing this is some pretty advanced physics. Can still do the first part with a non-bendy straw.
The likelihood is that the device you have to hand for taking videos is your smartphone or mobile tablet, a device such as an iPad. And that’s perfectly fine for taking video to share with your learners.
Whatever app you are running on an iPad then you can create a teaching video where you record whatever is on the iPad screen, where you can if you wish, add your voice-over to explain what your learners are seeing.
Do you want to appear on camera beside your screen recording on an iPad? Then here’s how you can use split screen to record yourself on the iPad camera while recording activity on the iPad
Want a video of yourself teaching alongside your lesson visuals? Use Split View alongside Screen Recording on an iPad. Quick and easy way to create lessons with a more personalised touch – pupils see you as well as your content. Give it a try and let me know how you get on! pic.twitter.com/6KejVHX2B0
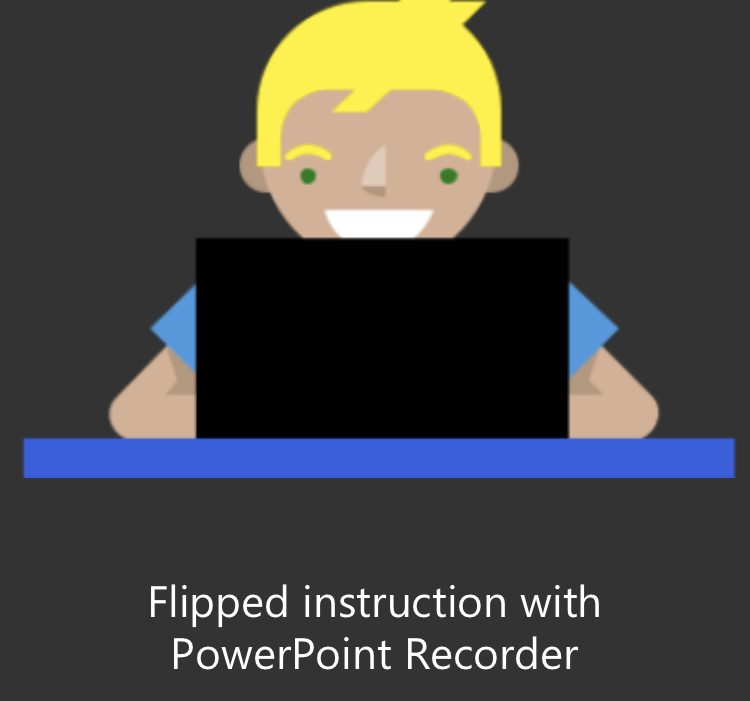
If you have the latest version of PowerPoint then you have the facility to capture a video recording of whatever is on your PC/laptop – whether that’s the PowerPoint presentation or indeed anything on the PC which you wish to show to include in the video.
NEW! I've created a new "Video and Screen Recording Tools" YouTube playlist chock full of quick tip videos
PowerPoint has the option to create a video from your presentation. Just open the PowerPoint presentation and go to File > Export > Save as Video. This will incorporate all that you’ve included in timings, narration, animations, media, and transitions.
If you wish to include yourself (or something else) in a video where the background is of something else, the subject of your video, then using the greenscreen facility available with some tools can let you, for instance, appear talking in front of a video of whatever you are teaching about.
I’m trying out different methods such as using green screens for teaching and learning when we are not able to teach as normal in classrooms. Here is part of a video I have created which will hopefully keep the Higher pupils more engaged with learning @HwbSt@StMungosFalkirkpic.twitter.com/sd3blAq1uM
The online tool unscreen.com provides the means to remove the background automatically from a video so that you can combine with another image or video and quickly create a greenscreen effect, without the need for any other equipment.
Stop-motion animation videos can be useful to illustrate a teaching point where you have a series of still images. This can be useful where live action of a sequence of events is difficult to capture on video, or may take too long, or where you only have access to still images. You can create a sequence of still images using presentation software like PowerPoint (and export as a video to create the illusion of animation/movement) or drop them into video editing software/app such as iMovie on an iPad. Or you can use stop-motion software/app such as the iPad app Stikbot.
How did you get on with the maths task yesterday? Can you measure a short distance and try to work out the speed of a toy car or paper aeroplane, time how long it takes to travel that distance and calculate the speed. Here’s an example my kids helped me make#antomathspic.twitter.com/w5T4AT0c61
There’s a host of video editing tools available. Chance are the device you have available has likely got something already there ready for you to use.
For Windows laptops/PCs then built into Windows 10 devices you will find Video editor (which replaced Windows Movie Maker, with which many teacher may already be familiar, from previous versions of Windows).
Did you know that there is a free video editing tool built right into Windows 10? Click the start button and type "Video Editor"
Great for creativity during #remotelearning. Think of it as "NextGen Movie Maker"
Apple Clips is a neat free video-creation app for iPad or iPhone. It lets you quickly combine text, music, graphics, recorded voice, images, and animations to create videos with ease. So if you are trying to find a way to explain a topic or a teaching point then you might find Apple Clips a handy way to create a visually engaging video. The inclusion of inbuilt graphics such as arrows, finger pointers and many more adaptable images make this really easy to highlight parts of photographs or video clips with explanatory text or spoken voice.
Sharing your video
You have many choices when deciding how to share you video. What platforms you have available to you for your school may determine the choice you make.
The following are just some of the ways you might share your video creations:
Using a school YouTube account – this option will let you share the link to the video in different places as well as provide an option to embed elsewhere such as a website or Sway. Depending on who you want to be able to access the video you can choose to have the video “unlisted” – that means only those who have the link can access it. It won’t be searchable and won’t appear on the list of videos on the YouTube channel.
Upload to your Microsoft OneDrive (available to all Glow users) and at the share option choose either to make it “share with anyone” (which means anyone with the link will be able to access and will not require to log into anything – and you can optionally choose to set a password and decide to block download) or you can choose “only my organisation” (which for Glow users means in order to access the link the viewer would require to log into Glow) – ensuring the share link is set to view-only, not edit.
Upload to Microsoft Sway (add a media card in a Sway and choose the video option and you can upload the video) – at the share option in your Sway you can choose to have it available to be viewed by anyone with the link, or only the organisation (Glow) and optionally add password if you wish. Having your video added to a Sway means you then also have the option to add text about the video and to add pictures related to it.
Upload to files in Microsoft Teams for your class or group – sometimes uploading larger files can be faster if you go to Files in your class in Microsoft Teams and then at the top right choose “Open in Sharepoint” then navigate to the folder “Class materials” which is read-only so that your class can view but not inadvertently remove the file.
So, I wrote a blog post last year about building out a new WordPress blogging service at Edinburgh over the summer of 2018. That was a cool piece of work and we still get a thrill out of running it on a daily basis. This … Continue reading Subtitling: Or what we did over summer 2019


 Want to present to your class in a live video meet?
 Don’t feel under pressure to use this video meet facility right away. And take on board safeguarding and employer requirements in use of such a tool, as well as being mindful of your professional teaching association advice.
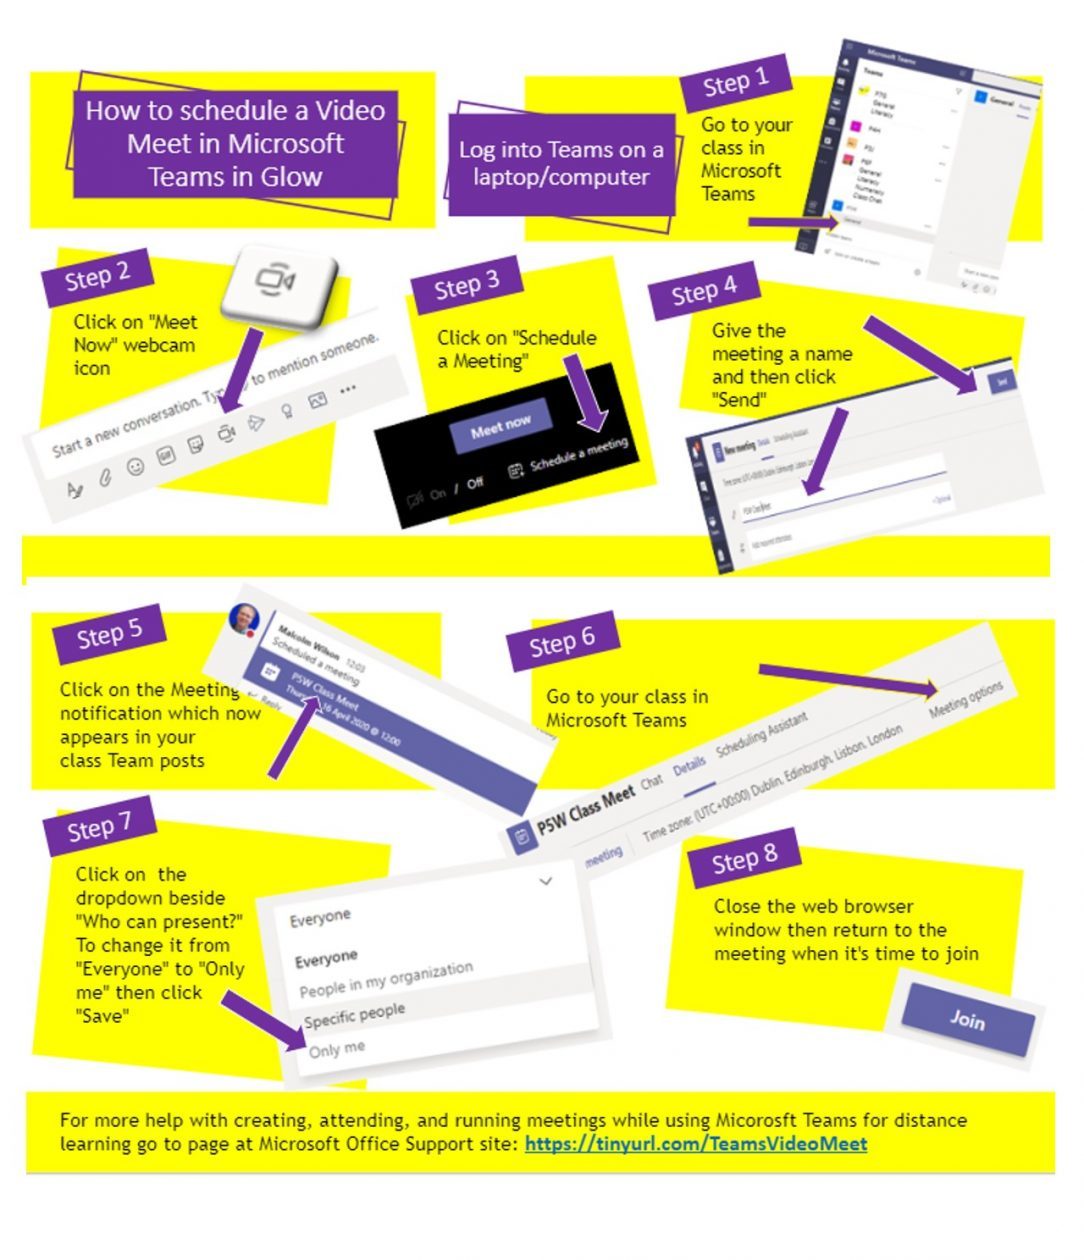
 If you wish to have only your voice in the video meet then you might instead opt to have the camera pointing at an object (piece of work, paper on which you’ll demonstrate a teaching point, or maybe a piece of writing you’ll discussing together, or for perhaps a class toy/character/mascot figure.
 Malcolm Wilson
  (@claganach)
 (@LGfLDigiSafe)


 Looking to create a teaching video?
 What makes an effective video?


 Here's how to make a screen recording on an iPad or iPhone—handy for recording video tutorials.
 YouTube playlist chock full of quick tip videos


 Stop-motion sequence of still images
 Editing your teaching video
 Sharing your video
 Online Courses for Creating Teaching Videos