Coding develops cognitive skills, problem solving and analytical thinking ("computational thinking"). By introducing and developing these abilities from primary school onwards, we create the building blocks and thought processes necessary for robotics and AI. This is not about displacing traditional subjects but, rather, changing the emphasis. Coding can comfortably sit alongside other subjects, especially those with a creative slant, reinforcing the development of key skills through multiple channels.
Coding develops cognitive skills, problem solving and analytical thinking (“computational thinking”). By introducing and developing these abilities from primary school onwards, we create the building blocks and thought processes necessary for robotics and AI. This is not about displacing traditional subjects but, rather, changing the emphasis. Coding can comfortably sit alongside other subjects, especially those with a creative slant, reinforcing the development of key skills through multiple channels.
Coding certainly can develop cognitive skills, problem solving and analytical thinking. A lot of other things can too. I think it is difficult.
Any class will present a wide range of learners. Designing or adapting lessons to try and get as many of them in the right zone to develop these skills is tricky. If you don’t get this right coding is neither productive or fun.
I’ve certainly found that putting coding into a context can lead to more fun and success. By adding elements art or making to a coding project more pupils are involved in problem solving, collaboration and creativity.
A difficulty in managing this might be the perceive need to be an expert in several different areas. I’ve certainly found myself in situations where I’ve not be completely confident around some of these areas.
The article acknowledges that covid has had an effect:
It is a reasonable assumption that this immersion in IT and technology is preparing young people for a digital future and teaching them the skills they will need.
But we need pupils to be creators as well as users:
there is a largely unrecognised digital difference between the users of technology and the creators
I think there is also a gap around literacy and the problems that the mixing of commercial and educational interests in technology. A lot of the uptake in digital solutions lacks any questioning of the provides of these solutions.
In just a few years, understanding programming will be an indispensable part of active citizenship. The idea that coding offers an unproblematic path to social progress and personal enhancement works to the advantage of the growing techno-plutocracy that’s insulating itself behind its own technology.
If you are looking for a way to support learners (or indeed, yourself!) to be clear, expressive and confident when communicating & presenting to others using digital tools, then Microsoft PowerPoint Presenter Coach is a handy feature of Microsoft PowerPoint. It’s built in to PowerPoint whether on the web, on desktop/laptop or mobile device, and …
The Inspiring Digital Enterprise Award, known as iDEA, is an award programme which provides access to a range of free on-demand online courses. In completing courses from the wide range available they not only aim to support developing digital, enterprise and employability skills, the completion of the assessments built into each course provide the means …
I had a great time at the TM Modern Foreign Languages event this morning. There certainly was a great variety of topics and presenters and now I am truly buzzing with new ideas...
I have always been a strong advocate for using music in the Languages classroom and was delighted to be offered to present a TiLT Webinar for ALL London on this topic.
In my webinar, I shared a range of tools and ideas for integrating music in activities in and outside the classroom. We looked at streaming platforms like Spotify, recording tools and apps as well as sites to source free beats and loops to support pupils' creativity and memorisation of language.
I also presented tools to use melody, rhythm and song lyrics to enhance pupils' enjoyment, motivation and support their recall of key language structures.
I showed different resources to develop teachers' knowledge in order to link music and song lyrics to the culture of the Target-Language countries.
Last but not least, I shared how specific websites, apps and social media can support teachers in discovering new artists and tracks from a range of Target-Language countries.
Don’t panic – it happens with any online tool! Every online platform hiccups from time to time: you might get error messages, things don’t update, you can’t upload files, you can’t share what you need to share – and you can probably add to that list! And, of course, it happens when you are trying …
Lockdown is continuing to be very
hectic and intense for teachers. I have asked my online teacher network about
what lockdown has meant for them and this is what I was told…
Lockdown has highlighted the
importance of students’ intrinsic motivation and home support and the large
impact they have on students’ achievements. It has also shown that teaching
needs to facilitate independence. For instance, some of the quietest students
have been seen to produce amazing work that they would never have produced in
class for fear of drawing attention to themselves.
However, lockdown has also sparked
creativity in many teachers, parents and pupils and in some case made parents
realise what teaching really is about.
It has also created many opportunities
for teachers to upskill, learn about blended learning, online learning and
reflect on our practice.
Pedagogy and new tools-A few pointers
Focusing on fewer aspects of the language
and guiding students’ practice to ensure complete mastery and success has come
out as the biggest priority
Acknowledging the need for more
repetition, practice and pace when learning vocabulary.
Understanding what it looks like from
a learner’s perspective, keeping things simple and along a linear organisation
allowing the teacher to reduce undue technical difficulties for pupils.
Developing a principled approach like
the one adopted by @BarriMoc : retrieval, short video presentation,
practice tasks (dictation, translation, gap-fill based on the content), reading
task and a writing or speaking task using Flipgrid. Everything is then put in one
document with any resources hyperlinked to avoid needing to open and flick
between multiple tabs including Textivate or Quizziz.
Turning a book-based IGCSE SoW into a
skill-driven one so that learning objectives and assessment align
Twitter conversations
Lockdown and teaching remotely have
highlighted …
The importance of high impact, low
stakes testing for informing planning as well as improving student retrieval
and retention.
That the children love to be able to
“pause” the teacher on Loomso pace of explanations during
direct instruction may need to be adapted.
That learners benefit from creating
sentences and actively applying vocab and grammar rules along with their own
creativity. This gives all they/we are doing a sense of value, purpose and
meaning. It creates a bond and link of learning trust between us even though we
are remote.
That in online lessons, it is a good
idea to include table of language chunks that pupils can use as a writing
scaffold. Pupils can add in suggestions too. Extension vocabulary and
structures need to be labelled explicitly. A simple example of an activity is
to get pupils to read out their Target Language phrase. Teacher highlights (on
zoom) . Another pupil translates. Creative
follow-up is then offered for further practice.
That your instructions are never
clear enough! It has confirmed more than ever the importance of quality
instruction, explanations, and modelling with a lot of comprehensible input and
chunks instead of single words. Voice record pro is great for making own listening.
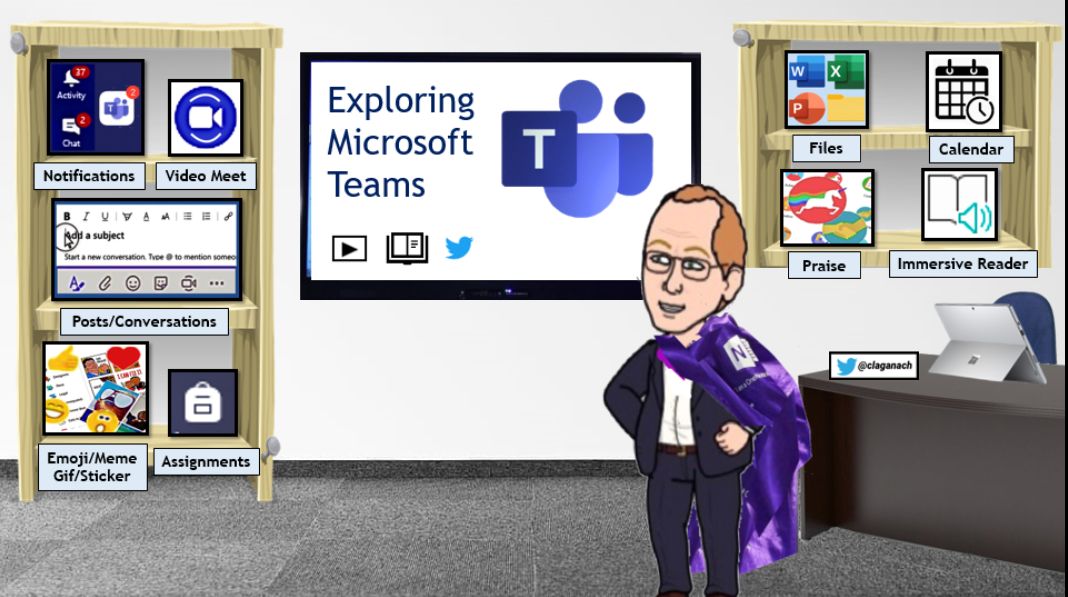
So you have just started using Microsoft Teams with your primary school class – now what?
Microsoft Teams can be described as an all-in-one Swiss-Army-Knife online digital tool – with facility for classroom conversations, shared space for collaborative Word documents, PowerPoint presentations, Excel spreadsheets, assignments tool for easily setting tasks for individuals, groups or the whole class (and providing feedback) and OneNote Class Notebook multi-purpose digital ring-binder, all made more accessible to all learners with Immersive Reader Learning Tools.
That might make it sound overwhelming for your class, so…
Start small – make connections
Don’t try and do everything at once!Microsoft Teams provides many features which can be used with your class but you don’t need to use them all right away. The Posts/Conversation area of a class Team is the first part users will see when they log into Teams, whether via browser, desktop app on computer/laptop, or mobile device smartphone/tablet. So this is the place suggested to start.
In the Posts tab you can share text, images or video.
So you can share information with your class either as:
Text (and where pupils can use Immersive Reader in the browser to read it aloud (pupils just click on the 3 dots to the right of the message and choose “Immersive Reader”);
Add a link to a web resource you wish the pupils to use;
Share a picture of a visual diagram of the tasks (as you might do in your classroom) – just click on the paperclip icon to upload a picture;
You might create a short video with your voice (so it’s familiar to your pupils) and the camera pointing at a piece of paper on which you are writing, or a book, picture or object such as classroom toy.
Set up channels in your class Team
When you first create a Team for your class you will automatically get a channel called the general channel. By default everyone in your class will be able to post there. And at the beginning that might be okay as everyone starts to use it.
However often you might find that you want to provide another channel within the Team for general chit-chat for the pupils and you as the teacher change the settings so that the main general channel can only have content added by you. So once you’ve set up additional channels then go into the Team settings and switch off the facility for pupils to be able to post there so that only you can post in the general channel.
You can set up channels for different areas of learning, perhaps by curricular area or for a specific topic or a group. This can help keep conversations related to each area in their respective spaces and not all jumbled together.
It’s suggested to create a channel for your class to have friendly chat so that the general channel does not get cluttered there (telling them that’s what it’s for but that you can still see it). And then restricting them from posting in the general channel. As a member of staff in a class in Microsoft Teams you are a Team Owner
Here’s how you can add an additional channel for class chat where pupils can post.
Go to the list (or tiles) showing all of your teams in Microsoft Teams
Click on the 3 dots (ellipsis) … to the right of the team name
Click “Manage channels”
Click “Add a new channel” (and name it something like Class Chat or Blether Station) and click done.
Primary teacher Roddy Graham shared his ideas for how he’d structured his class in Microsoft Teams so that there were a number of specific channels set up for specific purposes. Choosing the channels to have for your class depends on you and your class so getting the balance between too few and too many is something which only you and your experience with your class can determine. As Roddy Graham explained “Too few mean people aren’t sure whether to post something or not, or it can get too clogged up with random things. With children using these, it may take time to work successfully but here’s some channels I’m setting up for my pupils to use and why.” Here’s Roddy Graham’s channels for his class, along with the explanations for the purpose of each:
“ The Library – a place to talk about books being read at home and share any related learning they do. The Gym Hall – a place to share any physical activity they do, including home fitness or games. Ask the Teacher – a place to ask non-learning related questions, possibly things that are worrying them and they need a bit of reassurance. #NoFilter – a place to share photos of how they are spending their days so their classmates can view Taskmaster – inspired by the TV show so a place to share a fun challenge/daily task for class to tackle Literacy and Maths Tool Boxes – a place to share support resources for tasks set – websites, videos, documents The Playground – a place where the class can chat about anything they like, just as they would in their school playground. The teacher can keep track of everything pupils type (and they are told this)”
You may add additional channels as works for your class, perhaps for curricular areas, perhaps having one for pupils to offer support or share knowledge to other pupils (as teacher Carol Diamond called her channel “Tiny Teacher Talk – where they can ask each other how to do things/for hints/tips or share their knowledge about something which is their strength), or maybe a Weekly Reflections or Time Capsule Thoughts channel where pupils might share about their experiences during distance learning over the previous week,; or maybe a Fun Foto Friday, Talent Show or anything else which fits in with building the culture of your classroom community.
How can you keep your Microsoft Teams classroom organized?
Use channels for specific activities Admins only on general channel Set up a tab for week's schedule
Here’s how you can restrict who can post to the General channel like this:
Click on the 3 dots (ellipsis) … next to General channel
Select “Manage channel” from the menu
Click on “Only owners can post messages” – now only you (or other colleagues if you’ve added them as owners) will be able to post on your General channel of the team.
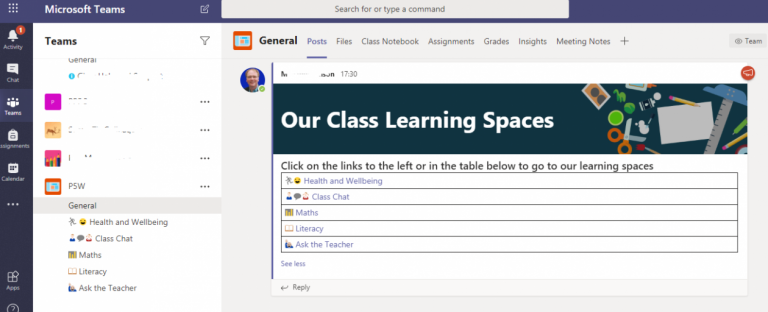
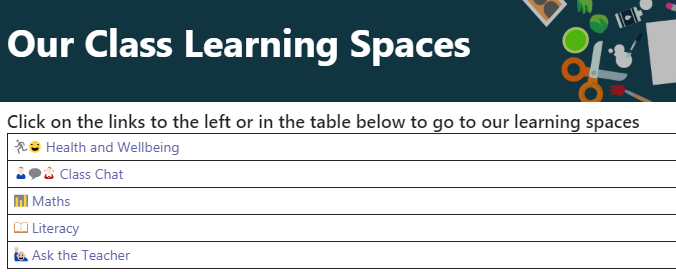
Once you have your channels set up you can create an announcement in the General channel of your Microsoft Teams class and add a table. Into the table add links to each of the channels (to get the link just click on the three dots beside each channel name and copy the link provided. Then go back to the text in your table, highlight the text and click on the link icon to paste the link you copied.
Whether it’s naming your channels in your class in Microsoft Teams, or when sharing information or activities in posts/conversations/announcements in your class in Microsoft Teams, or in names of sections and pages in your OneNote Class Notebook attached to your Microsoft Teams class then the addition of the visual cue of an appropriate emoji makes the text easier to identify in a list and also makes it more classroom friendly.
Click here for a blogpost about the use of emojis to support education – this contains lots of information about how these can support learning, as well as lots of examples of where they have been used. And if you’re wondering how you’d find just the emoji you need then that blogpost also contains a link to Emojipedia where you can type the word you want and a suggested emoji will be shown ready for you to copy and paste where needed.
Manage the settings of your class team
Once you’ve created your class space in Microsoft Teams it would be a good idea to manage the settings so that you can make choices about what you want your pupils to be able to do in your Team.
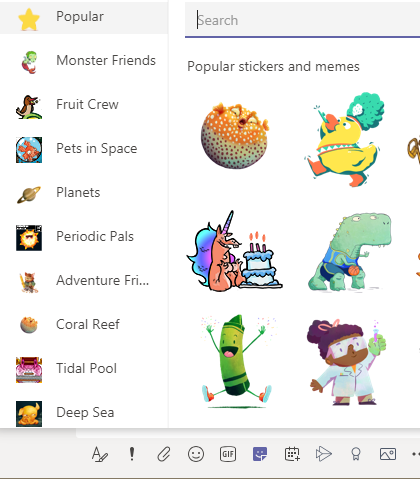
The choices are yours as you know your class best. Your level of familiarity with the tools available might make you decide to restrict what can be done by pupils at the outset and then enable features as you and your class become familiar with them. Or you might take the opposite view and leave everything enabled and only restrict an individual feature until you’ve had a conversation with the class about it, and responsible use. So you might want to disable the facility for pupils to share stickers, memes and animated gifs (you can switch them off and on at any time), you can make sure that pupils can’t add or delete channels, and you can ensure that pupils can only edit or delete their own posts in the posts/conversations. Teams manage members settings allows a teacher at any time to mute pupils, individually or collectively, to stop postings being able to be made temporarily for any reason.
Created this little reminder for pupils on how we keep our Teams learning spaces positive, helpful & productive during our period of distance learning – Planning to pop on our pages tonight so both pupils & parents can view. Happy to share if useful @HwbNews@MicrosoftTeamspic.twitter.com/ncOdC9jMBR
If you have older children, and you are looking for your class to co-create their own set of positive online expectations, then you might find helpful this School of Education Netiquette Guidelines from Chicago’s Loyola University as the starting point for a discussion to make the positive expectations explained within them re-interpreted in child-friendly language, making them specific to your class use of Microsoft Teams, and perhaps with associated visuals created by your pupils.
Everyday Etiquette for Microsoft Teams – a detailed guide, by Matt Wade and Chris Webb, to setting expectations around managing the use of Microsoft Teams with users. This is not aimed at primary school use of Microsoft Teams (and some of the features such as private chat and video camera use in video meets don’t apply to the configuration in Glow) but may be helpful as prompts for a teacher to perhaps have pupils come up with their own class-friendly versions, dependent on their age and experience and how it’s wanted to be in their class.
Check-ins
So you may wish to have a way of having a check-in with your pupils, to find out how they are, to show they have connected in your online class in Microsoft Teams. You can make use of a Microsoft Forms check-in form which pupils can complete when they come into your class in Microsoft Teams – and as well as asking how they are (with responses which might be by clicking beside an appropriate choice of emoji face) you can perhaps incorporate a bit of fun, and involvement so that pupils look forward to completing it each time, by having a different light-hearted question each time. The less predictable and funnier the questions the more likely your pupils might be to look forward to completing it. And because it would be a form within Microsoft Teams it means it already keeps a note of who responded (without pupils having to type their name) for the teacher to be able to access in Microsoft Forms. Click here for a ready-made template in Microsoft Forms (on the Microsoft Education Support site) ready for you to click on “Duplicate” button and adapt your your own needs.
Building engagement
Teachers in their classrooms have always found ways to engage their learners, to ensure every voice is heard, to coax the reluctant participant, to check understanding, to provide opportunities for collaboration, to create the environment for every learner to demonstrate their understanding, to move learners forward and build on previous experiences.
An online environment doesn’t change these principles, but instead requires adapting different approaches using available digital tools.
Consider encouraging the positive use of praise stickers (a teacher can control through manage settings options whether these are enabled or disabled for pupils in their Microsoft Teams class) – they can be used from the posts/conversations by clicking on the Sticker icon below where you’d type a message. These can be handy to provide a more visual way of providing positive feedback without having to type – click here for a guide to how to use these, whether on mobile or desktop/laptop
20 Ways to Facilitate Online Class Participation – a post by Halden Ingwersen with 20 suggested tips which apply to any online digital platform and can be adapted for different age groups has been used as a starting point for the approach below. Some things may not apply for specific tools or age groups, but the general advice in Halden Ingwersen’s post remains consistent for when using Microsoft Teams with your primary class:
Be clear in what you expect from your class online;
Become familiar with Microsoft Teams as your class digital learning platform (you don’t need to know about every feature, but make the most of what you use and try to experience from the learner viewpoint);
Provide online spaces within Microsoft Teams for group work (that might be use of channels in Microsoft Teams where focus on specific pieces of work with groups of learners take place, or it might be a collaborative PowerPoint presentation or Word document in Teams files, or a multimedia page in the collaboration spade within the OneNote Class Notebook integrated in your Microsoft Teams class, or at its simplest it might just be using the posts/conversations ensuring the starting point for each conversation group is followed by replies to their group’s task rather than a new conversation);
Share your plan with your class, which might be co-created with your learners or an outline you present of new learning which is going to be covered;
Make sure it’s easy for learners to find their tasks – aim to be consistent as to where learners can expect to find your plan for what’s expected, and provide links or clear steps to find something new.
Provide feedback in conversations/posts – in Microsoft Teams conversations within posts respond with encouragement as you would if you were face to face in the classroom, helping build the reassurance of your learners that you are listening to what they are saying – in the text-based nature of the posts/conversations there is no opportunity for a nod or a smile, but you can encourage through the use of thumbs-up to quickly acknowledge responses
Microsoft Teams has built into it the accessibility tool Immersive Reader Learning Tools. To access in conversations/posts a pupil simply clicks on the three dots … (ellipsis) to the right of any message in the conversations/posts in Microsoft Teams then selects “Immersive Reader.” This will let the user then hear the text played as spoken audio while the individual words are simultaneously highlighted in turn as they are spoken aloud. The pupil can change the background colour to help make it more easily distinguishable to suit the pupil (which only that individual will see, no settings here affect other users) and change the size of text, font, and spacing out of letters on the page. You can even break words into syllables and highlight in different colours nouns, verbs, adjectives and adverbs (all automatically). And you can switch on picture dictionary which will let a user click on any unfamiliar word and show a Boardmaker image (where available) and hear that word spoken aloud. For pupils where English is not their first language they can also use the inbuilt translate feature to translate individual words or the whole text of any message in conversations/posts in Microsoft Teams.
Connectivity woes or technical hiccups!
Every online platform hiccups from time to time: you might get error messages, things don’t update, you can’t upload files, you can’t share what you need to share – and you can probably add to that list!
Teams provides the facility for you as the teacher to present to your class. Don’t feel under pressure to use this video meet facility right away. And take on board safeguarding and employer requirements in use of such a tool, as well as being mindful of your professional teaching association advice. If this is for you, and you want your pupils to have the familiarity of seeing you and hearing your voice then click on this link for specific step-by-step guidance to setting up a video meet in Teams for your class. If you wish to have only your voice in the video meet then you might instead opt to have the camera pointing at an object (piece of work, paper on which you’ll demonstrate a teaching point, or maybe a piece of writing you’ll discussing together, or perhaps a class toy/character figure!
The files area within a Microsoft Teams class lets pupils within that class work collaboratively (whether real-time or asynchronously). As you would with a face-to-face class the teacher sets the expectations and roles of different groups within a class so that each pupil knows who will work on which document and with whom. No setting changes or permissions need to be made. Everything saves automatically. Pupils can create collaborative real-time PowerPoint presentations, or Word documents, or Excel spreadsheets. They can be uploaded from a device or just click “new” to start one right away in the Files folder/tab in your Microsoft Teams tab. Click on this link for a how-to guide about using Office 365 to create a collaborative Word document in Glow – this is the same process in Microsoft Teams just by clicking on the Files tab in your Microsoft Teams class, with the benefit that the permissions are already set to let anyone in the class collaborate with no need to specify usernames.Click on this link for a guide to creating a collaborative PowerPoint Online and click on this link for guide to creating a collaborative Excel Online spreadsheet. This is the same process in Microsoft Teams just by clicking on the Files tab in your Microsoft Teams class, with the benefit that the permissions are already set to let anyone in the class collaborate with no need to specify usernames
Assignments
Microsoft Teams includes the option to assign pupils activities, whether tasks for completion by specific dates or to assess understanding of individuals. This can be used to share assessments or quizzes, or share documents to a whole class in such a way that each pupil receives a copy ready for them to edit and submit on completion back to the teacher for feedback, without the rest of the class seeing it. Click here for a guide to making use of the assignments feature of Microsoft Teams.
OneNote Class Notebook
OneNote Class Notebook is built into Microsoft Teams. OneNote Class Notebook is like a digital ring-binder with cardboard colour dividers, and within each section you can have as many pages as you like. Each page is a freeform page which can be any size you wish, and become like your classroom whiteboard, where you can add a very wide range of content (including images, audio, video, documents, presentations, embedded Sway presentations, embedded Forms, and you can freehand draw or write just as you would on your classroom whiteboard. It all saves automatically and is accessible on any device so you can move from working on your smartphone on the OneNote app to working in the browser on a laptop (and other devices).
A OneNote Note Class Notebook already comes with the permissions for your pupils to access and collaborate on anything in the collaboration space, so you’ve no setting or permissions to worry about if you wish a group of pupils to work on something together, just create the page and tell them who’s working on it. In addition to these collaboration spaces a OneNote Class Notebook also has a section which the pupils can see, but on which only the teacher can add or edit content – handy for sharing what you might have shared on your classroom whiteboard. This is called the library space. There is also a teacher-only section which can be enabled (so you can create content ahead of time and move into the library when you wish pupils to make use of it. And the OneNote Class Notebook within Microsoft Teams also has individual sections for each pupil – which only you as teacher can see and that individual pupil (other pupils can’t see anyone else’s sections).
And if that wasn’t enough, OneNote Class Notebook built into a Microsoft Teams class also has Immersive Reader Learning Tools built in providing accessibility options for all learners.
Gathering feedback, taking quizzes to reinforce learning, or undertaking surveys of views are all the kinds of classroom activities which are ideally suited to the use of Microsoft Forms. Microsoft Forms are built right into Microsoft Teams, either in short-form quick polls with few questions added right inside posts/conversations in Microsoft Teams, or assessments or surveys as simple or as complex as you like created in Microsoft Forms and a link shared in conversations/posts in Microsoft Teams, or assigned to the class using the Assignments feature of Microsoft Teams. Whichever way Forms are assigned to the pupils the teacher then can see the results in one place, and can even be set up to be self-marking or to provide automated feedback depending on answers provided by pupils (using the branching feature of Microsoft Forms. Click here to find out more about Microsoft Forms
If you wish to create a teaching video to share with your class then where do you start?
There are a number of different ways to create a teaching video.
You don’t need lots of fancy filming equipment, specialist lighting, highly scripted text, remote microphones or
a studio set! You can just use what you have available – and be yourself. If you want to be on camera, that’s fine, but if you just want your voice over the activity you are filming then that’s perfectly fine too.
You just need something to record the video (eg phone/tablet) – & your skills and experience as a teacher (and maybe something to edit what you create).
Your choice partly depends on what you are aiming to share – what are you trying to achieve, how much information are you trying to share and in what way will you share the video with your intended audience?
Your choice partly depends on what you want the video to look like – do you want to be on camera, do you wish to include your voice, do you want it to be a video of a PowerPoint presentation (with or without narrated voice), or do you want to make use of animated characters instead of your own image?
Your choice also depends on what device and software/apps you have available to make the teaching videos, whether laptop/desktop, tablet/smartphone and software/apps you can access.
What makes an effective video?
There’s no hard and fast rule about what makes an effective teaching video. Every teacher is different and every class is different so find what works for you and your class. The age of your learners, the way you choose to share a video, whether you wish to have interactivity between shorter videos, and what you are trying to convey in the video, are all considerations to bear in mind. Being clear about what you are trying to share is the biggest consideration! Consider, instead of a long video, chunking a lot of content into perhaps a series of shorter videos each with a specific focus. And try out what you are creating on different devices to see how your learners might view the video. Is it bright enough lighting so that what you are showing is clearly seen, can the sound be clearly heard? You don’t need to make a masterpiece the first time round (or indeed at any time!) so give it a go and make changes in light of your experiences and feedback from your learners.
Camera-Ready Educators: Video As a Learning Staple – a blogpost by Paul Teske and Sarah Brown Wessling which gives food for thought for teachers looking to create a teaching video: “…teachers know it’s not the screen alone that engages students. It’s how teachers use video as part of deliberate instructional design that creates the opportunity for learning and growth. Teachers use video in various ways for various purposes, each thoughtfully constructed.” That blogpost succinctly summarises and provides points for reflection for teachers using video whether it’s for teaching new content, differentiation, scaffolding and support, or for conveying information about such things as class announcements and routines.
The experiences of others can help you make your own judgement about what will work and then you have the feedback from your own class of learners.
Latest blog: What does the research say about designing video lessons? https://t.co/1x7dXs4ct2 Featuring some insights from Richard Mayer's Handbook on Multimedia Learning. pic.twitter.com/aXyhIVwEw6
Engagement with videos begins to drop after the 6-minute mark, and it falls dramatically after 9 minutes. Keep this #BestPractice in mind – chunk instruction such that each video covers a single learning objective or task, and nothing more. #PearlandEdtech#WeArePearlandISDpic.twitter.com/GXKj0Ye5VN
If you are showing something you are writing – whether that’s simple phonics, handwriting formations, numeracy processes or anything else which involves writing – then you can point your phone/tablet camera at the paper or wipe-clean whiteboard, press record on the phone/tablet camera and start talking. Having your phone/tablet affixed to a tripod, a home-made stand or propped up so it won’t move is probably wise!
Keeping your video short is beneficial both for your own sake in not having to redo or edit a long video in which you wish to make a change, but also it’s helpful for sharing online somewhere to have smaller videos as they upload more quickly. If you are sharing on Twitter there is also a restriction on the length which will upload, but if sharing on your classroom digital platform you can add accompanying explanatory text, and perhaps have a sequence of short videos (each labelled with identifying text) so that pupils can more easily watch the parts as often as necessary for what they are doing.
Here’s example of videos shared by teachers where the camera is pointed at the writing area, and with the teacher voice added as narration, or using a class toy or puppet to provide the on-screen persona:
We are practising the parts of the body this week.
1. Practise the words 2. Draw a real or made up person with lots of detail if you can. 3. Label the parts on them in Spanish. 4. Keep your drawing safe, you’ll need it again. pic.twitter.com/ur3Rf1Dvbf
Plastic straws are hard to come by these days I know but if you have a bending piece of tubing this is some pretty advanced physics. Can still do the first part with a non-bendy straw.
The likelihood is that the device you have to hand for taking videos is your smartphone or mobile tablet, a device such as an iPad. And that’s perfectly fine for taking video to share with your learners.
Whatever app you are running on an iPad then you can create a teaching video where you record whatever is on the iPad screen, where you can if you wish, add your voice-over to explain what your learners are seeing.
Do you want to appear on camera beside your screen recording on an iPad? Then here’s how you can use split screen to record yourself on the iPad camera while recording activity on the iPad
Want a video of yourself teaching alongside your lesson visuals? Use Split View alongside Screen Recording on an iPad. Quick and easy way to create lessons with a more personalised touch – pupils see you as well as your content. Give it a try and let me know how you get on! pic.twitter.com/6KejVHX2B0
If you have the latest version of PowerPoint then you have the facility to capture a video recording of whatever is on your PC/laptop – whether that’s the PowerPoint presentation or indeed anything on the PC which you wish to show to include in the video.
NEW! I've created a new "Video and Screen Recording Tools" YouTube playlist chock full of quick tip videos
PowerPoint has the option to create a video from your presentation. Just open the PowerPoint presentation and go to File > Export > Save as Video. This will incorporate all that you’ve included in timings, narration, animations, media, and transitions.
If you wish to include yourself (or something else) in a video where the background is of something else, the subject of your video, then using the greenscreen facility available with some tools can let you, for instance, appear talking in front of a video of whatever you are teaching about.
I’m trying out different methods such as using green screens for teaching and learning when we are not able to teach as normal in classrooms. Here is part of a video I have created which will hopefully keep the Higher pupils more engaged with learning @HwbSt@StMungosFalkirkpic.twitter.com/sd3blAq1uM
The online tool unscreen.com provides the means to remove the background automatically from a video so that you can combine with another image or video and quickly create a greenscreen effect, without the need for any other equipment.
Stop-motion animation videos can be useful to illustrate a teaching point where you have a series of still images. This can be useful where live action of a sequence of events is difficult to capture on video, or may take too long, or where you only have access to still images. You can create a sequence of still images using presentation software like PowerPoint (and export as a video to create the illusion of animation/movement) or drop them into video editing software/app such as iMovie on an iPad. Or you can use stop-motion software/app such as the iPad app Stikbot.
How did you get on with the maths task yesterday? Can you measure a short distance and try to work out the speed of a toy car or paper aeroplane, time how long it takes to travel that distance and calculate the speed. Here’s an example my kids helped me make#antomathspic.twitter.com/w5T4AT0c61
There’s a host of video editing tools available. Chance are the device you have available has likely got something already there ready for you to use.
For Windows laptops/PCs then built into Windows 10 devices you will find Video editor (which replaced Windows Movie Maker, with which many teacher may already be familiar, from previous versions of Windows).
Did you know that there is a free video editing tool built right into Windows 10? Click the start button and type "Video Editor"
Great for creativity during #remotelearning. Think of it as "NextGen Movie Maker"
Apple Clips is a neat free video-creation app for iPad or iPhone. It lets you quickly combine text, music, graphics, recorded voice, images, and animations to create videos with ease. So if you are trying to find a way to explain a topic or a teaching point then you might find Apple Clips a handy way to create a visually engaging video. The inclusion of inbuilt graphics such as arrows, finger pointers and many more adaptable images make this really easy to highlight parts of photographs or video clips with explanatory text or spoken voice.
Sharing your video
You have many choices when deciding how to share you video. What platforms you have available to you for your school may determine the choice you make.
The following are just some of the ways you might share your video creations:
Using a school YouTube account – this option will let you share the link to the video in different places as well as provide an option to embed elsewhere such as a website or Sway. Depending on who you want to be able to access the video you can choose to have the video “unlisted” – that means only those who have the link can access it. It won’t be searchable and won’t appear on the list of videos on the YouTube channel.
Upload to your Microsoft OneDrive (available to all Glow users) and at the share option choose either to make it “share with anyone” (which means anyone with the link will be able to access and will not require to log into anything – and you can optionally choose to set a password and decide to block download) or you can choose “only my organisation” (which for Glow users means in order to access the link the viewer would require to log into Glow) – ensuring the share link is set to view-only, not edit.
Upload to Microsoft Sway (add a media card in a Sway and choose the video option and you can upload the video) – at the share option in your Sway you can choose to have it available to be viewed by anyone with the link, or only the organisation (Glow) and optionally add password if you wish. Having your video added to a Sway means you then also have the option to add text about the video and to add pictures related to it.
Upload to files in Microsoft Teams for your class or group – sometimes uploading larger files can be faster if you go to Files in your class in Microsoft Teams and then at the top right choose “Open in Sharepoint” then navigate to the folder “Class materials” which is read-only so that your class can view but not inadvertently remove the file.
You’ve no doubt seen lots of teachers sharing their interactive virtual classroom images – a visually-friendly way to connect with your learners via an online platform where they can click on elements in the picture to view details of learning activities, or view videos, or read books chosen for the class, or click on a link to online resources to support their learning.
You can set up an interactive virtual classroom image in several online platforms and using a variety of digital tools. This blogpost is specifically looking at how to do so if your school uses Microsoft Teams.
What you need to set this up in Microsoft Teams
You will need the following to set up your interactive virtual classroom image:
PowerPoint in which the interactive virtual classroom image will be built
Images which you are free to use (this post will show where to access these) to create the background and items in the classroom.
Your Bitmoji character (though if you don’t want t use a cartoon-style Bitmoji character you can alternatively use the inbuilt stock character images in PowerPoint online, or a cartoon-style image you have created with another digital tool).
The links to the resources you will be adding as interactive links to the image (whether that’s videos or online resources, whether somewhere in the class files in Microsoft Teams or shared somewhere external to the class Team).
Microsoft Teams for your class – where you will share the pdf with clickable links (you can also choose to use PowerPoint online from your OneDrive if you prefer to share it as a PowerPoint show).
How to set up you virtual classroom image in PowerPoint
View this super detailed step-by-step video by Brian White showing how to create the virtual classroom slide in PowerPoint online – this includes how to use the Bitmoji plugin in the Chrome browser, how to search within PowerPoint online for transparent backgrounds, how to add items for the class scene, how to add a video from YouTube as an embedded video, and how to create the link from a shared PowerPoint link which makes it a play-only view for pupils to interact with it – by adding &=&action=embedview to the end of the weblink from your shared PowerPoint link.
Interactive elements will be the links you attach to the individual items so when clicked on by your learners they will automatically be taken to what you have added. This might include websites, online resources, YouTube videos, or login to platforms your class uses.
There are different ways you can remove the background from any image so that when you place it on your background image it does not show anything from the background of the image you wish to place on the classroom background.
Using PowerPoint to remove background from an image
How to share your Interactive Virtual Classroom in Microsoft Teams
You can choose whether to share your interactive virtual classroom as a simple image (which will have no interactivity) or PDF (which will retain any interactive links you added) or PowerPoint
To create an image from PowerPoint click on File > Save as > choose location on your device > from dropdown “Save as type” choose “PNG Portable Network Graphics” format
To create a PDF from PowerPoint click on File > Save as > choose location on your device > click on “Options” and specify single slide you wish to use
When uploading to Microsoft Teams you can choose to share in the Posts/Conversations by clicking on the paperclip attachments icon – you will then be asked where you wish to share the uploaded item so choose to save in the “Class Materials” folder as this is read-only for your learners.
You can alternatively choose to upload the PowerPoint into your OneDrive and when choosing the share link ensure the permissions are set to “anyone with the link” (and ensure edit rights are disabled). To ensure the PowerPoint link opens as a play-only view for your learners to interact with it you can add &=&action=embedview to the end of the weblink from your shared PowerPoint link from OneDrive before you share it in the Microsoft Teams Posts/Conversations (this method also permits sharing outwith Microsoft Teams, such as on website or social media).
— Castlemilk High Technologies Faculty (@CHS_TechFac) May 29, 2020
Feeling inspired by fellow teacher chum @MckRoxi and made my own virtual classroom in PowerPoint. Of course my slides are pink pic.twitter.com/SqMU1YgiWR
You can also upload the image from your PowerPoint slide to ThingLink to add hotspots which, when clicked by your learners, give you the option to add the links as popout windows so that the learners don’t leave your virtual classroom space. ThingLink also gives the option to have text read aloud using Immersive Reader, and also to let you add audio recordings of your voice if you choose.
Creating Visual Learning Materials with ThingLink – a free online course on the Microsoft Educator Centre guiding you through learning how to use ThingLink to bring images, video and 360-degree virtual tours to life with added popup links, voice and text notes, and more. ThingLink creations can be shared via Microsoft Teams anywhere a link can be added.


 Text (and where pupils can use Immersive Reader in the browser to read it aloud (pupils just click on the 3 dots to the right of the message and choose “Immersive Reader”);
 Add a link to a web resource you wish the pupils to use;
 Share a picture of a visual diagram of the tasks (as you might do in your classroom) – just click on the paperclip icon to upload a picture;
 You might create a short video with your voice (so it’s familiar to your pupils) and the camera pointing at a piece of paper on which you are writing, or a book, picture or object such as classroom toy.
 When you first create a Team for your class you will automatically get a channel called the general channel. By default everyone in your class will be able to post there. And at the beginning that might be okay as everyone starts to use it.
 The Library – a place to talk about books being read at home and share any related learning they do.
 The Gym Hall – a place to share any physical activity they do, including home fitness or games.
 Ask the Teacher – a place to ask non-learning related questions, possibly things that are worrying them and they need a bit of reassurance.
 #NoFilter – a place to share photos of how they are spending their days so their classmates can view
 Taskmaster – inspired by the
  Literacy and Maths Tool Boxes – a place to share support resources for tasks set – websites, videos, documents
 The Playground – a place where the class can chat about anything they like, just as they would in their school playground. The teacher can keep track of everything pupils type (and they are told this)”
 Use channels for specific activities

 Once you have your channels set up you can
 . Thank you
 (@MrSteensonBusEd)

 Reassurance from their teachers+lesson links
  Exercise important message for healthy minds
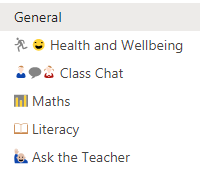 Whether it’s naming your channels in your class in Microsoft Teams, or when sharing information or activities in posts/conversations/announcements in your class in Microsoft Teams, or in names of sections and pages in your OneNote Class Notebook attached to your Microsoft Teams class then the addition of the visual cue of an appropriate emoji makes the text easier to identify in a list and also makes it more classroom friendly.
 Facility to mute activity in posts at weekends or holidays
 Share your class expectations

 Building engagement


 Accessibility and Inclusion
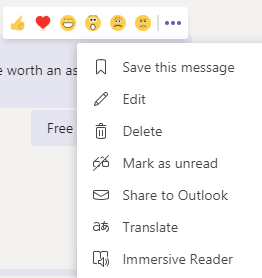

 Want to present to your class?
 Collaborative documents


 OneNote Class Notebook is built into Microsoft Teams. OneNote Class Notebook is like a digital ring-binder with cardboard colour dividers, and within each section you can have as many pages as you like. Each page is a freeform page which can be any size you wish, and become like your classroom whiteboard, where you can add a very wide range of content (including images, audio, video, documents, presentations, embedded Sway presentations, embedded Forms, and you can freehand draw or write just as you would on your classroom whiteboard. It all saves automatically and is accessible on any device so you can move from working on your smartphone on the OneNote app to working in the browser on a laptop (and other devices).
 Microsoft Forms for assessment or surveys
 (@andrewkbailey13)
  Looking to create a teaching video?

 What makes an effective video?


 Here's how to make a screen recording on an iPad or iPhone—handy for recording video tutorials.
 YouTube playlist chock full of quick tip videos


 Malcolm Wilson
  (@claganach)
  Stop-motion sequence of still images
 Editing your teaching video

 Sharing your video
 Online Courses for Creating Teaching Videos

 What you need to set this up in Microsoft Teams
 How to set up you virtual classroom image in PowerPoint
 How to remove the background from an image
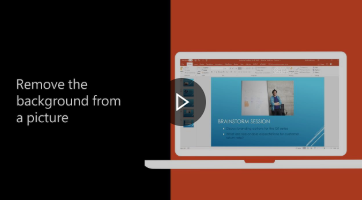
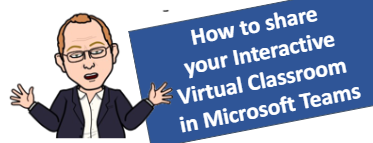 How to share your Interactive Virtual Classroom in Microsoft Teams
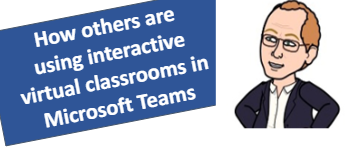 Want to find out how others are using interactive virtual classrooms in Microsoft Teams?
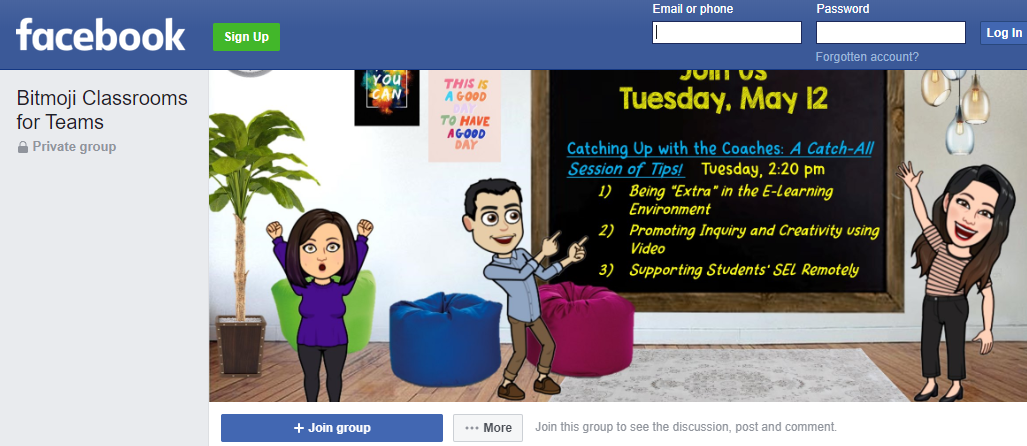
 Definitely spent longer than i should have on this…

 Want to add even more interactivity?

 (@AJOBPickard)