Do you want to present with panache, style or flair? If you or your learners spend a lot of time trying to make your PowerPoint slides look good, then welcome to PowerPoint’s inbuilt Designer or Design Ideas to power up your PowerPoint presentation in the click of a button! With just a few clicks in …
If you are looking for a way to support learners (or indeed, yourself!) to be clear, expressive and confident when communicating & presenting to others using digital tools, then Microsoft PowerPoint Presenter Coach is a handy feature of Microsoft PowerPoint. It’s built in to PowerPoint whether on the web, on desktop/laptop or mobile device, and …
If you wish to create a teaching video to share with your class then where do you start?
There are a number of different ways to create a teaching video.
You don’t need lots of fancy filming equipment, specialist lighting, highly scripted text, remote microphones or
a studio set! You can just use what you have available – and be yourself. If you want to be on camera, that’s fine, but if you just want your voice over the activity you are filming then that’s perfectly fine too.
You just need something to record the video (eg phone/tablet) – & your skills and experience as a teacher (and maybe something to edit what you create).
Your choice partly depends on what you are aiming to share – what are you trying to achieve, how much information are you trying to share and in what way will you share the video with your intended audience?
Your choice partly depends on what you want the video to look like – do you want to be on camera, do you wish to include your voice, do you want it to be a video of a PowerPoint presentation (with or without narrated voice), or do you want to make use of animated characters instead of your own image?
Your choice also depends on what device and software/apps you have available to make the teaching videos, whether laptop/desktop, tablet/smartphone and software/apps you can access.
What makes an effective video?
There’s no hard and fast rule about what makes an effective teaching video. Every teacher is different and every class is different so find what works for you and your class. The age of your learners, the way you choose to share a video, whether you wish to have interactivity between shorter videos, and what you are trying to convey in the video, are all considerations to bear in mind. Being clear about what you are trying to share is the biggest consideration! Consider, instead of a long video, chunking a lot of content into perhaps a series of shorter videos each with a specific focus. And try out what you are creating on different devices to see how your learners might view the video. Is it bright enough lighting so that what you are showing is clearly seen, can the sound be clearly heard? You don’t need to make a masterpiece the first time round (or indeed at any time!) so give it a go and make changes in light of your experiences and feedback from your learners.
Camera-Ready Educators: Video As a Learning Staple – a blogpost by Paul Teske and Sarah Brown Wessling which gives food for thought for teachers looking to create a teaching video: “…teachers know it’s not the screen alone that engages students. It’s how teachers use video as part of deliberate instructional design that creates the opportunity for learning and growth. Teachers use video in various ways for various purposes, each thoughtfully constructed.” That blogpost succinctly summarises and provides points for reflection for teachers using video whether it’s for teaching new content, differentiation, scaffolding and support, or for conveying information about such things as class announcements and routines.
The experiences of others can help you make your own judgement about what will work and then you have the feedback from your own class of learners.
Latest blog: What does the research say about designing video lessons? https://t.co/1x7dXs4ct2 Featuring some insights from Richard Mayer's Handbook on Multimedia Learning. pic.twitter.com/aXyhIVwEw6
Engagement with videos begins to drop after the 6-minute mark, and it falls dramatically after 9 minutes. Keep this #BestPractice in mind – chunk instruction such that each video covers a single learning objective or task, and nothing more. #PearlandEdtech#WeArePearlandISDpic.twitter.com/GXKj0Ye5VN
If you are showing something you are writing – whether that’s simple phonics, handwriting formations, numeracy processes or anything else which involves writing – then you can point your phone/tablet camera at the paper or wipe-clean whiteboard, press record on the phone/tablet camera and start talking. Having your phone/tablet affixed to a tripod, a home-made stand or propped up so it won’t move is probably wise!
Keeping your video short is beneficial both for your own sake in not having to redo or edit a long video in which you wish to make a change, but also it’s helpful for sharing online somewhere to have smaller videos as they upload more quickly. If you are sharing on Twitter there is also a restriction on the length which will upload, but if sharing on your classroom digital platform you can add accompanying explanatory text, and perhaps have a sequence of short videos (each labelled with identifying text) so that pupils can more easily watch the parts as often as necessary for what they are doing.
Here’s example of videos shared by teachers where the camera is pointed at the writing area, and with the teacher voice added as narration, or using a class toy or puppet to provide the on-screen persona:
We are practising the parts of the body this week.
1. Practise the words 2. Draw a real or made up person with lots of detail if you can. 3. Label the parts on them in Spanish. 4. Keep your drawing safe, you’ll need it again. pic.twitter.com/ur3Rf1Dvbf
Plastic straws are hard to come by these days I know but if you have a bending piece of tubing this is some pretty advanced physics. Can still do the first part with a non-bendy straw.
The likelihood is that the device you have to hand for taking videos is your smartphone or mobile tablet, a device such as an iPad. And that’s perfectly fine for taking video to share with your learners.
Whatever app you are running on an iPad then you can create a teaching video where you record whatever is on the iPad screen, where you can if you wish, add your voice-over to explain what your learners are seeing.
Do you want to appear on camera beside your screen recording on an iPad? Then here’s how you can use split screen to record yourself on the iPad camera while recording activity on the iPad
Want a video of yourself teaching alongside your lesson visuals? Use Split View alongside Screen Recording on an iPad. Quick and easy way to create lessons with a more personalised touch – pupils see you as well as your content. Give it a try and let me know how you get on! pic.twitter.com/6KejVHX2B0
If you have the latest version of PowerPoint then you have the facility to capture a video recording of whatever is on your PC/laptop – whether that’s the PowerPoint presentation or indeed anything on the PC which you wish to show to include in the video.
NEW! I've created a new "Video and Screen Recording Tools" YouTube playlist chock full of quick tip videos
PowerPoint has the option to create a video from your presentation. Just open the PowerPoint presentation and go to File > Export > Save as Video. This will incorporate all that you’ve included in timings, narration, animations, media, and transitions.
If you wish to include yourself (or something else) in a video where the background is of something else, the subject of your video, then using the greenscreen facility available with some tools can let you, for instance, appear talking in front of a video of whatever you are teaching about.
I’m trying out different methods such as using green screens for teaching and learning when we are not able to teach as normal in classrooms. Here is part of a video I have created which will hopefully keep the Higher pupils more engaged with learning @HwbSt@StMungosFalkirkpic.twitter.com/sd3blAq1uM
The online tool unscreen.com provides the means to remove the background automatically from a video so that you can combine with another image or video and quickly create a greenscreen effect, without the need for any other equipment.
Stop-motion animation videos can be useful to illustrate a teaching point where you have a series of still images. This can be useful where live action of a sequence of events is difficult to capture on video, or may take too long, or where you only have access to still images. You can create a sequence of still images using presentation software like PowerPoint (and export as a video to create the illusion of animation/movement) or drop them into video editing software/app such as iMovie on an iPad. Or you can use stop-motion software/app such as the iPad app Stikbot.
How did you get on with the maths task yesterday? Can you measure a short distance and try to work out the speed of a toy car or paper aeroplane, time how long it takes to travel that distance and calculate the speed. Here’s an example my kids helped me make#antomathspic.twitter.com/w5T4AT0c61
There’s a host of video editing tools available. Chance are the device you have available has likely got something already there ready for you to use.
For Windows laptops/PCs then built into Windows 10 devices you will find Video editor (which replaced Windows Movie Maker, with which many teacher may already be familiar, from previous versions of Windows).
Did you know that there is a free video editing tool built right into Windows 10? Click the start button and type "Video Editor"
Great for creativity during #remotelearning. Think of it as "NextGen Movie Maker"
Apple Clips is a neat free video-creation app for iPad or iPhone. It lets you quickly combine text, music, graphics, recorded voice, images, and animations to create videos with ease. So if you are trying to find a way to explain a topic or a teaching point then you might find Apple Clips a handy way to create a visually engaging video. The inclusion of inbuilt graphics such as arrows, finger pointers and many more adaptable images make this really easy to highlight parts of photographs or video clips with explanatory text or spoken voice.
Sharing your video
You have many choices when deciding how to share you video. What platforms you have available to you for your school may determine the choice you make.
The following are just some of the ways you might share your video creations:
Using a school YouTube account – this option will let you share the link to the video in different places as well as provide an option to embed elsewhere such as a website or Sway. Depending on who you want to be able to access the video you can choose to have the video “unlisted” – that means only those who have the link can access it. It won’t be searchable and won’t appear on the list of videos on the YouTube channel.
Upload to your Microsoft OneDrive (available to all Glow users) and at the share option choose either to make it “share with anyone” (which means anyone with the link will be able to access and will not require to log into anything – and you can optionally choose to set a password and decide to block download) or you can choose “only my organisation” (which for Glow users means in order to access the link the viewer would require to log into Glow) – ensuring the share link is set to view-only, not edit.
Upload to Microsoft Sway (add a media card in a Sway and choose the video option and you can upload the video) – at the share option in your Sway you can choose to have it available to be viewed by anyone with the link, or only the organisation (Glow) and optionally add password if you wish. Having your video added to a Sway means you then also have the option to add text about the video and to add pictures related to it.
Upload to files in Microsoft Teams for your class or group – sometimes uploading larger files can be faster if you go to Files in your class in Microsoft Teams and then at the top right choose “Open in Sharepoint” then navigate to the folder “Class materials” which is read-only so that your class can view but not inadvertently remove the file.
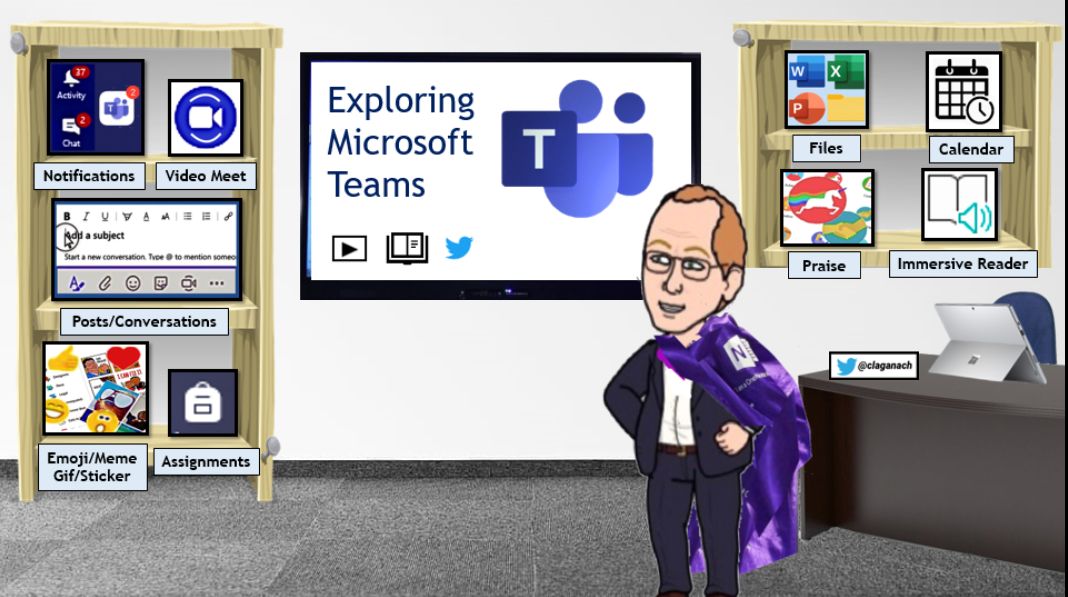
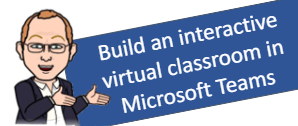
You’ve no doubt seen lots of teachers sharing their interactive virtual classroom images – a visually-friendly way to connect with your learners via an online platform where they can click on elements in the picture to view details of learning activities, or view videos, or read books chosen for the class, or click on a link to online resources to support their learning.
You can set up an interactive virtual classroom image in several online platforms and using a variety of digital tools. This blogpost is specifically looking at how to do so if your school uses Microsoft Teams.
What you need to set this up in Microsoft Teams
You will need the following to set up your interactive virtual classroom image:
PowerPoint in which the interactive virtual classroom image will be built
Images which you are free to use (this post will show where to access these) to create the background and items in the classroom.
Your Bitmoji character (though if you don’t want t use a cartoon-style Bitmoji character you can alternatively use the inbuilt stock character images in PowerPoint online, or a cartoon-style image you have created with another digital tool).
The links to the resources you will be adding as interactive links to the image (whether that’s videos or online resources, whether somewhere in the class files in Microsoft Teams or shared somewhere external to the class Team).
Microsoft Teams for your class – where you will share the pdf with clickable links (you can also choose to use PowerPoint online from your OneDrive if you prefer to share it as a PowerPoint show).
How to set up you virtual classroom image in PowerPoint
View this super detailed step-by-step video by Brian White showing how to create the virtual classroom slide in PowerPoint online – this includes how to use the Bitmoji plugin in the Chrome browser, how to search within PowerPoint online for transparent backgrounds, how to add items for the class scene, how to add a video from YouTube as an embedded video, and how to create the link from a shared PowerPoint link which makes it a play-only view for pupils to interact with it – by adding &=&action=embedview to the end of the weblink from your shared PowerPoint link.
Interactive elements will be the links you attach to the individual items so when clicked on by your learners they will automatically be taken to what you have added. This might include websites, online resources, YouTube videos, or login to platforms your class uses.
There are different ways you can remove the background from any image so that when you place it on your background image it does not show anything from the background of the image you wish to place on the classroom background.
Using PowerPoint to remove background from an image
How to share your Interactive Virtual Classroom in Microsoft Teams
You can choose whether to share your interactive virtual classroom as a simple image (which will have no interactivity) or PDF (which will retain any interactive links you added) or PowerPoint
To create an image from PowerPoint click on File > Save as > choose location on your device > from dropdown “Save as type” choose “PNG Portable Network Graphics” format
To create a PDF from PowerPoint click on File > Save as > choose location on your device > click on “Options” and specify single slide you wish to use
When uploading to Microsoft Teams you can choose to share in the Posts/Conversations by clicking on the paperclip attachments icon – you will then be asked where you wish to share the uploaded item so choose to save in the “Class Materials” folder as this is read-only for your learners.
You can alternatively choose to upload the PowerPoint into your OneDrive and when choosing the share link ensure the permissions are set to “anyone with the link” (and ensure edit rights are disabled). To ensure the PowerPoint link opens as a play-only view for your learners to interact with it you can add &=&action=embedview to the end of the weblink from your shared PowerPoint link from OneDrive before you share it in the Microsoft Teams Posts/Conversations (this method also permits sharing outwith Microsoft Teams, such as on website or social media).
— Castlemilk High Technologies Faculty (@CHS_TechFac) May 29, 2020
Feeling inspired by fellow teacher chum @MckRoxi and made my own virtual classroom in PowerPoint. Of course my slides are pink pic.twitter.com/SqMU1YgiWR
You can also upload the image from your PowerPoint slide to ThingLink to add hotspots which, when clicked by your learners, give you the option to add the links as popout windows so that the learners don’t leave your virtual classroom space. ThingLink also gives the option to have text read aloud using Immersive Reader, and also to let you add audio recordings of your voice if you choose.
Creating Visual Learning Materials with ThingLink – a free online course on the Microsoft Educator Centre guiding you through learning how to use ThingLink to bring images, video and 360-degree virtual tours to life with added popup links, voice and text notes, and more. ThingLink creations can be shared via Microsoft Teams anywhere a link can be added.
Apple Clips is a neat free video-creation app for iPad or iPhone. It lets you quickly combine text, music, graphics, recorded voice, images, and animations to create videos with ease. So if you are trying to find a way to explain a topic or a teaching point then you might find Apple Clips a handy way to create a visually engaging video. The inclusion of inbuilt graphics such as arrows, finger pointers and many more adaptable images make this really easy to highlight parts of photographs or video clips with explanatory text or spoken voice.
Likewise if learners in your classroom are trying to demonstrate their understanding of a topic being studied then this app can provide a great means for learners to illustrate their understanding of concepts.
Apple Education have a free downloadable guide called Everyone Can Create showing how to make use of Apple Clips app to support creativity in learning and teaching
Microsoft Sway is a presentation tool which is free and works on any device. It can start with a simple word-processed document (or from other sources such as Powerpoint or PDF) where you’ve put your ideas and, with just a few clicks, you can upload the document, highlight text you wish to emphasise, which parts to make into new sections, where to add images, embedded video links and images, and add emphasis in an engaging way.
Want to make a tutorial presentation using Sway? The video below shows how you can structure a Sway presentation to use embedded videos, images and text to explain the steps in any process for explaining to others.
How to use Sway for a school project. The following video shows how Sway can be used to create a project on any topic in an educational context.
To share your Sway presentation with others you simply copy the weblink URL which Sway provides for you, and share that, whether via social media or email (there are specific buttons at the share part of Sway which provides you with the appropriate link for each method of sharing. This can also be used to embed in a Glow WordPress blog – just add the short link in the body of a blogpost and it will automatically embed. Note that if you are using your Glow user account to share your Sway link the Sway presentation must have ben made public for others to see it, it cannot be embedded elsewhere online (such as a blog) unless the Sway presentation is public and can be seen by anyone on the Sway settings.
Below is an example Sway “Sway for Education: Sway in the Classroom” which provides examples of how Sway can be used, and also shows in itself what a Sway presentation can look like.
Examples of Sway in Education
Sway – The star of your 2015 Classroom – a post on the Microsoft Australian Teachers Blog. This provides a host of ideas for how Sway can be used in a classroom context, as well as examples of created Sways.
On May 6th I made the trip across Birmingham in rush hour traffic to attend TeachMeetWM organised by the irrepressible and absolutely bonkers Simone Haughey at her school Robin Hood Primary. I sadly missed the choir singing and the start of proceedings thanks to a staff meeting and the traffic, but I arrived in the end to be greeted by delicious Chinese food saved for me by Sim and lots of friendly faces including John Rolfe and AnaPaula Booth from the British Council, and the staff of Robin Hood who are obviously well used to Simone as they didn’t bat an eyelid when I asked if they had a couple of hula hoops I could borrow!
There were many great presentations on the night including a couple via video, and you can see what you missed by looking at the Storify of the tweets at the end of the post. However, my presentation is below as promised for those who were there. How I managed to explain it all in 7 minutes I do not know but I avoided being attacked with a cuddly toy! Do leave a comment if you have questions!
After testing Slate a while back I though I’d try out Microsoft Sway. I downloaded the app to my phone on the bus and made this while traveling home on bus and train.
Sway feels much like Adobe Slate, I used the same words and pictures to test Slate on my iPad a few posts ago: Chalking my First Slate.
Both Apps produce stylish, responsive webpages with nice fonts, full width images and slick galleries created from blocks of content.
Both host everything for you at no cost. Neither lets you download the work locally.
I am ‘reviewing’ them for a position of using them once. Given Sway is beta and I only used the iPhone app I take everything here with a pinch of salt.
While Slate was iPad only ,the iOS version of Sway is for the iPhone. Sway in the browser seems to be more of a web producer fitting in with your MS office account apps.
I’ve also installed Sway on an iPad and it just scales the interface to fit the screen, it seems to work just as well there as on the phone.
I was surprised to find how pleasant Sway was to use on a phone. The interface made it easy to add the content blocks.
The browser version of Sway allows video and access to photos from Flickr, OneDrive, Youtube and more. Slate give access to Lightroom, Creative Cloud and DropBox. The Sway iPhone app only gives access to your camera roll at the moment.
Sway is in preview and the iPhone app indicates that there are more content block (called cards) in the works. Currently you can add Headers (image and text), photos text and More. The more turns out to be ‘cards’ currently groups and stacks of images, more are coming:
Sway on Glow?
When I posted my sway on twitter, I got a reply from someone from Microsoft. I had the chance to ask if Sway would be usable with a edu O365 account:
@johnjohnston@sway We have said it will, but no specific date at this time…
Sway would make a nice presentation tool for use in Glow.
I’ve got a few negative feelings about all of these services.
Firstly the lack of control of the data you publish to them. I’ve watched a few web services disappear. I generally like to at least have an export option. I’d love one of these tools to give you the opportunity to publish to your own space or download copies. That said it seems unlikely any of these companies are going out of business soon.
I also wonder if all of these highly polished presentation tools take away some creativity. Making anything with technology gives a range of choices about how near the metal you get with your tools. If we were trying to teach learners about presentation there are limitations.
Effortless design
Sway’s built-in design engine takes the hassle out of formatting your various pieces of content by integrating them into a cohesive layout. From there, you can easily adjust the design to create a look and feel that reflects your unique style.
Some might think that the hassle is part of the fun or learning?
I am quite likely wrong about this. I’ve be saying it for a while. I though the same about iMovie trailers, too easy to learn with. But I’ve seen some nice examples of learning using iMovie trailers.
Both Sway and Slate remind me of medium, I’ve put the same text and images on medium as a comparison.
I also created a home knitted version The Devils Pulpit. This is somewhat less polished, but fun to do.
All three applications are easy to pick up an use. They do not allow much customisation of the layout. Sway having more choices medium the least.
Sway and Slate both offer embed codes, Slate’s is limited to a clickable splash screen that takes you to adobe’s site. Sway’s embed is, in my opinion, much nicer.
For the words and images I was using I prefer Slate’s presentation a little. I like the ‘letterbox’ background images that scroll a lot. I did manage to get these working to some extent (no mobile) on my hand knitted attempt.
Medium is more focused on writing than Sway or Slate.
Medium is the only one that offers something in the way of guidance and suggestions as to what to read. I’ve enjoyed quite a lot of writing on medium through my daily email.
Both Sway and Slate are particularly nice ways to publish when you want your images to be as important as your words. Given Sway has an iPhone app it would be a good choice for using on the move (and on the bus). Sway would be a great tool for producing good looking reports from school trips. For myself I’ll probably stick to blog posts and hand knitted solutions where the fun is in the making.
Starting out as a teacher, I was terrified at public speaking in assemblies and staff briefings. However, when starting out in middle leadership just 2½ years later, I discovered I had no choice. I had to speak and present on behalf of my faculty. It was the expected norm and as with all things teaching, … Okumaya devam et →
 Looking to create a teaching video?

 What makes an effective video?


 Here's how to make a screen recording on an iPad or iPhone—handy for recording video tutorials.
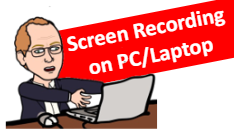
 YouTube playlist chock full of quick tip videos


 Malcolm Wilson
  (@claganach)
  Stop-motion sequence of still images
 Editing your teaching video
 Sharing your video
 Online Courses for Creating Teaching Videos
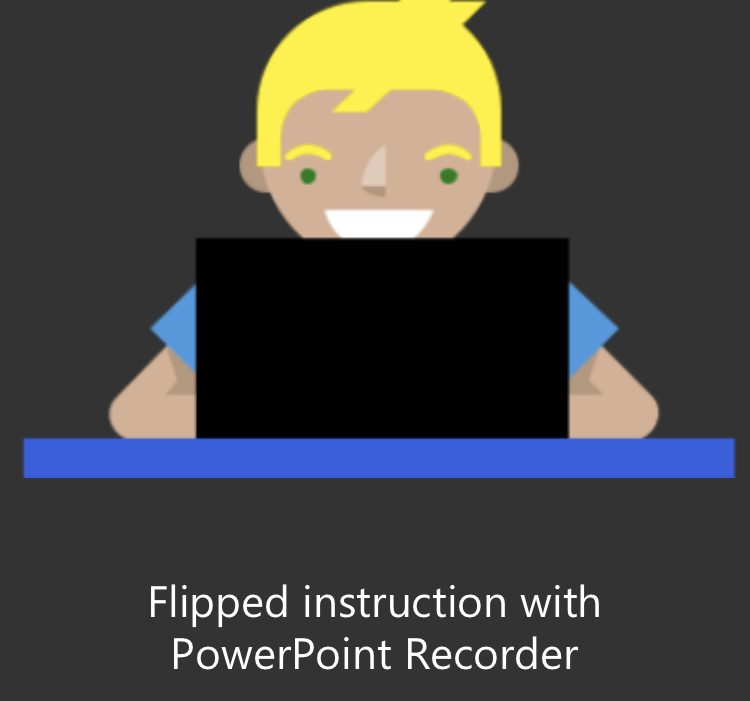
 What you need to set this up in Microsoft Teams
 How to set up you virtual classroom image in PowerPoint
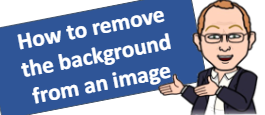 How to remove the background from an image
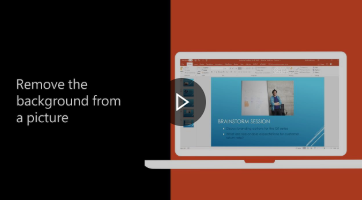
 How to share your Interactive Virtual Classroom in Microsoft Teams
 Want to find out how others are using interactive virtual classrooms in Microsoft Teams?
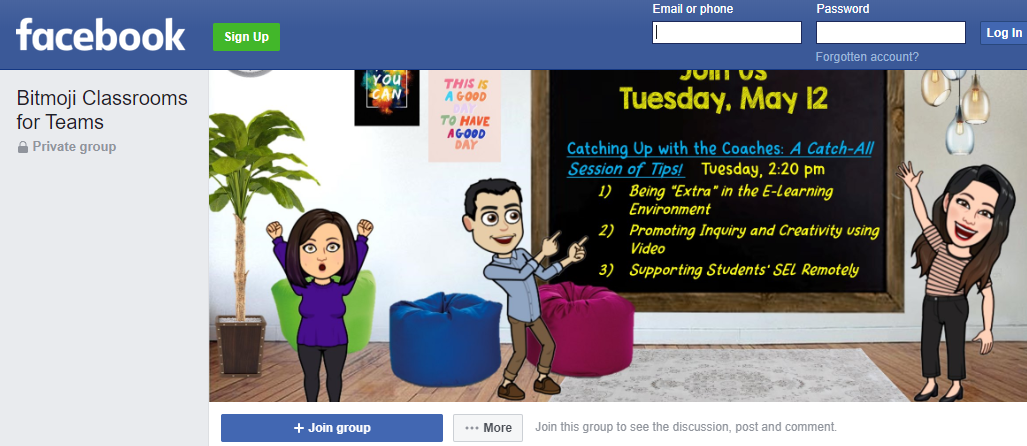
 Definitely spent longer than i should have on this…

 Want to add even more interactivity?

 (@AJOBPickard)
 Want to use the

 (@ICTEvangelist)