As with all schools in Scotland, Kyle Academy closed our doors on Friday 20th March with very little warning, and quite literally, no time to prepare. The final week was spent ensuring that those who were still able to attend school, had a note of their Glow login details and knew how to access Microsoft Teams.
For some staff, they had already been using Teams with a handful of classes, but for most, they hadn’t logged into Glow for a very long time! This was going to be a challenge!
As the ‘Digital Champion’ in school, and the only MIE Expert, I knew it was time to step up and offer support to the school community. This has been a huge task, but I feel very proud of where we are now!
One of my first tasks was to establish a Staff Team for Digital Support rather than sending out yet another email. This has proved invaluable as a ‘one-stop-shop’ for colleagues. A place to find out more information, ask for help, highlight problems and share examples of good practice.
Thinking of the wider school community, one of the main tasks early on was to provide additional support to students and parents who were new to Microsoft Teams. To help with this, I put together a couple of guides which were shared by parental email and twitter.
Feedback for these guides for computer and mobile users has been positive and has since been tailored by other schools. You can view the original sway here.
Digital Learning in Maths
Regular use of Microsoft Teams was already embedded in my own classroom practice and colleagues in the department were supportive. It’s often difficult to deviate from traditional teaching methods in Maths, but it is possible as long as the tasks are both relevant and accessible. Despite working in a department where you are the only one below the age of 50, who says you can’t teach old dogs new tricks? Huge respect for Donna, Sue, Joyce, Karen and Sharon and very proud of what they have achieved this term. Well done!
Setting up Teams
Teams were setup for all our students, but classes working on the same level were added to one Team. This reduced the need for duplicating tasks and lessons. All our Teams were setup with a consistent use of channels. We wanted to make it as easy as possible to navigate, particularly in the junior school where pupils may be a member of 15 subject Teams.
Here is an example of our S2 Maths Team comprising 4 classes of 33 students each.
General – Where weekly tasks are set alongside important announcements and all assignments. Only staff could post in this channel which prevented instructions getting lost.
Online Classroom – Where the live lessons are delivered for all students in the Team, each Monday.
Ask (Mr Wallace) – For students to collaborate with their own teacher and peers. Teachers would ask students to post a photo of their work if they needed help then provide feedback. We held smaller live tutorial classes in our own channel.
Technical Difficulties – To ask a technical question or report a fault with ICT.
Weekend Challenge – A bit of fun for our S2 students!
We had a similar picture for Higher Maths, with 3 classes added to the Team.
General – Worksheets and core tasks are posted on a Monday and a Tuesday, immediately after each live lesson. We also post assignments on a Wednesday, due for the Friday. All solutions are also provided in a sway in this channel.
Online Classroom – Where the live lessons are delivered for all students in the Team.
Ask (Mr Wallace) – For students to collaborate with their own teacher and peers. Teachers would ask students to post a photo of their work if they needed help then provide feedback. We held smaller live tutorial classes in our own channel.
Extension Tasks – To distinguish between the core tasks and extra material for students who would like to deepen their understanding with more exam level questions.
We received very positive feedback from students early on, advising us that Maths was one of the easiest Teams to navigate. I then continued to liaise with departments to review their own Teams and adapt a similar format for consistency across the school. Where staff adopted this, the results were very positive and students appreciated it.
Setting Weekly Tasks
For most classes, we found that Sway offered an excellent tool to provide easy access to short video clips, worksheets and extracts from textbook resources. Sway does most of the work for you in terms of presentation, you just need to concentrate on collating the content! The Sway was setup with tasks for the week, presented in small manageable chunks. Given the nature of the content, we agreed that we would then share a link to the Team using the option for ‘anyone with a link’ to view. This also allowed us to email the link directly to parents of students who were not engaging in the Team.
Solutions were included for students to self-mark, and there was no requirement to send through evidence of all their working. We felt it would be very time consuming to provide feedback on all tasks but students were always encouraged to get in touch or post a photo should they need help.
Live Lessons
From the second week in lockdown, I started to experiment with a variety of video conferencing tools but wholeheartedly supported the use of Teams Meeting despite the lack of incoming video from a student account. For those reading outside Scotland, Glow have currently disabled incoming video from students.
In the department, we all felt that the nature of Maths lends itself much better to live delivery than pre-recorded PowerPoints. This format still provides the opportunity to adapt our lesson, just like what we would do in the classroom. We were able to put students on mute and deliver our lesson by sharing our screen and making use of OneNote and the Microsoft Whiteboard apps. Students always have the opportunity to raise a hand in agreement, or unmute if they wanted to ask a question. In the end, most students preferred to ask their questions in the chat area which we would monitor during the course of the lesson. We all found it was beneficial to have two screens when delivering a lesson. The main screen would allow for digital inking and the second to keep an eye on the hands and chat.
Class Notebook
To deliver successful lessons to my Higher class, I found the Class Notebook open in OneNote for Windows 10 just fantastic, especially when paired with my own Microsoft Surface Pro. Luckily my colleagues managed to get their hands on the smaller Surface Go which had coincidentally been bought for the PE department in school, complete with keyboard and pen! The Class Notebook was setup from a template of notes which I’d collated a number of years ago when I first started to teach the course. Each lesson was easy to navigate in the Content Library by topic section, then lesson. Each lesson was numbered in successive order and carefully matched to suit my worksheets which were set as tasks in the Team. Whilst each lesson had already been typed up, digital ink allowed me to add annotation, highlights, sketches and refer to a marking scheme. It really was magical! Whilst I always used the OneNote for Windows 10 app, there was never a problem with sync back to the Class Notebook in Teams.
Here are a couple of screenshots of my lessons in the Class Notebook:
In addition to the Content Library, latterly we started to use each pupils personal area in the Notebook. Ideally we would have liked students to post photos of there work directly into their own Homework section, but without adequate training, I asked them to submit photos of their work as an assignment in Teams.
Weekly Assignments
To help manage our workload and assess student progress, each week we would set one formal assignment which would be reviewed by the teacher. Usually this was a short auto-marking Quiz using Microsoft Forms in the format of multiple choice or short response. Students would receive instant feedback since we had pre-populated a summary message per question which would display after submission. This then meant we only needed to input a more general comment when reviewing responses.
Latterly, we tasked students with completing a few Maths problems and asked them to submit as a File Upload. This was ok, but I wanted to add annotation so I copied their photo submissions into their private section in the Class Notebook and used digital ink to leave feedback. This would have been perfect if students were able to submit their photos directly into their OneNote, but I know this will need further training once we are back in school.
Engagement
Overall, we have been delighted with the levels of engagement in Maths during lockdown, particularly in senior certificated classes. This is testament to the hard work and support from a committed group of staff, not just in our department, but across the school. By setting clear instructions, short tasks and regular live lessons, we led from the front to establish a new routine with our students. Pupils appreciated this. Ok, we can’t get them all to engage, but that will always be part of the challenge.
So you have just started using Microsoft Teams with your primary school class – now what?
Microsoft Teams can be described as an all-in-one Swiss-Army-Knife online digital tool – with facility for classroom conversations, shared space for collaborative Word documents, PowerPoint presentations, Excel spreadsheets, assignments tool for easily setting tasks for individuals, groups or the whole class (and providing feedback) and OneNote Class Notebook multi-purpose digital ring-binder, all made more accessible to all learners with Immersive Reader Learning Tools.
That might make it sound overwhelming for your class, so…
Start small – make connections
Don’t try and do everything at once!Microsoft Teams provides many features which can be used with your class but you don’t need to use them all right away. The Posts/Conversation area of a class Team is the first part users will see when they log into Teams, whether via browser, desktop app on computer/laptop, or mobile device smartphone/tablet. So this is the place suggested to start.
In the Posts tab you can share text, images or video.
So you can share information with your class either as:
Text (and where pupils can use Immersive Reader in the browser to read it aloud (pupils just click on the 3 dots to the right of the message and choose “Immersive Reader”);
Add a link to a web resource you wish the pupils to use;
Share a picture of a visual diagram of the tasks (as you might do in your classroom) – just click on the paperclip icon to upload a picture;
You might create a short video with your voice (so it’s familiar to your pupils) and the camera pointing at a piece of paper on which you are writing, or a book, picture or object such as classroom toy.
Set up channels in your class Team
When you first create a Team for your class you will automatically get a channel called the general channel. By default everyone in your class will be able to post there. And at the beginning that might be okay as everyone starts to use it.
However often you might find that you want to provide another channel within the Team for general chit-chat for the pupils and you as the teacher change the settings so that the main general channel can only have content added by you. So once you’ve set up additional channels then go into the Team settings and switch off the facility for pupils to be able to post there so that only you can post in the general channel.
You can set up channels for different areas of learning, perhaps by curricular area or for a specific topic or a group. This can help keep conversations related to each area in their respective spaces and not all jumbled together.
It’s suggested to create a channel for your class to have friendly chat so that the general channel does not get cluttered there (telling them that’s what it’s for but that you can still see it). And then restricting them from posting in the general channel. As a member of staff in a class in Microsoft Teams you are a Team Owner
Here’s how you can add an additional channel for class chat where pupils can post.
Go to the list (or tiles) showing all of your teams in Microsoft Teams
Click on the 3 dots (ellipsis) … to the right of the team name
Click “Manage channels”
Click “Add a new channel” (and name it something like Class Chat or Blether Station) and click done.
Primary teacher Roddy Graham shared his ideas for how he’d structured his class in Microsoft Teams so that there were a number of specific channels set up for specific purposes. Choosing the channels to have for your class depends on you and your class so getting the balance between too few and too many is something which only you and your experience with your class can determine. As Roddy Graham explained “Too few mean people aren’t sure whether to post something or not, or it can get too clogged up with random things. With children using these, it may take time to work successfully but here’s some channels I’m setting up for my pupils to use and why.” Here’s Roddy Graham’s channels for his class, along with the explanations for the purpose of each:
“ The Library – a place to talk about books being read at home and share any related learning they do. The Gym Hall – a place to share any physical activity they do, including home fitness or games. Ask the Teacher – a place to ask non-learning related questions, possibly things that are worrying them and they need a bit of reassurance. #NoFilter – a place to share photos of how they are spending their days so their classmates can view Taskmaster – inspired by the TV show so a place to share a fun challenge/daily task for class to tackle Literacy and Maths Tool Boxes – a place to share support resources for tasks set – websites, videos, documents The Playground – a place where the class can chat about anything they like, just as they would in their school playground. The teacher can keep track of everything pupils type (and they are told this)”
You may add additional channels as works for your class, perhaps for curricular areas, perhaps having one for pupils to offer support or share knowledge to other pupils (as teacher Carol Diamond called her channel “Tiny Teacher Talk – where they can ask each other how to do things/for hints/tips or share their knowledge about something which is their strength), or maybe a Weekly Reflections or Time Capsule Thoughts channel where pupils might share about their experiences during distance learning over the previous week,; or maybe a Fun Foto Friday, Talent Show or anything else which fits in with building the culture of your classroom community.
How can you keep your Microsoft Teams classroom organized?
Use channels for specific activities Admins only on general channel Set up a tab for week's schedule
Here’s how you can restrict who can post to the General channel like this:
Click on the 3 dots (ellipsis) … next to General channel
Select “Manage channel” from the menu
Click on “Only owners can post messages” – now only you (or other colleagues if you’ve added them as owners) will be able to post on your General channel of the team.
Once you have your channels set up you can create an announcement in the General channel of your Microsoft Teams class and add a table. Into the table add links to each of the channels (to get the link just click on the three dots beside each channel name and copy the link provided. Then go back to the text in your table, highlight the text and click on the link icon to paste the link you copied.
Whether it’s naming your channels in your class in Microsoft Teams, or when sharing information or activities in posts/conversations/announcements in your class in Microsoft Teams, or in names of sections and pages in your OneNote Class Notebook attached to your Microsoft Teams class then the addition of the visual cue of an appropriate emoji makes the text easier to identify in a list and also makes it more classroom friendly.
Click here for a blogpost about the use of emojis to support education – this contains lots of information about how these can support learning, as well as lots of examples of where they have been used. And if you’re wondering how you’d find just the emoji you need then that blogpost also contains a link to Emojipedia where you can type the word you want and a suggested emoji will be shown ready for you to copy and paste where needed.
Manage the settings of your class team
Once you’ve created your class space in Microsoft Teams it would be a good idea to manage the settings so that you can make choices about what you want your pupils to be able to do in your Team.
The choices are yours as you know your class best. Your level of familiarity with the tools available might make you decide to restrict what can be done by pupils at the outset and then enable features as you and your class become familiar with them. Or you might take the opposite view and leave everything enabled and only restrict an individual feature until you’ve had a conversation with the class about it, and responsible use. So you might want to disable the facility for pupils to share stickers, memes and animated gifs (you can switch them off and on at any time), you can make sure that pupils can’t add or delete channels, and you can ensure that pupils can only edit or delete their own posts in the posts/conversations. Teams manage members settings allows a teacher at any time to mute pupils, individually or collectively, to stop postings being able to be made temporarily for any reason.
Created this little reminder for pupils on how we keep our Teams learning spaces positive, helpful & productive during our period of distance learning – Planning to pop on our pages tonight so both pupils & parents can view. Happy to share if useful @HwbNews@MicrosoftTeamspic.twitter.com/ncOdC9jMBR
If you have older children, and you are looking for your class to co-create their own set of positive online expectations, then you might find helpful this School of Education Netiquette Guidelines from Chicago’s Loyola University as the starting point for a discussion to make the positive expectations explained within them re-interpreted in child-friendly language, making them specific to your class use of Microsoft Teams, and perhaps with associated visuals created by your pupils.
Everyday Etiquette for Microsoft Teams – a detailed guide, by Matt Wade and Chris Webb, to setting expectations around managing the use of Microsoft Teams with users. This is not aimed at primary school use of Microsoft Teams (and some of the features such as private chat and video camera use in video meets don’t apply to the configuration in Glow) but may be helpful as prompts for a teacher to perhaps have pupils come up with their own class-friendly versions, dependent on their age and experience and how it’s wanted to be in their class.
Check-ins
So you may wish to have a way of having a check-in with your pupils, to find out how they are, to show they have connected in your online class in Microsoft Teams. You can make use of a Microsoft Forms check-in form which pupils can complete when they come into your class in Microsoft Teams – and as well as asking how they are (with responses which might be by clicking beside an appropriate choice of emoji face) you can perhaps incorporate a bit of fun, and involvement so that pupils look forward to completing it each time, by having a different light-hearted question each time. The less predictable and funnier the questions the more likely your pupils might be to look forward to completing it. And because it would be a form within Microsoft Teams it means it already keeps a note of who responded (without pupils having to type their name) for the teacher to be able to access in Microsoft Forms. Click here for a ready-made template in Microsoft Forms (on the Microsoft Education Support site) ready for you to click on “Duplicate” button and adapt your your own needs.
Building engagement
Teachers in their classrooms have always found ways to engage their learners, to ensure every voice is heard, to coax the reluctant participant, to check understanding, to provide opportunities for collaboration, to create the environment for every learner to demonstrate their understanding, to move learners forward and build on previous experiences.
An online environment doesn’t change these principles, but instead requires adapting different approaches using available digital tools.
Consider encouraging the positive use of praise stickers (a teacher can control through manage settings options whether these are enabled or disabled for pupils in their Microsoft Teams class) – they can be used from the posts/conversations by clicking on the Sticker icon below where you’d type a message. These can be handy to provide a more visual way of providing positive feedback without having to type – click here for a guide to how to use these, whether on mobile or desktop/laptop
20 Ways to Facilitate Online Class Participation – a post by Halden Ingwersen with 20 suggested tips which apply to any online digital platform and can be adapted for different age groups has been used as a starting point for the approach below. Some things may not apply for specific tools or age groups, but the general advice in Halden Ingwersen’s post remains consistent for when using Microsoft Teams with your primary class:
Be clear in what you expect from your class online;
Become familiar with Microsoft Teams as your class digital learning platform (you don’t need to know about every feature, but make the most of what you use and try to experience from the learner viewpoint);
Provide online spaces within Microsoft Teams for group work (that might be use of channels in Microsoft Teams where focus on specific pieces of work with groups of learners take place, or it might be a collaborative PowerPoint presentation or Word document in Teams files, or a multimedia page in the collaboration spade within the OneNote Class Notebook integrated in your Microsoft Teams class, or at its simplest it might just be using the posts/conversations ensuring the starting point for each conversation group is followed by replies to their group’s task rather than a new conversation);
Share your plan with your class, which might be co-created with your learners or an outline you present of new learning which is going to be covered;
Make sure it’s easy for learners to find their tasks – aim to be consistent as to where learners can expect to find your plan for what’s expected, and provide links or clear steps to find something new.
Provide feedback in conversations/posts – in Microsoft Teams conversations within posts respond with encouragement as you would if you were face to face in the classroom, helping build the reassurance of your learners that you are listening to what they are saying – in the text-based nature of the posts/conversations there is no opportunity for a nod or a smile, but you can encourage through the use of thumbs-up to quickly acknowledge responses
Microsoft Teams has built into it the accessibility tool Immersive Reader Learning Tools. To access in conversations/posts a pupil simply clicks on the three dots … (ellipsis) to the right of any message in the conversations/posts in Microsoft Teams then selects “Immersive Reader.” This will let the user then hear the text played as spoken audio while the individual words are simultaneously highlighted in turn as they are spoken aloud. The pupil can change the background colour to help make it more easily distinguishable to suit the pupil (which only that individual will see, no settings here affect other users) and change the size of text, font, and spacing out of letters on the page. You can even break words into syllables and highlight in different colours nouns, verbs, adjectives and adverbs (all automatically). And you can switch on picture dictionary which will let a user click on any unfamiliar word and show a Boardmaker image (where available) and hear that word spoken aloud. For pupils where English is not their first language they can also use the inbuilt translate feature to translate individual words or the whole text of any message in conversations/posts in Microsoft Teams.
Connectivity woes or technical hiccups!
Every online platform hiccups from time to time: you might get error messages, things don’t update, you can’t upload files, you can’t share what you need to share – and you can probably add to that list!
Teams provides the facility for you as the teacher to present to your class. Don’t feel under pressure to use this video meet facility right away. And take on board safeguarding and employer requirements in use of such a tool, as well as being mindful of your professional teaching association advice. If this is for you, and you want your pupils to have the familiarity of seeing you and hearing your voice then click on this link for specific step-by-step guidance to setting up a video meet in Teams for your class. If you wish to have only your voice in the video meet then you might instead opt to have the camera pointing at an object (piece of work, paper on which you’ll demonstrate a teaching point, or maybe a piece of writing you’ll discussing together, or perhaps a class toy/character figure!
The files area within a Microsoft Teams class lets pupils within that class work collaboratively (whether real-time or asynchronously). As you would with a face-to-face class the teacher sets the expectations and roles of different groups within a class so that each pupil knows who will work on which document and with whom. No setting changes or permissions need to be made. Everything saves automatically. Pupils can create collaborative real-time PowerPoint presentations, or Word documents, or Excel spreadsheets. They can be uploaded from a device or just click “new” to start one right away in the Files folder/tab in your Microsoft Teams tab. Click on this link for a how-to guide about using Office 365 to create a collaborative Word document in Glow – this is the same process in Microsoft Teams just by clicking on the Files tab in your Microsoft Teams class, with the benefit that the permissions are already set to let anyone in the class collaborate with no need to specify usernames.Click on this link for a guide to creating a collaborative PowerPoint Online and click on this link for guide to creating a collaborative Excel Online spreadsheet. This is the same process in Microsoft Teams just by clicking on the Files tab in your Microsoft Teams class, with the benefit that the permissions are already set to let anyone in the class collaborate with no need to specify usernames
Assignments
Microsoft Teams includes the option to assign pupils activities, whether tasks for completion by specific dates or to assess understanding of individuals. This can be used to share assessments or quizzes, or share documents to a whole class in such a way that each pupil receives a copy ready for them to edit and submit on completion back to the teacher for feedback, without the rest of the class seeing it. Click here for a guide to making use of the assignments feature of Microsoft Teams.
OneNote Class Notebook
OneNote Class Notebook is built into Microsoft Teams. OneNote Class Notebook is like a digital ring-binder with cardboard colour dividers, and within each section you can have as many pages as you like. Each page is a freeform page which can be any size you wish, and become like your classroom whiteboard, where you can add a very wide range of content (including images, audio, video, documents, presentations, embedded Sway presentations, embedded Forms, and you can freehand draw or write just as you would on your classroom whiteboard. It all saves automatically and is accessible on any device so you can move from working on your smartphone on the OneNote app to working in the browser on a laptop (and other devices).
A OneNote Note Class Notebook already comes with the permissions for your pupils to access and collaborate on anything in the collaboration space, so you’ve no setting or permissions to worry about if you wish a group of pupils to work on something together, just create the page and tell them who’s working on it. In addition to these collaboration spaces a OneNote Class Notebook also has a section which the pupils can see, but on which only the teacher can add or edit content – handy for sharing what you might have shared on your classroom whiteboard. This is called the library space. There is also a teacher-only section which can be enabled (so you can create content ahead of time and move into the library when you wish pupils to make use of it. And the OneNote Class Notebook within Microsoft Teams also has individual sections for each pupil – which only you as teacher can see and that individual pupil (other pupils can’t see anyone else’s sections).
And if that wasn’t enough, OneNote Class Notebook built into a Microsoft Teams class also has Immersive Reader Learning Tools built in providing accessibility options for all learners.
Gathering feedback, taking quizzes to reinforce learning, or undertaking surveys of views are all the kinds of classroom activities which are ideally suited to the use of Microsoft Forms. Microsoft Forms are built right into Microsoft Teams, either in short-form quick polls with few questions added right inside posts/conversations in Microsoft Teams, or assessments or surveys as simple or as complex as you like created in Microsoft Forms and a link shared in conversations/posts in Microsoft Teams, or assigned to the class using the Assignments feature of Microsoft Teams. Whichever way Forms are assigned to the pupils the teacher then can see the results in one place, and can even be set up to be self-marking or to provide automated feedback depending on answers provided by pupils (using the branching feature of Microsoft Forms. Click here to find out more about Microsoft Forms
I am Rosslyn Lee and I am the Digital Skills Coordinator for North Ayrshire Education. Part of my job is to support staff and pupils in our schools with all aspects of digital learning and teaching. I became a Microsoft Innovative Educator Expert in 2017 as I recognised the value to my professional learning as well as my training role. Completing courses on the MEC is a great way of keeping up to date with O365 developments as well as providing me with opportunities for professional learning, not available elsewhere.
The North Ayrshire Music Service consisting of 23 peripatetic instructors has been and continues to be very successful in delivering music instruction across the authority. North Ayrshire young musicians regularly achieve great success at the Ayrshire Music Festival as soloists and ensembles. There are two authority ensembles who take part in the annual National Concert Band Festival, again achieving success within Scotland as well as at the national finals.
The Music Service has used a phone app for several years to distribute information to pupils and all staff have their own laptop to digitally record pupil achievements. Microsoft Office365 through Glow is the platform that the Music Service utilise. Use has also been made of a staff Sharepoint site for a number of years. This is maintained by the Music Service Admin Officer. However, the current COVID-19 crisis has had a huge impact on the delivery of their service.
As a forward-thinking service, Ronan Watson, the Music Service Manager started to look at how instruction could be delivered remotely. I worked with Ronan to help develop their use of Microsoft Teams, a blog, a Sharepoint site and a You Tube Channel. Two of our instructors recently achieved Certified MIE status as they see the value in this type of professional learning which will help support their work now and in the future.
MUSIC SERVICE BLOG
The blog is public facing and serves to provide information about the Music Service to parents.
SHAREPOINT SITE
The Sharepoint site was set up to give primary pupils access to resources and to allow staff to communicate with them about their tasks. The site contains a document library for each school with folders for each instructor who works with that school. These folders contain uploads of music, links to the Music Service videos on You Tube and soundtracks as well as records of work for pupils in the school.
YOU TUBE CHANNEL
The You Tube Channel was set up as unlisted to allow the instructors to upload videos of themselves demonstrating instrumental techniques to pupils. As neither Stream or video conferencing with pupils is possible using Teams in Glow, a solution was required to provide some visual instruction and it was felt that You Tube was the easiest option to share these videos.
VSCENE
Several months before lockdown, I was asked to look at Vscene, video conferencing software from Ajenta, as a way of delivering Advanced Higher subjects and also to facilitate lessons to Arran High School, our island school who have challenges around staffing as well as access for staff. Indeed, in January this year the ferry service was severely disrupted for most of the month. Vscene seemed to be an ideal solution for us.
Due to COVID-19, I decided to trial Vscene with the Music Service and they are piloting it until the end of June to assess its suitability. It is highly likely that music tuition will continue to be delivered virtually to pupils, whether in school or at home, for some time yet as schools attempt to keep numbers in their buildings to a minimum to comply with social distancing rules.
TEAMS
A few of the staff also use Teams to communicate with pupils. Here pupils can find files of music they require as well as upload their own practise audio files.
One of the instructors, Fiona Ramsay, has created three Teams for her clusters and communicates with her pupils by posting announcements regularly. None of her pupils had ever used Teams before lockdown and it has taken time to persuade some of them to engage, however she is making progress and they are now posting questions as well as uploading their work.
Fiona also makes up Microsoft Form quizzes for the pupils and has a channel to support pupils using Teams. The ‘Ask Mrs Ramsay’ channel avoids the general channel from becoming cluttered.
Feeling that pupils were becoming more comfortable with Teams, Fiona recently started to use OneNote. Pupils sections include their Practise Diary where they can upload their audio files and receive feedback privately.
Remotely delivering a practical subject like music has its challenges. However, the North Ayrshire Music Service has risen to these challenges and is striving to maintain its delivery of music lessons to pupils to as high a standard as possible. These methods will never permanently replace face to face tuition but serve to deliver music instruction to our pupils in the best way possible, given the current circumstances.
Hello, I am a Computing Science teacher at Falkirk High school, this post is about my experience of moving to remote learning and my journey through it until the summer break. I have been an MIEExpert for 3 years and gained MIE Trainer status during this period of remote learning.
Before moving to remote learning Microsoft Teams was used by a small number of teachers across our school. I lead the schools eLearning staff working group and had been providing training to these colleagues on using the main features of Glow (Teams, OneNote Notebook, Forms, Sway, O365 and Immersive Reader) that we thought would be most useful in our setting. We had planned to roll this training out across the entire school this year with eLearning staff and our pupil Digital Leaders supporting and leading the way. This did happen, just not how we had planned.
In the two weeks prior to starting remote learning I provided training sessions to staff on the basics of using Glow and Teams so that all staff had a grounding on it and could use this whilst working from home. I also synced all Glow pupil groups within our school to enable staff to quickly create the teaching groups and teams they needed. All Staff rose to the challenge and engaged with digital learning tools in a way that I have never seen before in my 20 year teaching career. I remember one of the last things I said to my Head Teacher was that “My silver lining out of all of this will be the staff engagement with Digital Tools and Technology for learning.” My view has slightly changed on that front – I’ll explain later.
Overview of my original use of Teams and Digital Tools
I have been using OneNote Notebook for a number of years and then Teams when it launched in Glow with most of my classes. I had used O365, Immersive Reader, Forms and Sway before but not extensively. Additionally, some of the tools I’m using now I had never heard of before remote learning.
When setting up my Teams I wanted to make things as easy as possible for pupils to locate work and navigate their virtual learning space. With this in mind, the first assignment I set all of my pupils was a ThingLink on Navigating our Team. This gave them pictures of their Team with links to explain each part so that they could gain an understanding of how our virtual classroom was laid out and would operate. ThingLink is a digital tool that I had not heard of prior to remote learning but is one I will definitely continue to use. I had great feedback both from pupils and staff on it and great engagement from both when using it.
ThingLink screen clipping from pupil Teams Navigation Assignment
All of my Teams have been set up the same way. I have added different channels to hopefully indicate what each one is being used for rather than all communications being in the one General channel. It can otherwise quickly become clogged up making it difficult to locate work, etc. I also set my General channel for staff only commenting as this is where I post Assignments and Announcements to. This should mean that it is easy for pupils to see the weekly work and important announcements.
I am using Assignments to issue weekly work to all pupils. This means that each child gets their own editable document (Word, notebook page, spreadsheet, PowerPoint, etc.) that they can work on, complete and submit for marking and individual feedback. Pupils can clearly see what assignments they have outstanding and completed. Using the Grades tab they can also see their progress and scores for all submitted tasks. All of my Teams have a OneNote Notebook which gives each child a space to work.
OneNote Notebook Lesson Outline
My organisation and layout of my notebooks has developed through remote learning. I now have clear Success Criteria, Tasks and Exit Passes to help the children see exactly what they need to do for each lesson and for me to gain feedback about how they felt about that lesson.
I have been teaching programming to my new S4 class. We started this when we “Moved On Learning”. At our school we code in Python and normally use our desktop PCs or Laptops in the lab, however, not all of my pupils have these devices at home. Some are using a tablet or their phone to complete work. Some have opted to download Python onto a device while others are using PythonAnywhere which is all done online. The actual Python coding is identical in both environments but the platforms themselves are quite different, therefore, I have been recording myself doing the tutorial tasks in both platforms and embedding these into a Sway each week. The pupils then watch the tutorial for the platform they are using.
Python Code attached in Assignments
I was delighted when pupils were attaching their programs to their assignments when it showed me the code in the assignment window. I did not expect to see the code within the Teams assignment. This meant that I could view their code, mentally run through it to check that it would work but it also made discussing their code easier. Because I could see the code line numbers it made our discussions easier because I could state the line number in which they needed to revise. There were occasions where it was necessary to “show” pupils what I meant as communicating via keyboard was not always easy and I have started using Trinket for this type of thing. I can create Python code in Trinket and share it via a link with pupils to edit and experiment with which has helped them to see the differences between their code and mine. Trinket is another digital tool that I was unaware of prior to remote learning but will definitely continue to use.
I have also been using Forms to create surveys and quizzes. Sometimes I have set these as the weekly work tasks on their own but also embedded these into Sways and OneNote Notebook pages depending on the task. This has allowed me to combine a variety of resources (theory, pictures, video and quiz) enabling all of the elements of that task to be in the same document making it easier for pupils to complete the work set for them.
I have had positive feedback from pupils when issuing praise stickers for completing work, being kind or helpful to others in the team and have received praise from pupils myself. Which I must admit nearly made me cry. It was really nice to get this from pupils as it let me know that everything I had been doing was working, helping and appreciated.
Other Digital Tools that I have been using to support teaching and learning during this time are Wakelet, Flipgrid and Canva. I had been using Wakelet this year with my Higher Computing class. We had been adding online resources to it as we came across them building up a bank of revision materials as the course progressed. During remote learning I have been using it as a central point for storing staff training “How To” videos that I have produced. I have added the Wakelet as a tab in our whole staff team so that everyone can access it easily. As part of the staff CPD Training that I offered I created a Wakelet on making a virtual emoji classroom and shared it with staff to help them to create their own virtual classrooms. I have used Flipgrid to record ‘shorts’ (videos of less than 10 minutes) and shared these with pupils in my Teams. These short videos have normally been instructions on how to do something or a welcome to our team message from me. I have not used this app with pupils recording their own videos but this is something that I would like to be able to use in the future. I stumbled upon Canva during an online CPD session that I was taking part in during remote working. Canva is a design app that allows you to quickly design and create great looking publications either working from templates or from your imagination. I have used it to create certificates of appreciation for my pupil Digital Leaders, pupils submitting work, infographics, a twitter header image and various Teams announcement banners. All of your creations can be animated, downloaded as pdf, image or video and shared with a link directly into my Teams, etc.
Announcement banners
My other roll during remote working has been training and supporting staff within my school with Glow, Teams, using Assignments, O365, ThingLink, Forms, Sway, Voice Overs in PowerPoint and OneNote Notebook. This has been great fun and very rewarding with staff sharing their successes and creations with me. Again reinforcing my original ‘silver lining’ from lockdown. However, I did say earlier that my view of that has slightly changed and it has – I’ve been so impressed by our pupils; taking part, sharing, asking questions and trying things out, however, in equal measure also by their parents and folks at home, supporting them (and me). I have received some lovely messages from them which has been greatly appreciated.
I have also achieved MIE Trainer status during remote learning. I had completed my own training for this way back in 2018 but had never tracked the training and support I had been providing to staff until now. Something else from remote learning that I will continue to do.
My silver lining now – the way in which pupils, parents and teachers have collectively engaged with Digital Tools and Technology for learning.
The transition to remote, and now blended learning, has been incredibly challenging for students and educators alike but it has especially difficult for those with additional support needs. Many have co-occurring difficulties and rely heavily on a variety of support mechanisms in the classroom. So the key question is how do you maintain this level of support when the classroom the student and educator are in is no longer the same four walls? How do you create the inclusive classroom when the physical classroom is no longer there?
Thankfully, Microsoft’s Learning Tools are available to all educators and staff with M365 levelling the playing field and ensuring that every student can share their voice and become successful learners. The best aspect of all is that the tools are completely integrated into Microsoft tools such as Microsoft Teams, OneNote and Flipgrid. No extensions or additional cumbersome steps to install an add-in are required to access the tools. The tools are there by default and that is key for creating any inclusive classroom: accessibility by default.
When I am creating my classroom, inclusion is always the first aspect I consider. It is so important to ensure that we intentionally include otherwise we are always destined to unintentionally exclude. I am now going take you into the strategies I employ to develop the inclusive classroom and I have broken it down into four key areas: reading, writing, maths and communication.
Reading
Immersive Reader logo
Microsoft’s Immersive Reader has completely transformed my classroom and, I am not exaggerating when I say that it has been life-changing for many of the students I work with.
I had used various Text to Speech software applications in the past with limited success. They did the job but were clunky and often prone to crash. Worst of all they were just another thing to worry about. As soon as I pressed the Immersive Reader logo on OneNote for the first time I was hooked (I always feel like a little bit of sparkle dust should appear when I click). I couldn’t quite believe the options available to my students. Page colours could be instantaneously changed (no more need for coloured overlays; the students kept losing them anyway), line focus meant that my students could remove distractions and focus on one, three or five lines at time (no more reading rulers; again they just lost them). Picture dictionary available to show an image of a word to support comprehension, using Boardmaker symbols that I had used for years without the need to print out, cut out, laminate, lose them and repeat again and again.
Last time I checked, Immersive Reader can translate text into 63 different languages and that list continues to grow and grow. I have now introduced Immersive Reader to every student I work with for the past three years since I discovered it (and every colleague too).
With the transition to remote learning, many students are now getting bombarded with so much more text to read than ever before. Every assignment can be full of text instructions, PDF and Word attachments also full of text, links to websites again with screeds of text and so on. It’s not surprising that many students are not engaging with online activities.
By introducing Immersive Reader to all my students (and colleagues) in school prior to lockdown, I’ve also empowered them to develop the skills needed to access any form of text. Microsoft Teams is the hub we use to communicate and share and Immersive Reader is there in every line of text for anyone to access with just 2 clicks (click three dots and click Immersive Reader).
Immersive Reader is not just exclusive to Microsoft tools but can be found across a whole host of third party applications such as Wakelet, ThingLink and Buncee.
Going back to my earlier point about bombarding students with a whole host of materials, Wakelet is a fantastic app to consider using to mitigate this. All of your resources can be housed in one Wakelet collection, with a clear sequence for students to follow and can be shared in one single URL or QR code. Best of all, Immersive Reader is integrated and accessed at the click of a button (the Immersive Reader logo in this case).
If you have never seen it in action before, prepare to be blown away here:
What about if the text is on paper you ask? Fret not, because combining the magic of OneNote and Office Lens, you could be using the power Immersive Reader within 90 seconds. Don’t believe me, check it out below for yourself.
Also integrated into almost all Microsoft tools (apart from Microsoft Teams which I will come to in a minute) is Dictate. I have tried various computer dictation programs over the years but they required both a studio quality microphone and a heck of amount of patience to train it to actually recognise a coherent sentence. Dictate is already there, integrated into OneNote and works on any Windows, Mac or Chromebook device, and it is incredibly accurate . It can even understand my Glaswegian accent! The only downside is that Microsoft Teams does not have Dictate built in (seems strange to me that the instant messaging app does not have the ability to instantly message). You can get around it by taking advantage of the device’s in-built dictation tool (Window Key + H for Windows devices if you are wondering).
Students can now access support for reading and writing at any time, in any place, with any device and, more importantly, without asking. This has now become even more important because of Covid-19, as in many cases, there is often no one there to ask. By introducing and training students to make the most of these integrated tools, we have inadvertently equipped for a situation that we could never have predicted.
Maths
Many students have real anxiety about undertaking maths work and I can’t say I blame them – maths was never my strong point. Even drawing a straight line with a ruler I can find challenging. The digital inking tools in OneNote are a complete gamechanger in this regard. You can use the digital ruler to get a perfect straight line (even tells you the exact angle!). The page can turned into a maths jotter by the square grid option and the individual squares can be made as large as like. For someone like me with writing difficulties such as dysgraphia, this makes such difference (when I was at school, I could never fit the numbers in the boxes in the maths notebooks the teachers gave me!)
Even if you can’t access the digital inking tools, OneNote can solve typed equations for you, break down the steps and you can also create Forms quizzes of the back of one equation for your students to practice with. The questions have, of course, Immersive Reader ready to leap into action.
Establishing and maintaining communication can be the most challenging aspect of creating a remote inclusive classroom. A number of local authorities have initially prevented live teaching to take place and even fort those that have allowed it, educators are prevented from seeing their students in Microsoft Teams as the camera is disabled for them. That’s before you consider the fact that many students will not have the opportunity to connect live for a whole host of reasons. For this reason, and a whole host of other reasons, I have turned to the video discussion tool, Flipgrid for asynchronous communication.
Flipgrid is an incredible app that I love for two simple reasons:
It is inclusive and accessible to all!
You can use it for absolutely anything – “If you can think it, you can Flipgrid it!”
I will use a whole other blog to share with you with how Flipgrid is the perfect tool to amplify voice asynchronously in the remote classroom. Let’s just say, that Flipgrid allows both educators and students to share their voice in the way most suitable to them. Both teachers and pupils can use the camera to share their video asynchronously by recording short videos (up to 10 minutes) but if they (or you for that matter) don’t want to appear in the camera, they don’t have to. They can use videos of objects, photos, sketches on the whiteboard/blackboard canvas, emojis over their face, text…the list could go on and on.
I have been specifically using Flipgrid in two ways during lockdown: to create short videos to explain the instructions in the assignment and creating short videos to share spelling rules and show how to decode words and blend sounds. This they can’t get from a PDF worksheet!
Anytime I want to record a video for my students (whether it is a Face to camera video or a screen recording), I immediately jump onto Flipgrid. Accessibility is definitely everywhere in Flipgrid, not only is Immersive Reader integrated for use with any piece of text, Flipgrid will automatically generate captions which you can also edit (so important when you are sharing videos and you have a thick Scottish accent like myself!).
Screenshot of Edit Captions feature in Flipgrid
Developing communication skills during remote learning does not just mean having face to face interaction with their teacher but the opportunity to connect with their peers as well. Microsoft Teams provides the perfect platform for this. I have specifically created a team for my Tutor group for this purpose, the opportunity for students to chat and connect with their friends in a safe space. I even throw in a fun Kahoot Quiz every Friday and there is great chat on the team before and after (even the classroom assistants get involved). It can get quite competitive!
Building self-esteem in all students is important but especially those with additional support needs such as Autism Spectrum Condition. Finding ways to do this during such difficult times can be tricky but one thing I have found that the students have responded to is the use of Praise stickers in Microsoft Teams. When students have completed work to a high standard, I always ensure I pick out a praise sticker, whether it be the awesome one or the achiever one or the courage one, and share it with my students. I’ve had some lovely messages from parents who have been so appreciative of me doing this.
Praise sticker in Microsoft Teams
I would just like to end by saying that this does not mean every one of my students have engaged with remote learning and achieving their full potential. Several have not shown any sign of accessing the materials at all. I have just had to accept that there are many factors that are out with my control e.g. access to devices, connectivity, support from home, motivation etc. What I have tried to ensure is that I fully consider everything that is within my control to ensure that my materials and lessons are inclusive and accessible to all. After all, if we don’t strive to intentionally include we are always destined to unintentionally exclude!
About Me
I am an Additional Support Needs teacher at Lanark Grammar School. I am also an MIE Expert, Master Trainer and MCE (Microsoft Certified Educator). I am also a Flipgrid Student Voice Ambassador and Grid Guide and a Wakelet Ambassador. I was awarded MIE Expert of the Year for Scotland 2019-20 and I also won a global competition ran by Flipgrid to attend E2 Education Exchange in Sydney, Australia.
About Me My name is Sarah Wyllie and I am a Business Education Teacher at Marr College in South Ayrshire. I have been a Microsoft Innovative Educator Expert (MIEE) for 1 year and managed to gain my MIE Trainer badge during lockdown. I have really enjoyed being a member of Team MIEE Scotland – I am so thankful for their support and encouragement throughout the year. Alongside my colleague, Alan Simpson, we have been working to develop the digital skills of staff and students at Marr College. We set up ‘Digital Drop Ins’, which have continued online, and also a team of enthusiastic Student Digital Champions.
Looking back on my experience during lockdown I can only describe it as a complete rollercoaster. The highs of students and staff overcoming obstacles, pulling together in difficult circumstances, and growing in confidence in using digital tools. Seeing some students really embrace the change and adapt to their ‘new normal’ was inspiring. The lows were just never feeling quite good enough, not having enough hours in the day (or night) to get things done and worrying about engagement and accessibility. I have learned a lot along the way…
1 – Making Resources Easy to Access
Having a platform that acts as a one-stop-shop for students has been invaluable. We use Microsoft Teams to post announcements, answer questions, share resources, have live meetings with the class, set assignments and provide feedback. Students can access everything on Teams using their Glow login. As a Business Education teacher, I have been using Teams for a few years now but over the last couple of months I have learned so much more about how to make the most of Teams.
2 – Students Like to See and Hear You
Feedback from students was that they missed being able to hear and see their teacher – just as we missed being able to hear and see them. There were several ways we tried to combat this:
Meetings – we held weekly live meetings with our classes using Microsoft Teams. We used this to signpost learning for that week, answer any questions from students and check in on pupils. Feedback from students was that they really valued this. It also gave them the opportunity to connect with one another. At the end of each meeting we would play a live quiz using Quizizz – students loved this part of the meeting! The winner each week was posted on Twitter and in the praise channel.
PowerPoint Recorder – being able to record my screen and share this as a video has been incredibly helpful. For example, Administration & IT students learn how to use different types of software and so screen recorder has helped us record demonstrations to share via Teams, students can pause the demo video and watch it as many times as they like. Record slideshow also allowed me to narrate my presentations, annotate on the slides, have my face visible in the recording and export this as a video to share with students.
Audio and Video Feedback – using OneNote allowed me to provide students with different types of feedback, including audio and video feedback. Students could then replay this when needed.
Help Videos – both staff and students needed support in learning how to use these digital tools. Using screen recorder to make help videos seemed like the best option but sharing these videos in an accessible way took a few attempts! I used a variety of different techniques including: Wakelet, Flipgrid, YouTube, Twitter, Satchel One (Show My Homework) and embedding videos on the school website. You can view our Teams Help Video Playlist below.
3 – Accessibility is Key
What can I say about the wonderful array of free Learning Tools available in most Microsoft software? A few of my favourites are Immersive Reader, Dictate and live captions on PowerPoint.
If you have not investigated Immersive Reader then you should take a look today, you will be amazed. To find out more view the video below and visit Chris Gerrard’s helpful blog all about the many different accessibility tools on offer. As a school we are also very fortunate to have access to Read and Write software which we were also able to make available to students from home.
4 – OneNote
I have been using OneNote for a couple of years now – and love the range of features it offers. It acts as an electronic jotter or ring binder for students, keeping all their notes and tasks in one place. When classes initially stopped during lockdown, I was so thankful for OneNote because I will still able to access all my student’s work from home. Students can type directly onto the page, can upload files and can print directly to a OneNote page.
As a Business Education teacher, the ability to print directly to a OneNote page has been incredibly useful for Administration & IT as students need to be able to print their work, in a particular way, to gain marks. Even in the classroom this has dramatically cut down on the amount of paper and ink used in the department while still ensuring students develop printing skills.
Other useful features include: digital inking, dictate, immersive reader, embedding other resources, clipping tool and audio and video feedback. You can also add digital stickers – I even attempted to make my own stickers to highlight common mistakes made by students.
Staff OneNote Help Video Playlist
5 – Keeping it Fun and Staying Connected
Though we could not all be together as a class – it was important to try and feel connected. As a department we tried to do this in different ways. We had weekly meetings with S3-S6 classes, shared fun Friday quizzes using Quizizz or Kahoot and we used our ‘ice breakers’ channel to learn more about each other, for example playing 2 truths and a lie.
We also used Thinglink to create a ‘virtual classroom’ to share with students. We added this as a new tab in Teams and embedded them into our class notebooks. Our S3 Administration class even used their PowerPoint skills to create their own ‘virtual’ workspace! To view one of my Thinglinks click on the image below.
Transitions were also very different this year. We were keen to welcome our new S1 students to the department. I used Joomag to put together a welcome booklet for them – with a gallery of images and staff videos.
In school I run a newsletter group aiming to celebrate successes at Marr College. During lockdown this was a way to share positive news with parents, students, and staff, maintain a feeling of community spirit and allow students to share what they had been learning. I used Microsoft Forms to collate student stories and included the option for them to upload pictures of their activities if they wanted to. This was also a way to check in with students. I really enjoyed seeing our students’ responses – it always gave me a boost. You can view some of our school newsletters by clicking on the image below.Our students, parents and staff at Marr College have made amazing progress in developing their digital skills. I have received lovely messages of support from staff and parents and I am excited to see where we go next! To view any of our resources please see the links below.
Hi I am Mandy Davidson Acting Principal Teacher Curriculum Support (Wider Achievement) RME/RMPS/Care at Lenzie Academy.
I came to be a Microsoft Expert because it was the easiest way to find out how the limited technology I had could be put to the best use. Nobody around seemed to know the answers to my questions or to even know a person who might. Discovering the Microsoft Educator Centre and meeting individuals like Malcolm Wilson (@claganach) and Sarah Clark (sfm36) and Ian Stuart (IanStuart66) helped me see what could be done if I kept trying. My first sway for the MIEE application focussed more on what I hoped to do than what I had already achieved. I was amazed when I was given the place on the roll of honour! The more I’ve talked about my role as an MIEE, the more I have realised that there is a barrier between many of my peers engaging with this massive CPD opportunity and ironically it is not ” time” that none of us have had prior to lockdown. The barrier is recognised by many departments in my school and no doubt schools around the country, who display posters detailing the different approach between having a fixed mindset and having a growth mindset. Yet the very teachers who encourage their pupils to” prepare to fail ” as a learning opportunity, to accept they are always learning and quote the line “it is not I can’t but I can’t yet”, will shake their heads when I suggest that they too can become a Microsoft Expert. I always say I use a computer like a drive a car; I can do the basics and familiarity makes it easier, but I’m no mechanic!
The more experienced we become as a teacher, the more comfortable we become with our areas of expertise and the more concerned we are about what we don’t know. In some subjects where the content changes little over the years, the comfort and the fear may be even more of a contrast . The perception that the students around us need to know that we are the experts, in order to accept our delivery of lessons, fuels the fear that we cannot experiment with new platforms in case it all goes wrong. Looking at the fixed mindset image above ask your self honestly how many of the fixed mindset phrases have you used when discussing using technology to teach?
how the different mindsets work.
Lockdown has forced many teachers to turn to technology in order to continue to provide education remotely. The opportunities created by using Teams, Forms, Sway and PowerPoint with narration have been publicised and many teachers are now engaging with them. Countless organisations are offering advice, how to videos and it can all be overwhelming for someone with a fixed mindset who has hitherto been very comfortable with their individual face to face approach to teaching.
So my advice as a Microsoft Innovator Education Expert is quite simple. Use the MEC tile that already exists in Glow. If you cannot find it on your launchpad then add it from your apps library. Then explore and develop your own growth mindset! Start from an area with which you are familiar, it could be Teams or other Office 365 tools and watch the videos and complete the quizzes.
The bridge to all new ICT learning
They really are not scary and although you have to gain 80% to pass, there are resit opportunities so what do you have to lose!
Once you pass some quizzes you will gain badges in your personal profile.
Each badge is worth a number of points and all can be used as part of your CPD evidence for GTCs
Microsoft badges
Some badges also come with certificates whilst others are part of learning paths and the certificate is awarded at the end of a significant amount of work. Each certificate details the time spent on acquiring them.
Engaging pupils Collecting badges can become addictive once you realise that, just spending a little bit of time working through the video tutorials, can save you hours of time in creating and distributing quality learning opportunities. Before you know it you will have acquired 1000 points and you become recognised as a Microsoft Innovative Educator and you join a fast paced growth mindset community from where your learning will really take off!
Microsoft Innovator Educator
The MIE Community In Scotland exists in the virtual world so even if there is nobody at your school that has any expertise in using Microsoft tools, you can gain support at the click of a mouse, from teachers just like you, who have learned the short cuts and possibilities available through Glow and are willing to share. Twitter is the platform outside of glow where you can gain insight into how you can stretch your understanding, as most of us have twitter accounts and there are regular tweetmeets for #MicrosoftEduChat#TeamMIEEScotland and #MSFtCelt ( team Scotland together with the Welsh team). What makes us experts is not that we know the answers but we are not afraid to ask the questions – how do you do that? Is that on glow too? Can I have a copy?
So as an experienced RME teacher what are my favourite tools for teaching and learning? Microsoft Teams is key as you can literally teach an entire course through a class team. I facilitate a Religion Beliefs and Values remote learning Team, as with the minimal support required for the Level 5 award the pupils who have opted into this team just work their way through their investigation and reflection. The fact pupils can literally complete all work on their phone helps to engage many of them more than a jotter and a text book. Forms to gain pupil voice or quizzes for formative learning are quick and effective and last of all my love of Sway with the ability to include so much information in an accessible format where readers can focus on what they need to learn. With these tools I have increased my engagement with pupils that I only used to physically see once a week and for whom the instant and personalised feedback encouraged greater participation and deeper reflection. Now I am shielding physically away from my closed classroom, this interaction has continued and the record of all interactions are now documented in the new Insights tab.
As the PT of Wider Achievement I can facilitate a number of Youth Achievement Awards via Teams and together with our school Youth worker Caroline Shirreffs we are currently supporting senior pupils creating their Personal Development plans for their Platinum Award. Being able to have online meetings has actually given us more time than we would have managed to gain in school as these pupils have such busy lives! My YPi teams who collaborate via Teams chat and create group presentations show the scope is as limited as the learner’s imagination.
You may have thought you did not have time to learn about all these tools but the time it saves makes up for the investment. You just need to be a bit braver and click on the MEC tile. A whole new world of opportunities await!
Hi, I am Shelley a Business Education Teacher in the Scottish Borders. This is my first year as an MIEExpert and a Microsoft Trainer and I am very passionate about digital technologies. Due to the nature of my subject in School I am fairly comfortable with using Microsoft software and I have
been using Microsoft Teams for about 3 years now, so the transition to remote learning for myself has been quite seamless.
My Local Authority has introduced 1:1 iPads in Secondary Level, you can follow the progress of this @inspireSBC
What am I using in my Virtual Classroom
Microsoft Teams
Class Notebook/One Note
Thinglink
PowerPoint (creating video content)
Microsoft Forms
Satchel One (Show My Homework)
Post it App
Kahoot
Loom
Microsoft Teams
This is used as a tool to communicate with learners and give praise. I have several channels:
General
Question & Answer
Whole Class Feedback
Exit Tickets
The General Channel is for Owner only posting, this makes it clearer for learners to access information without it getting lost in a long thread. This means that announcements are clear. I LOVE announcements you have the ability to personalise your header and make information stand out.
Any queries/questions are put in the Q&A channel. I also use this channel to give out praise to students to help build realtionships.
The Exit Channel is used for learners to post their POST IT note exit tickets directly to this channel from their app.
I also have a weekly Assignment Task for each class which will either be Summative (points attached to task) or Formative (rubric attached to task).
The benefit of the weekly assignment is that all information is automatically stored into a digital grade book which can then if need be exported to excel. You also have the INSIGHTS tab which allows you to analyse your data.
Class Notebook
I have set notebooks up with the Microsoft Teams Apps for each of my classes and created Sections for them so that they can keep a Digital Jotter of their work and I can monitor their progress and give feedback.
Benefits of the class notebook are immense from easily distributing pages, reviewing student work and leaving feedback. I love the versatility of being able to embed Audio, Video and Microsoft Forms directly into the one page making accessing resources easier for learners. I also love that learners can reply verbally to feedback or use the audio tool as an exit ticket. This then allows you to stay connected (its lovely to hear their voices!) but also identify any misconceptions that may need to picked up on the following week.
ThingLink
I am using this as an interactive classroom. Each of the tags can be clicked and will give learners either video, text or tasks. It allows me to also add audio to any of the content. This blog does not support the interactivity/embed in the graphic but you can click HERE to go to the online version of this example.
You’ve no doubt seen lots of teachers sharing their interactive virtual classroom images – a visually-friendly way to connect with your learners via an online platform where they can click on elements in the picture to view details of learning activities, or view videos, or read books chosen for the class, or click on a link to online resources to support their learning.
You can set up an interactive virtual classroom image in several online platforms and using a variety of digital tools. This blogpost is specifically looking at how to do so if your school uses Microsoft Teams.
What you need to set this up in Microsoft Teams
You will need the following to set up your interactive virtual classroom image:
PowerPoint in which the interactive virtual classroom image will be built
Images which you are free to use (this post will show where to access these) to create the background and items in the classroom.
Your Bitmoji character (though if you don’t want t use a cartoon-style Bitmoji character you can alternatively use the inbuilt stock character images in PowerPoint online, or a cartoon-style image you have created with another digital tool).
The links to the resources you will be adding as interactive links to the image (whether that’s videos or online resources, whether somewhere in the class files in Microsoft Teams or shared somewhere external to the class Team).
Microsoft Teams for your class – where you will share the pdf with clickable links (you can also choose to use PowerPoint online from your OneDrive if you prefer to share it as a PowerPoint show).
How to set up you virtual classroom image in PowerPoint
View this super detailed step-by-step video by Brian White showing how to create the virtual classroom slide in PowerPoint online – this includes how to use the Bitmoji plugin in the Chrome browser, how to search within PowerPoint online for transparent backgrounds, how to add items for the class scene, how to add a video from YouTube as an embedded video, and how to create the link from a shared PowerPoint link which makes it a play-only view for pupils to interact with it – by adding &=&action=embedview to the end of the weblink from your shared PowerPoint link.
Interactive elements will be the links you attach to the individual items so when clicked on by your learners they will automatically be taken to what you have added. This might include websites, online resources, YouTube videos, or login to platforms your class uses.
There are different ways you can remove the background from any image so that when you place it on your background image it does not show anything from the background of the image you wish to place on the classroom background.
Using PowerPoint to remove background from an image
How to share your Interactive Virtual Classroom in Microsoft Teams
You can choose whether to share your interactive virtual classroom as a simple image (which will have no interactivity) or PDF (which will retain any interactive links you added) or PowerPoint
To create an image from PowerPoint click on File > Save as > choose location on your device > from dropdown “Save as type” choose “PNG Portable Network Graphics” format
To create a PDF from PowerPoint click on File > Save as > choose location on your device > click on “Options” and specify single slide you wish to use
When uploading to Microsoft Teams you can choose to share in the Posts/Conversations by clicking on the paperclip attachments icon – you will then be asked where you wish to share the uploaded item so choose to save in the “Class Materials” folder as this is read-only for your learners.
You can alternatively choose to upload the PowerPoint into your OneDrive and when choosing the share link ensure the permissions are set to “anyone with the link” (and ensure edit rights are disabled). To ensure the PowerPoint link opens as a play-only view for your learners to interact with it you can add &=&action=embedview to the end of the weblink from your shared PowerPoint link from OneDrive before you share it in the Microsoft Teams Posts/Conversations (this method also permits sharing outwith Microsoft Teams, such as on website or social media).
— Castlemilk High Technologies Faculty (@CHS_TechFac) May 29, 2020
Feeling inspired by fellow teacher chum @MckRoxi and made my own virtual classroom in PowerPoint. Of course my slides are pink pic.twitter.com/SqMU1YgiWR
You can also upload the image from your PowerPoint slide to ThingLink to add hotspots which, when clicked by your learners, give you the option to add the links as popout windows so that the learners don’t leave your virtual classroom space. ThingLink also gives the option to have text read aloud using Immersive Reader, and also to let you add audio recordings of your voice if you choose.
Creating Visual Learning Materials with ThingLink – a free online course on the Microsoft Educator Centre guiding you through learning how to use ThingLink to bring images, video and 360-degree virtual tours to life with added popup links, voice and text notes, and more. ThingLink creations can be shared via Microsoft Teams anywhere a link can be added.
I’m a primary school teacher, passionate about digital learning but by no means an expert.
This is where I am in our class learning journey with Microsoft Teams after 8/9 weeks of lockdown.
I am now using Thinglink as an interactive classroom, below is an image of my example to show my interactive classroom, the blog does not support embedding so you will need to click on the image or link to be able to click on the hotspots in the Thinglink.
So I thought I’d tell you a little bit about the journey, where I started, what I did and why and where I am now.
Yes, I have been teaching Digital Literacy skills to every class I’ve ever taught from the first week, including this years primary 1b (brilliant). The trickiest thing I found for the wee ones is keyboard skills, learning phonics is tricky but ‘find the ‘a’ on the keyboard’ was just another way of identifying and learning the sound, playing with keyboards, typewriters, another choice.
Before lockdown all of the p1b boys and girls could login to a desktop, click on a shortcut and login to a website with little or no help using their own unique login.
The week of lockdown I showed them Glow and Teams, they logged in and logged out.
Microsoft Teams is where I communicate with my class
In the beginning
A typical day started with a post from me saying good morning and
asking the class to reply to the message answering a question, e.g. best part of your weekend.
Suggesting activities/tasks, e.g. Sumdog, Reading Eggs.
After 8 / 9 weeks in we had progressed to:
A typical day starts with an Announcement with a pretty image to catch the eye and mark a new day. The morning message can include lots of different things and reflects the morning meeting message we did in class at school:
Tasks
Challenges
Activity ideas
Pictures
What’s in store for the day
An MS Forms poll about something, e.g. vote on a story, when to meet
ThingLink – super visual, interactive, easy to use
What kind of assignments?
Why do I use assignments?
I can create a lesson and schedule it for a date in the future
The assignment appears as a post in the general chat and provides a link for the pupils to click on – easy peasy
I can assign to the whole class, a group or an individual – great for differentiation
The pupils can attach work – photos, etc to their assignment and hand it in
The pupils work is saved in Sharepoint – in individual folders by assignment – all done for me – no extra work, no clogging up the files section in Teams – super organise, easy peasy, woohoo!
Feedback is private between me and individual pupil
The Grades tab tracks assignments completed so I can see what’s happening
 Hugh Wallace
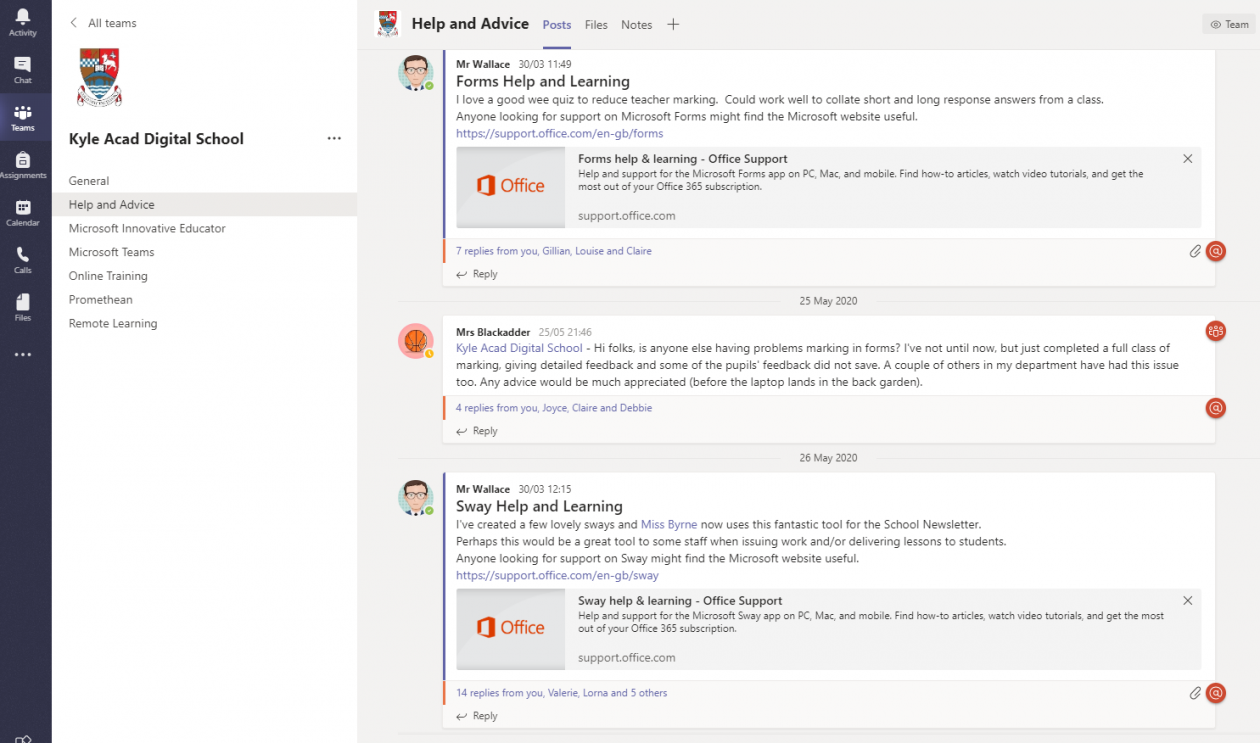
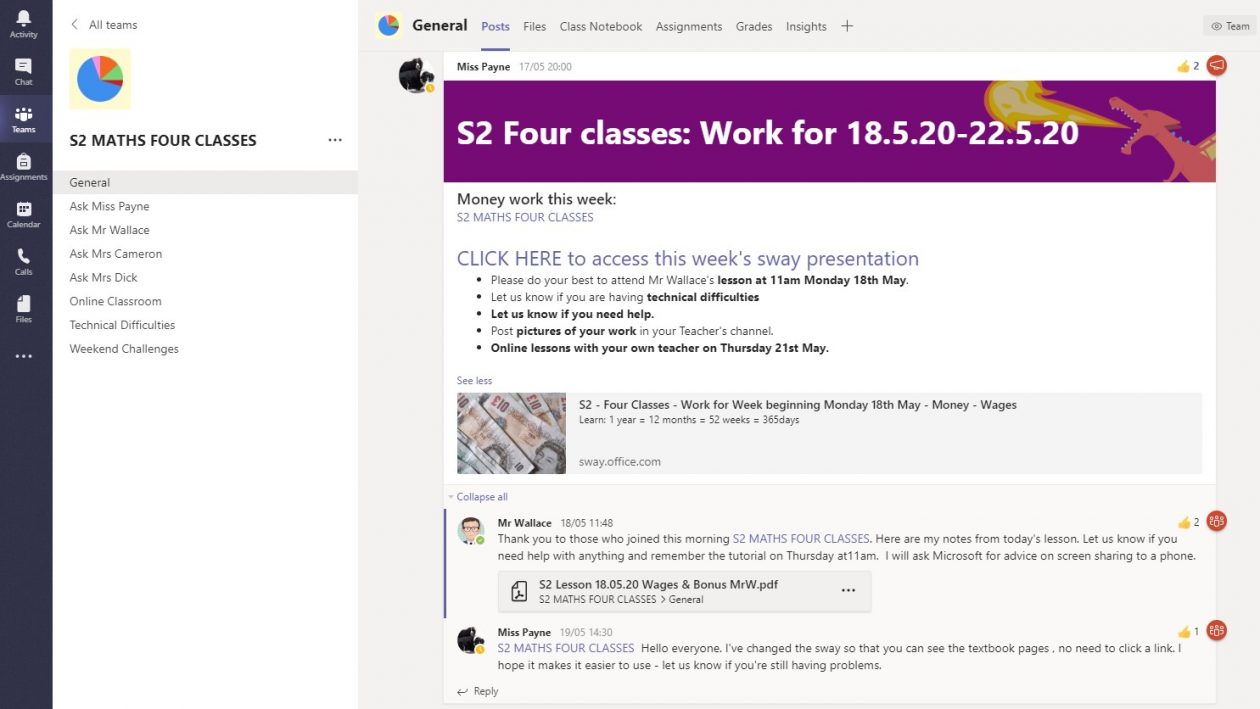
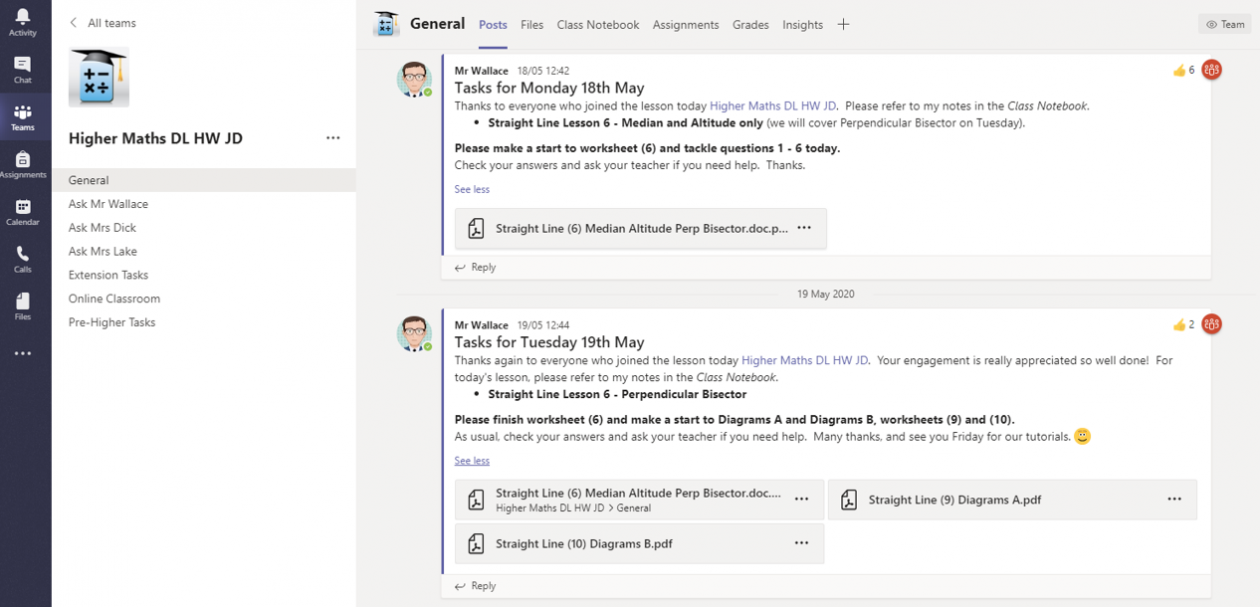
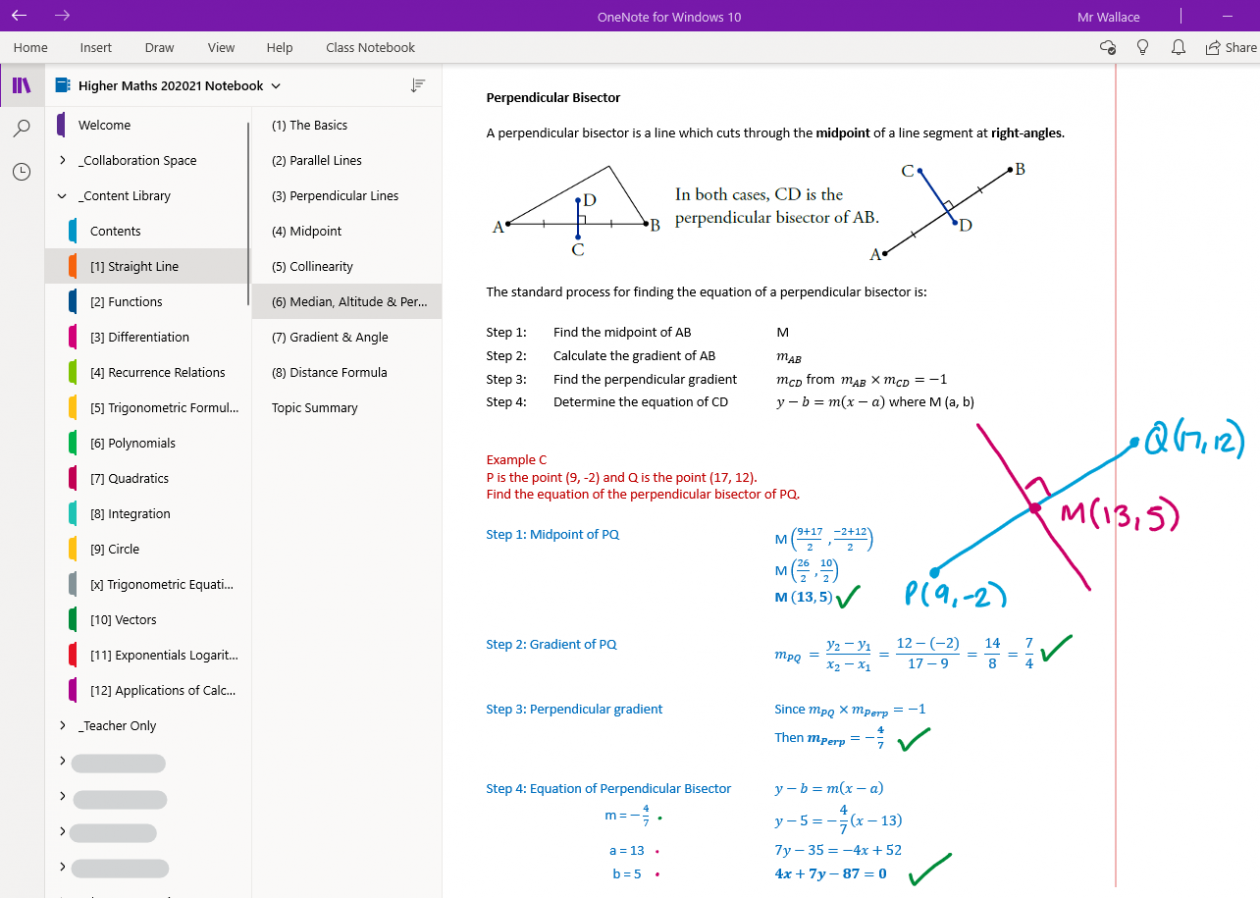
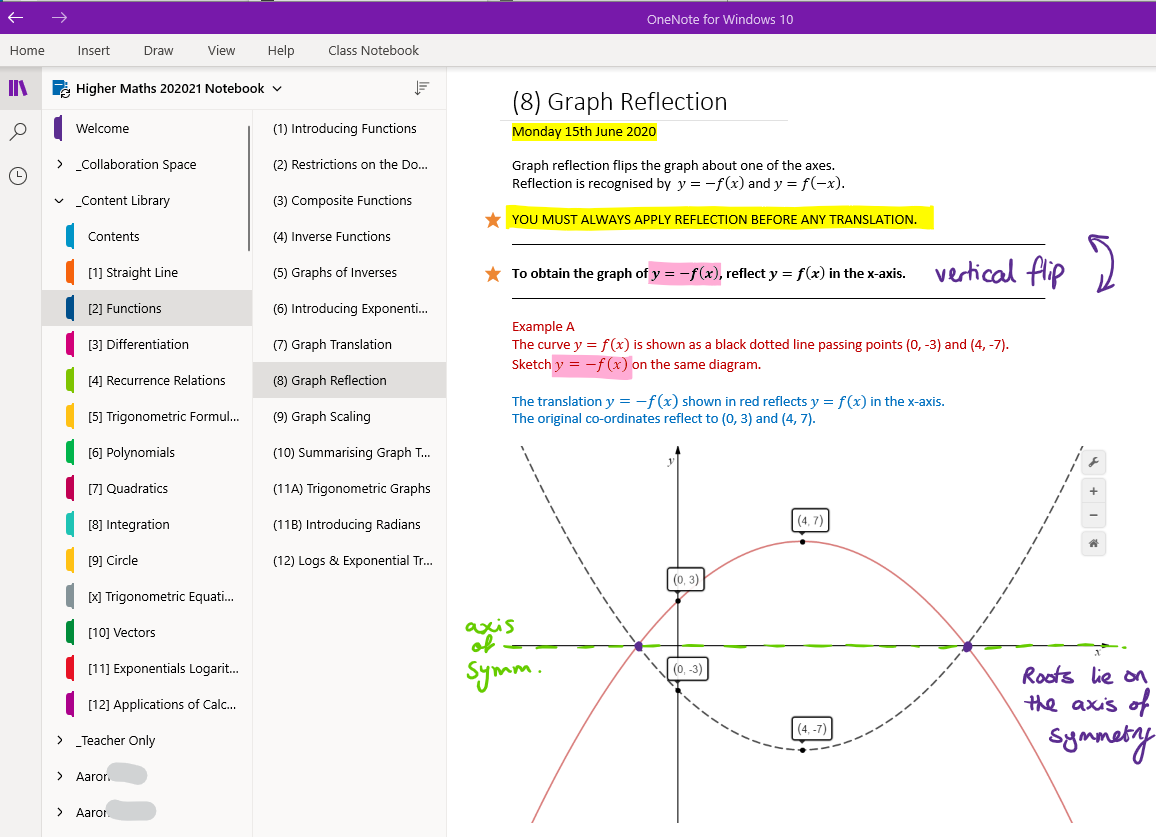
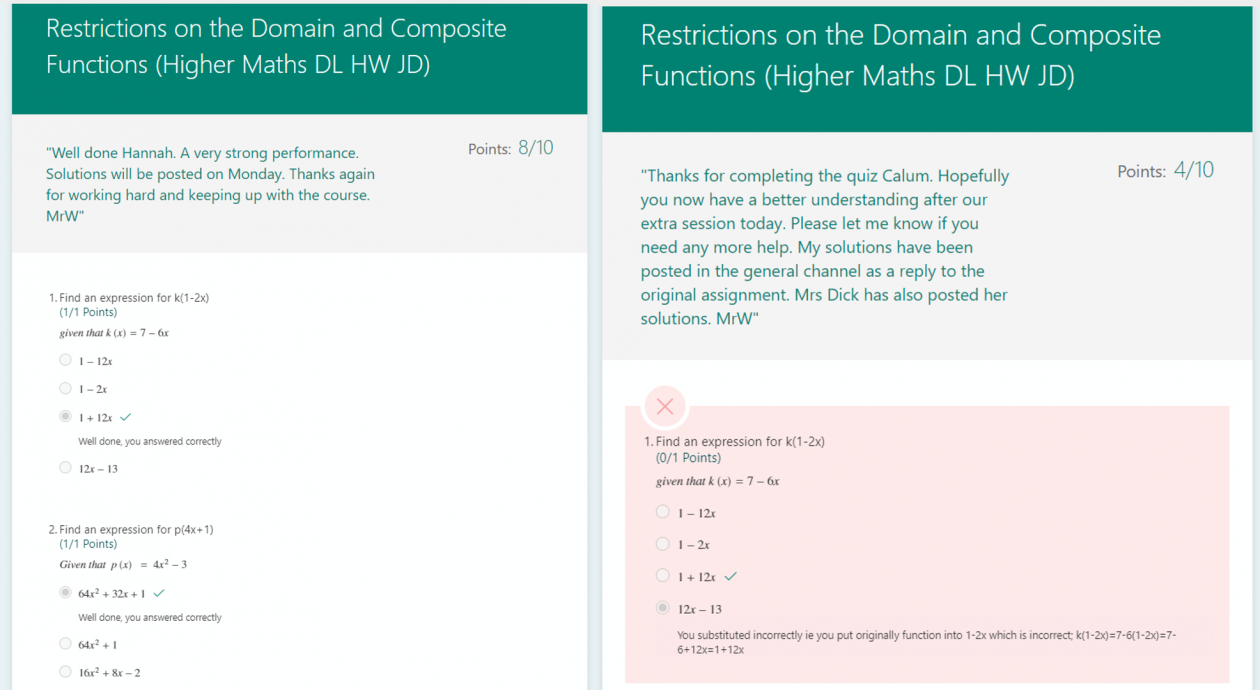
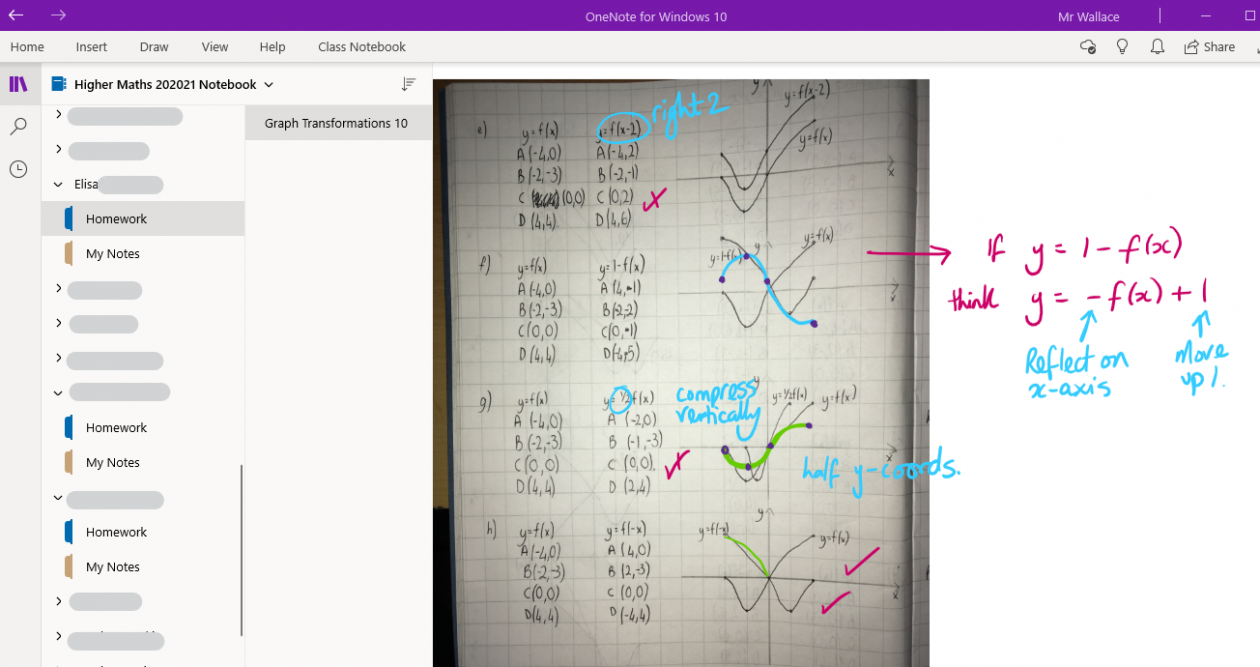
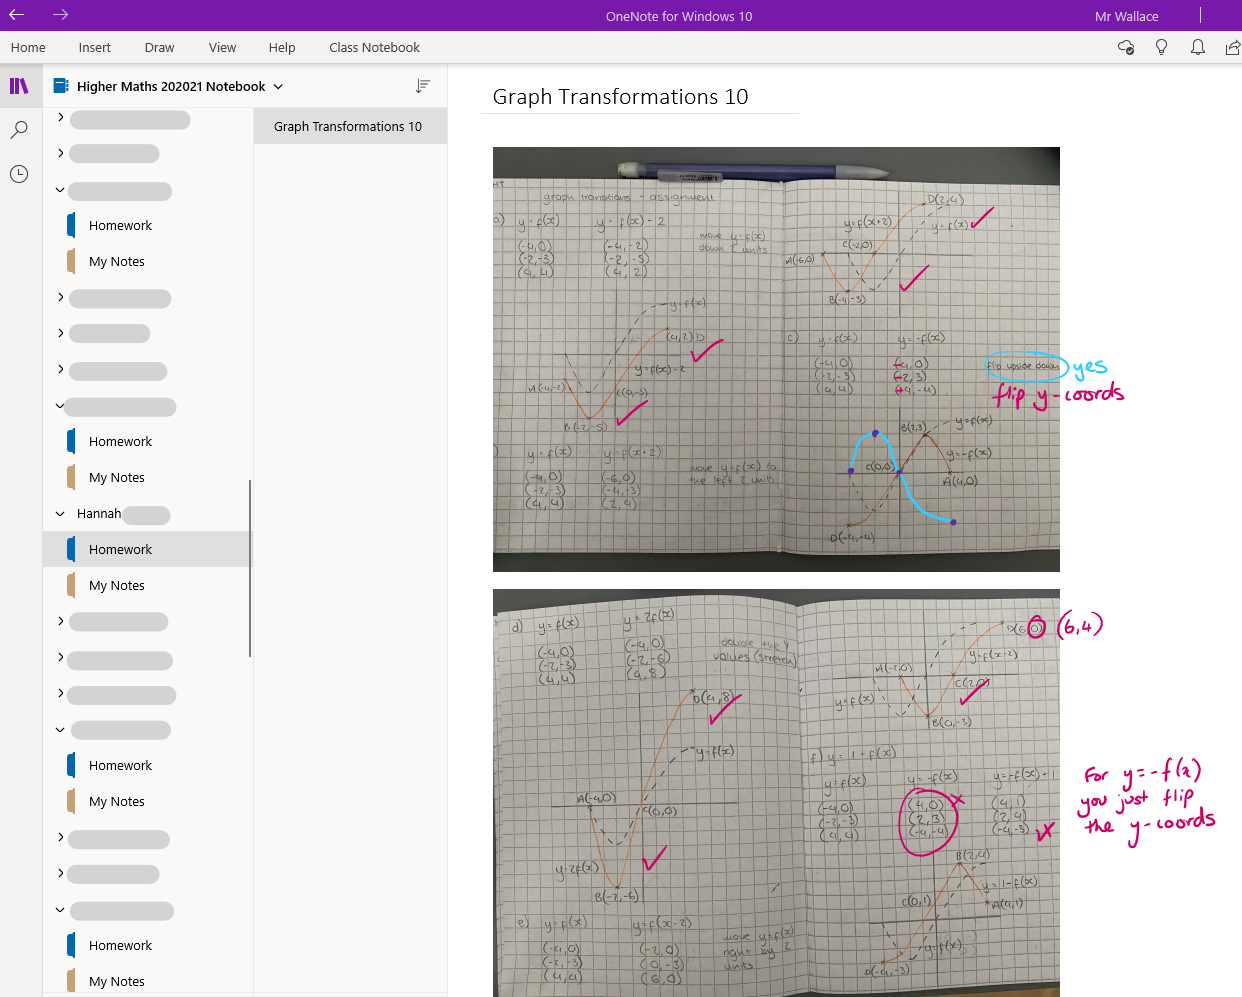


 Text (and where pupils can use Immersive Reader in the browser to read it aloud (pupils just click on the 3 dots to the right of the message and choose “Immersive Reader”);
 Add a link to a web resource you wish the pupils to use;
 Share a picture of a visual diagram of the tasks (as you might do in your classroom) – just click on the paperclip icon to upload a picture;
 You might create a short video with your voice (so it’s familiar to your pupils) and the camera pointing at a piece of paper on which you are writing, or a book, picture or object such as classroom toy.
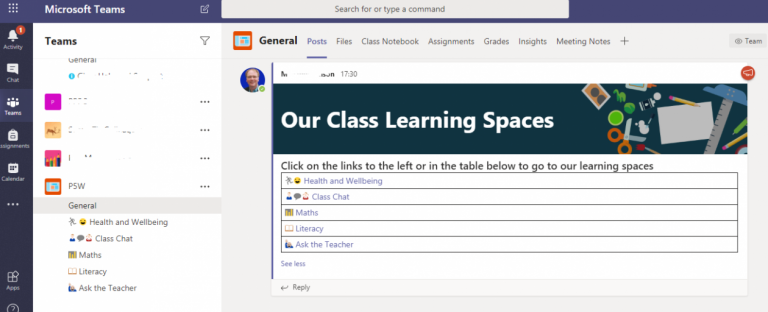
 When you first create a Team for your class you will automatically get a channel called the general channel. By default everyone in your class will be able to post there. And at the beginning that might be okay as everyone starts to use it.
 The Library – a place to talk about books being read at home and share any related learning they do.
 The Gym Hall – a place to share any physical activity they do, including home fitness or games.
 Ask the Teacher – a place to ask non-learning related questions, possibly things that are worrying them and they need a bit of reassurance.
 #NoFilter – a place to share photos of how they are spending their days so their classmates can view
 Taskmaster – inspired by the
  Literacy and Maths Tool Boxes – a place to share support resources for tasks set – websites, videos, documents
 The Playground – a place where the class can chat about anything they like, just as they would in their school playground. The teacher can keep track of everything pupils type (and they are told this)”
 Use channels for specific activities

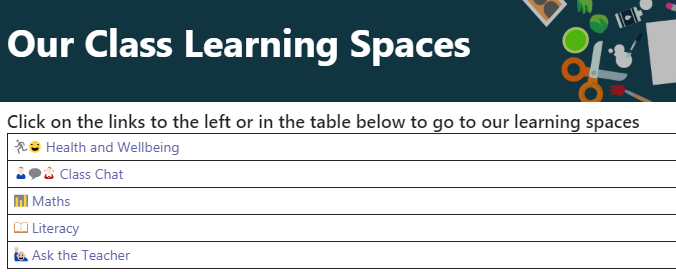 Once you have your channels set up you can
 . Thank you
 (@MrSteensonBusEd)

 Reassurance from their teachers+lesson links
  Exercise important message for healthy minds
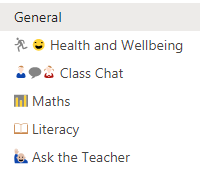 Whether it’s naming your channels in your class in Microsoft Teams, or when sharing information or activities in posts/conversations/announcements in your class in Microsoft Teams, or in names of sections and pages in your OneNote Class Notebook attached to your Microsoft Teams class then the addition of the visual cue of an appropriate emoji makes the text easier to identify in a list and also makes it more classroom friendly.
 Facility to mute activity in posts at weekends or holidays
 Share your class expectations

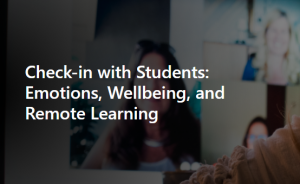
 Building engagement
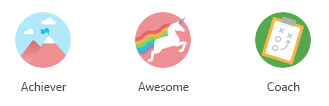
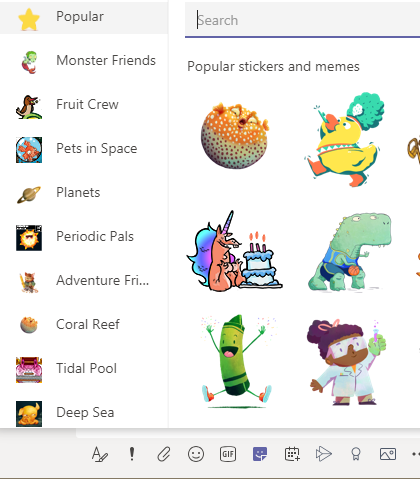


 Accessibility and Inclusion
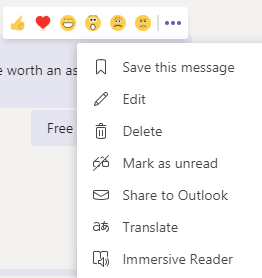

 Want to present to your class?
 Collaborative documents


 OneNote Class Notebook is built into Microsoft Teams. OneNote Class Notebook is like a digital ring-binder with cardboard colour dividers, and within each section you can have as many pages as you like. Each page is a freeform page which can be any size you wish, and become like your classroom whiteboard, where you can add a very wide range of content (including images, audio, video, documents, presentations, embedded Sway presentations, embedded Forms, and you can freehand draw or write just as you would on your classroom whiteboard. It all saves automatically and is accessible on any device so you can move from working on your smartphone on the OneNote app to working in the browser on a laptop (and other devices).
 Microsoft Forms for assessment or surveys
 (@andrewkbailey13)
  I am Rosslyn Lee and I am the Digital Skills Coordinator for North Ayrshire Education. Part of my job is to support staff and pupils in our schools with all aspects of digital learning and teaching. I became a Microsoft Innovative Educator Expert in 2017 as I recognised the value to my professional learning as well as my training role. Completing courses on the MEC is a great way of keeping up to date with O365 developments as well as providing me with opportunities for professional learning, not available elsewhere.
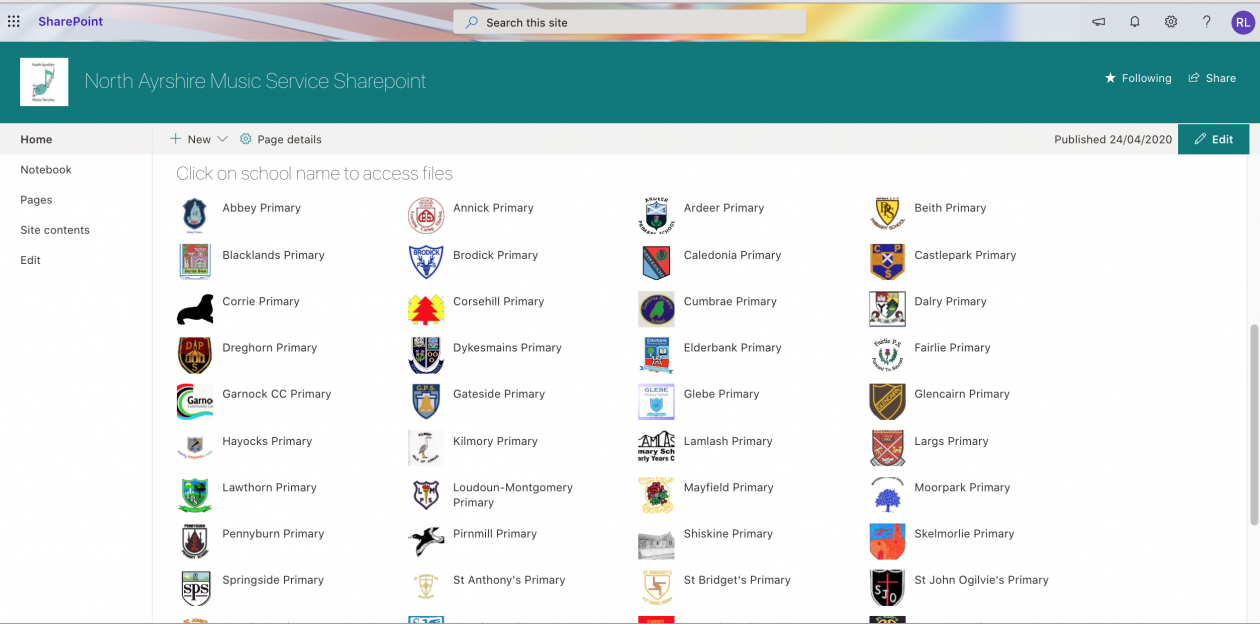

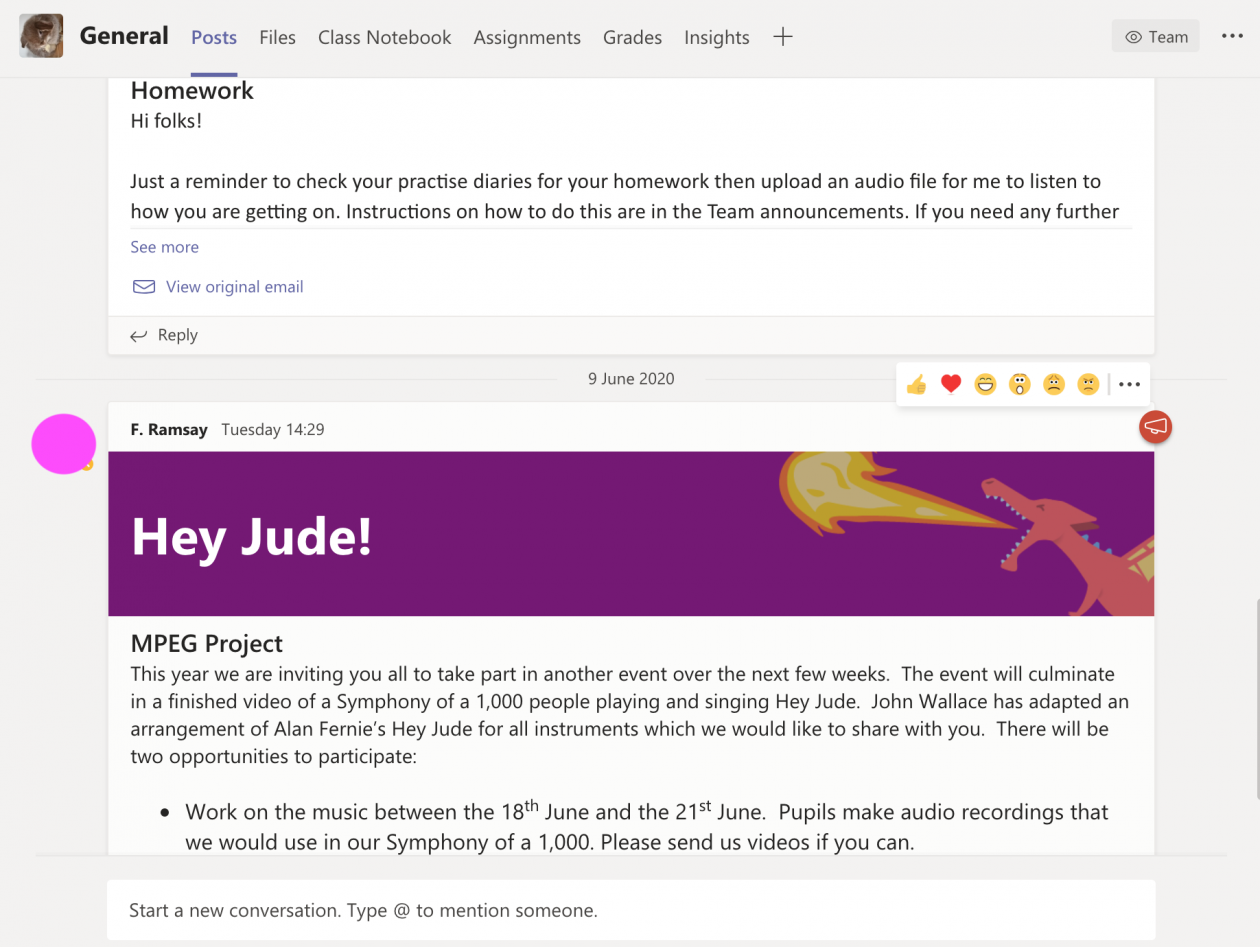
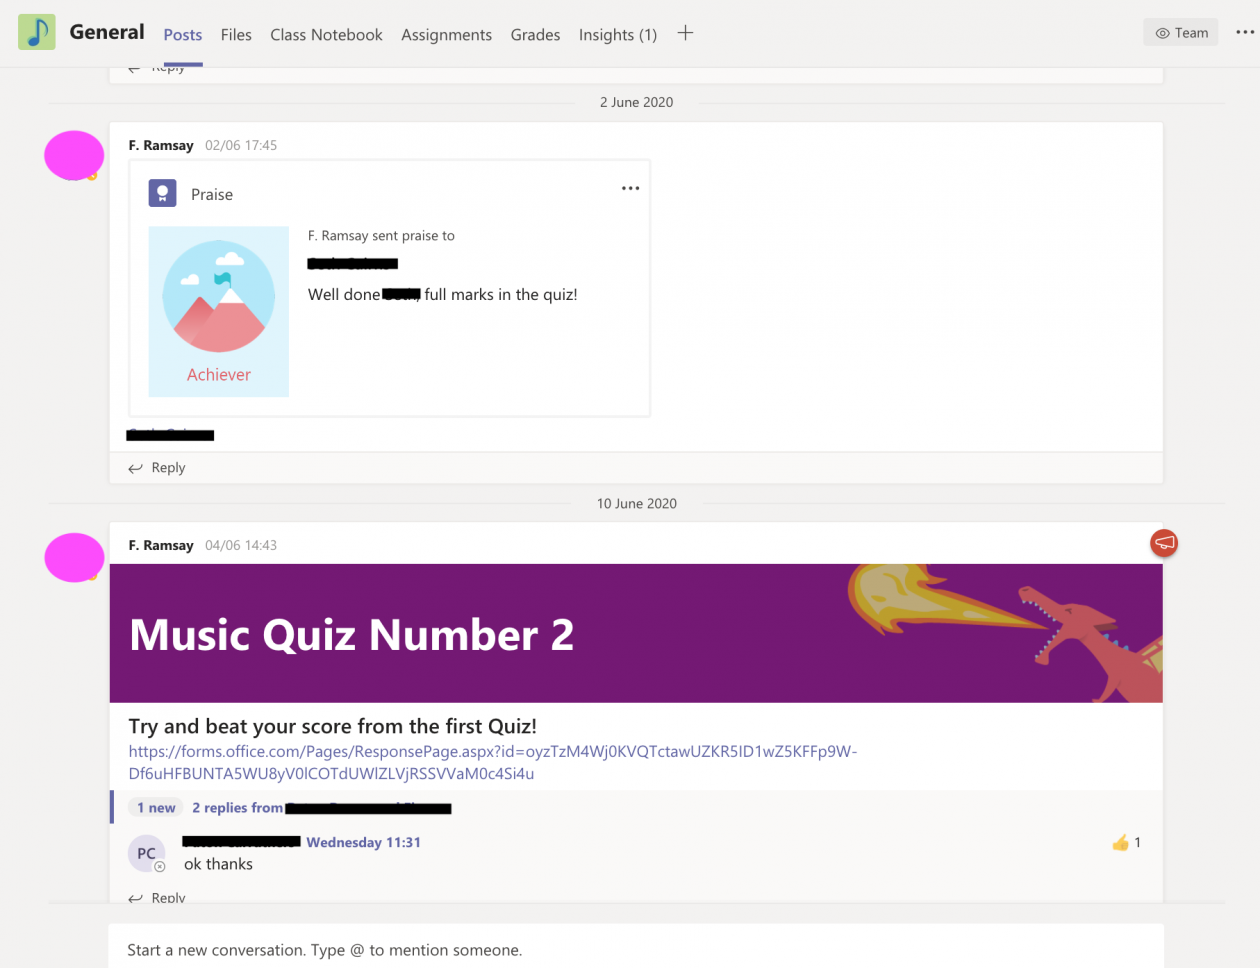

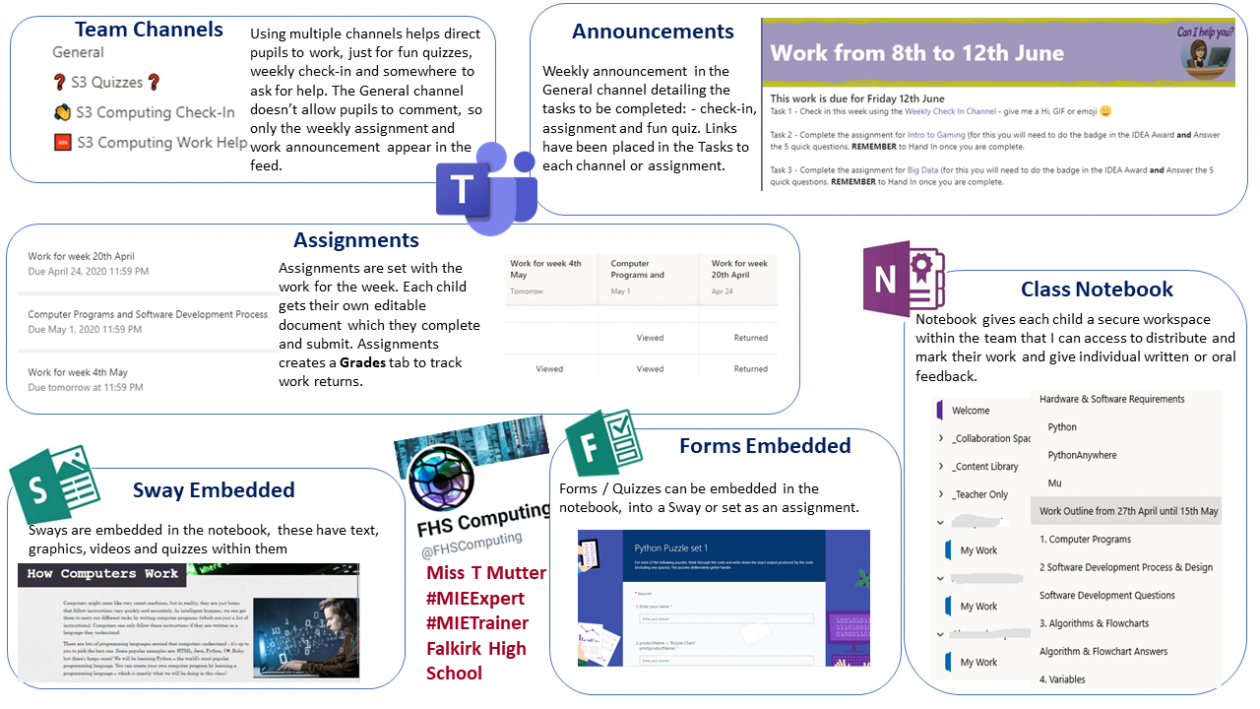
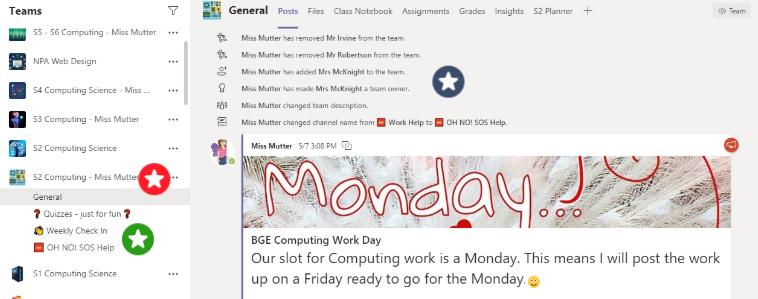
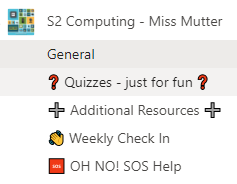
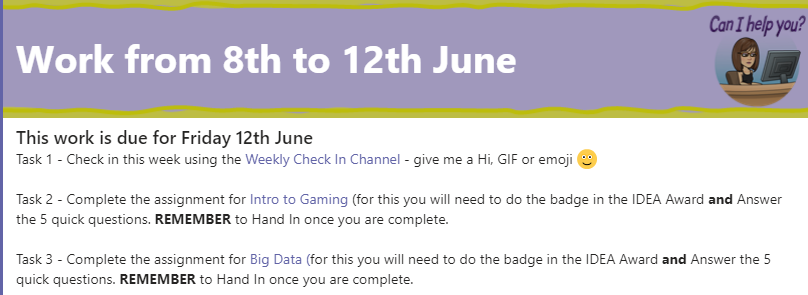
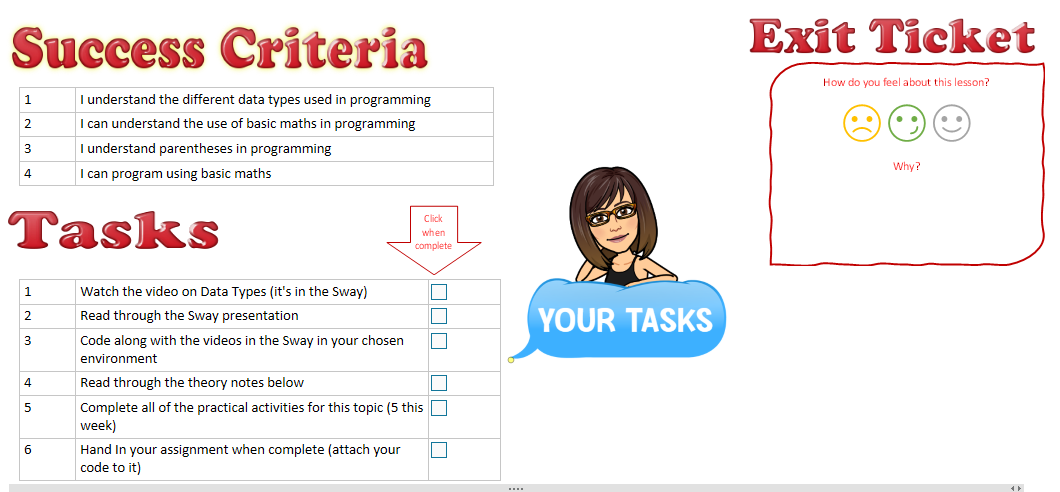
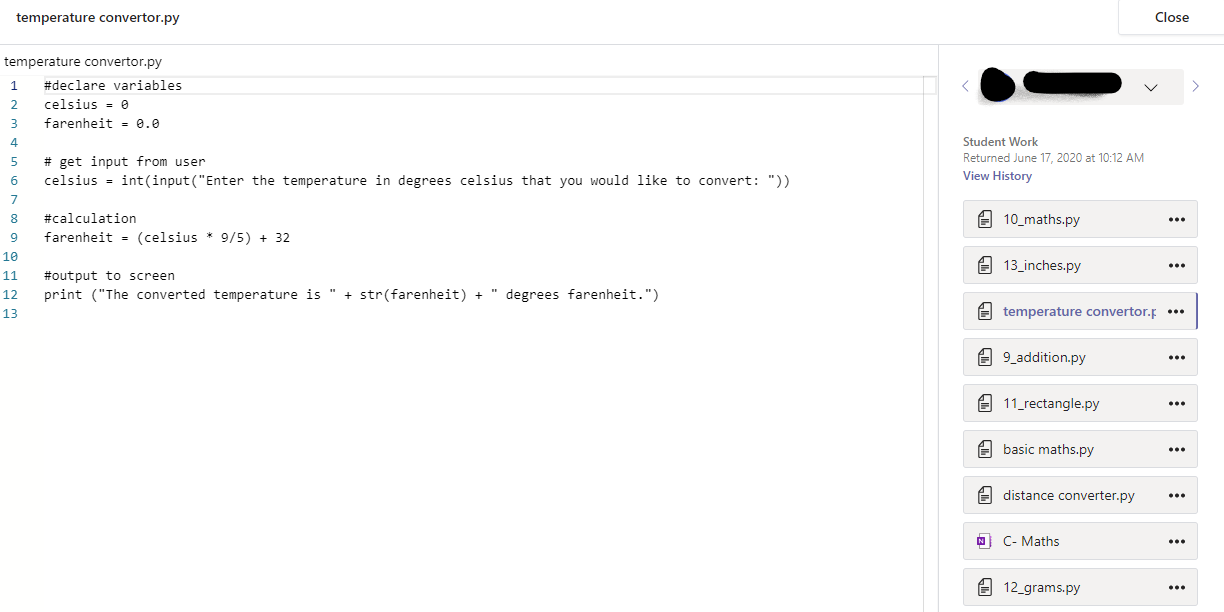
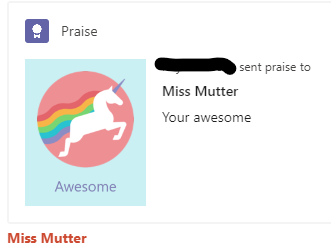
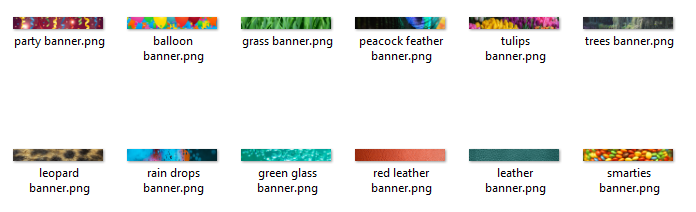
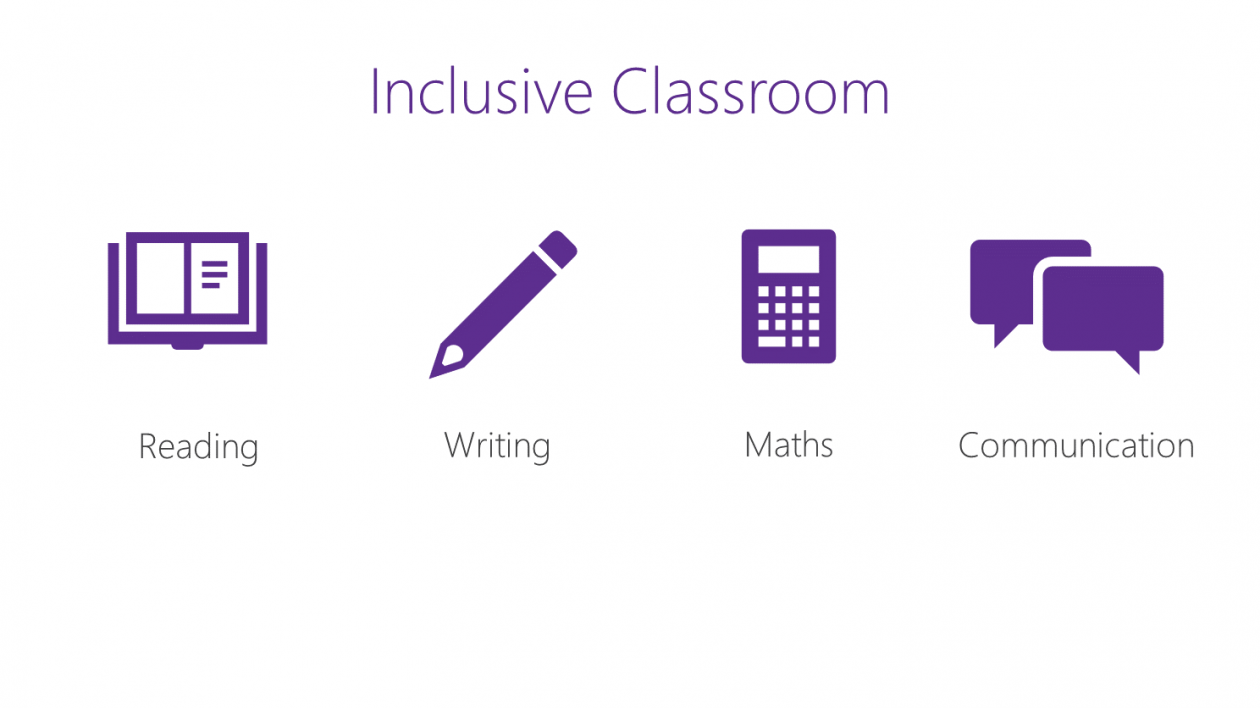
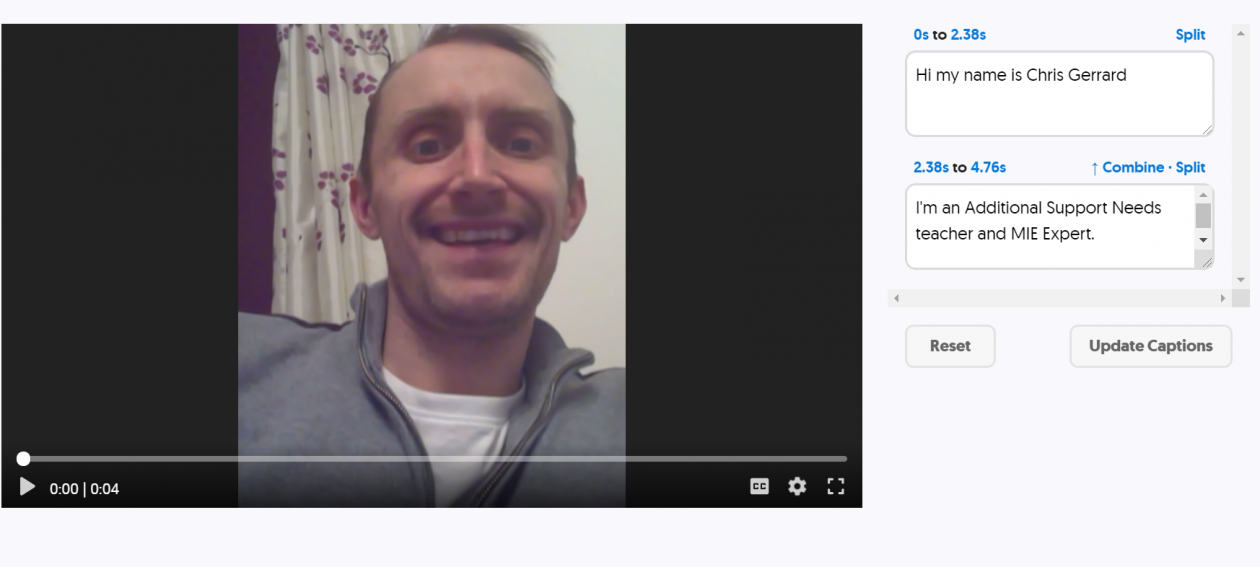


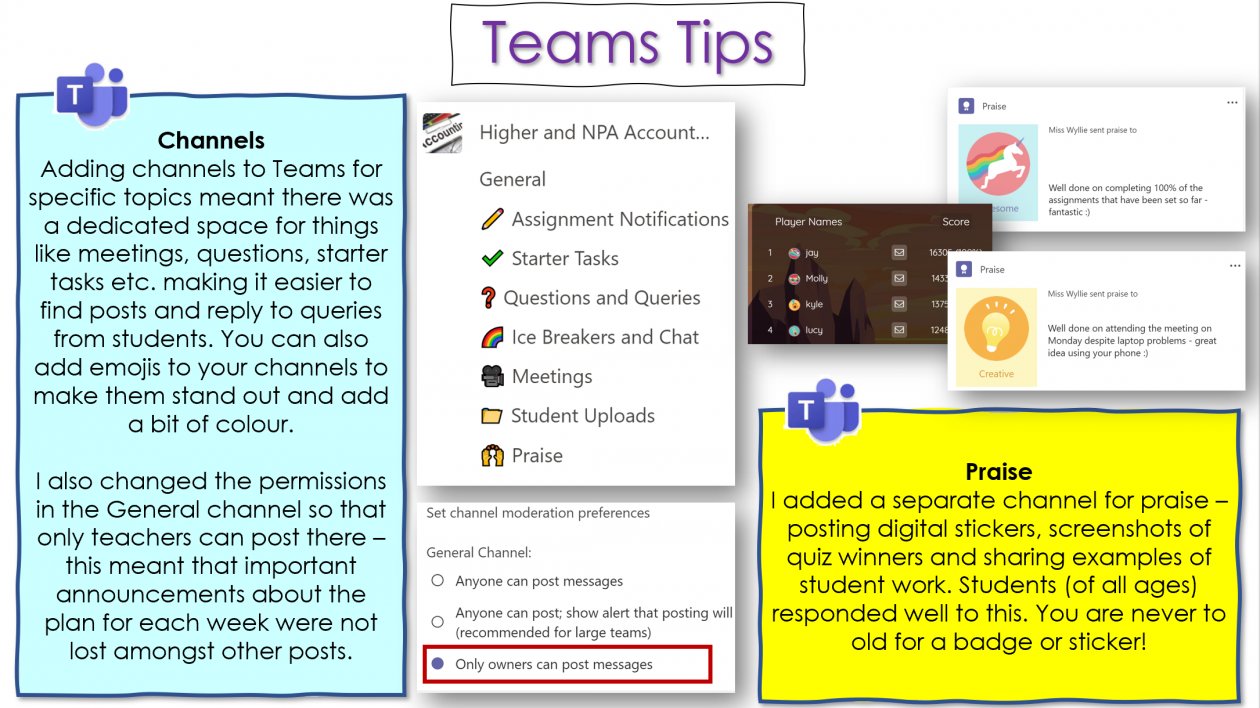

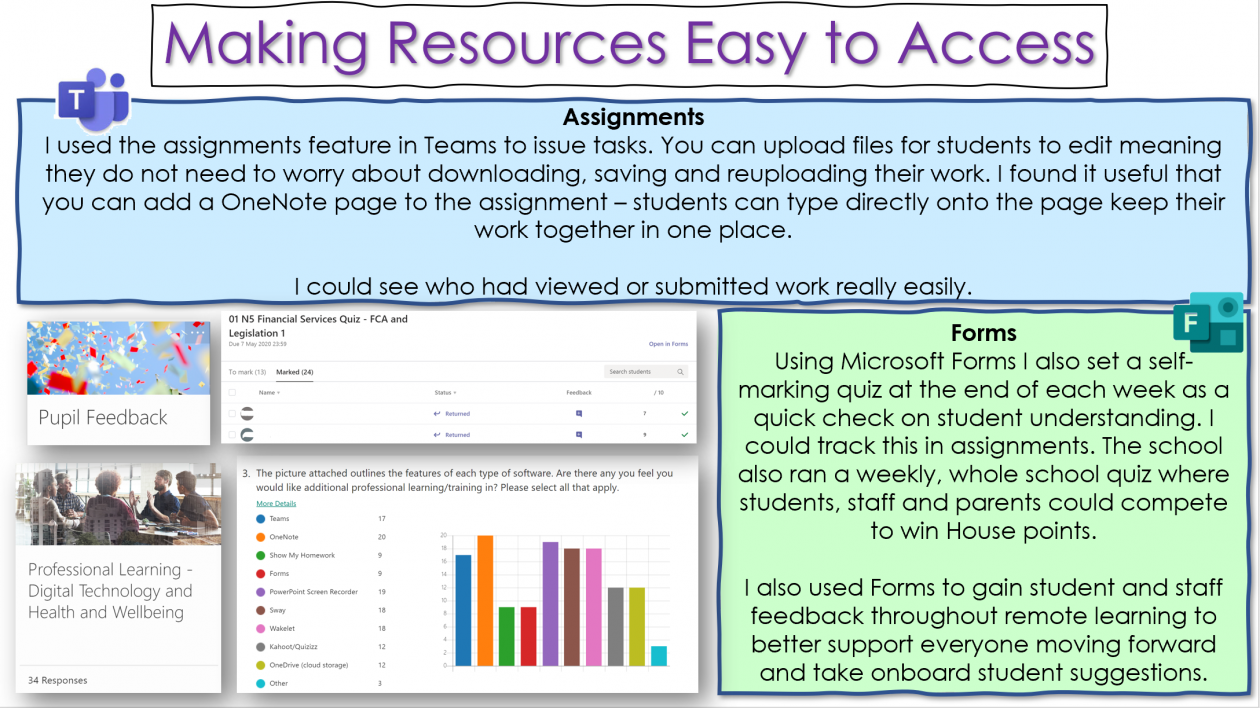

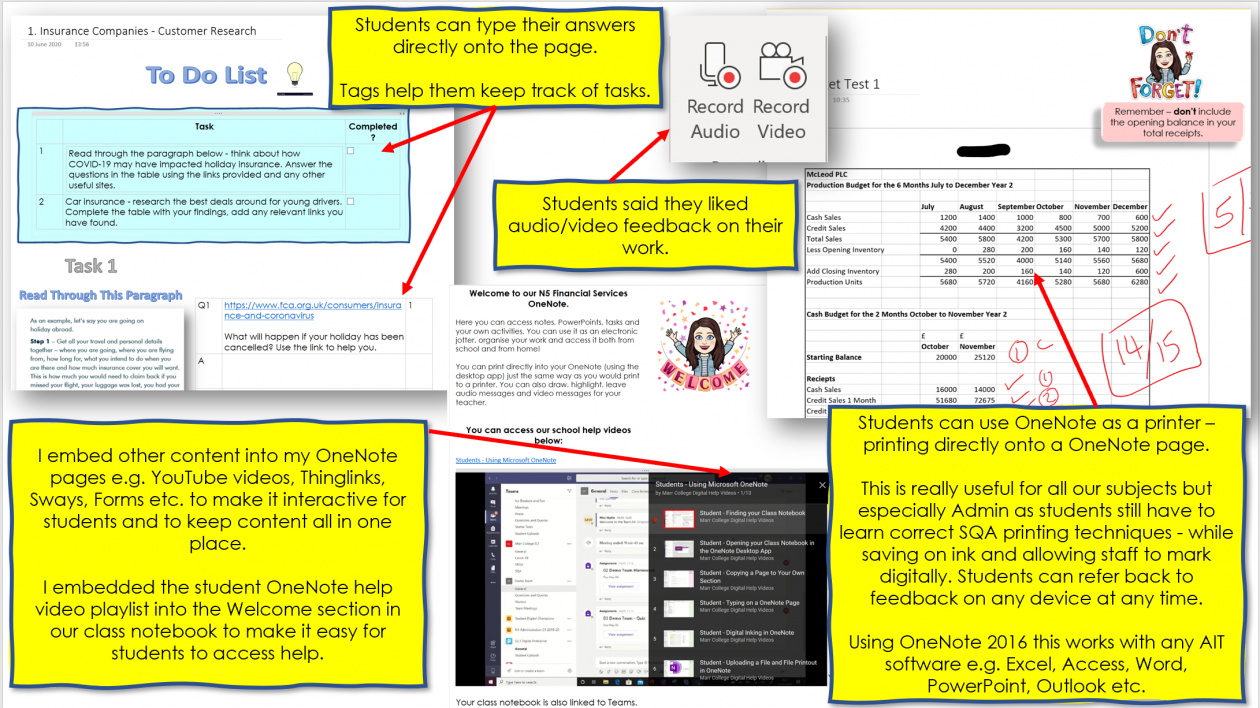
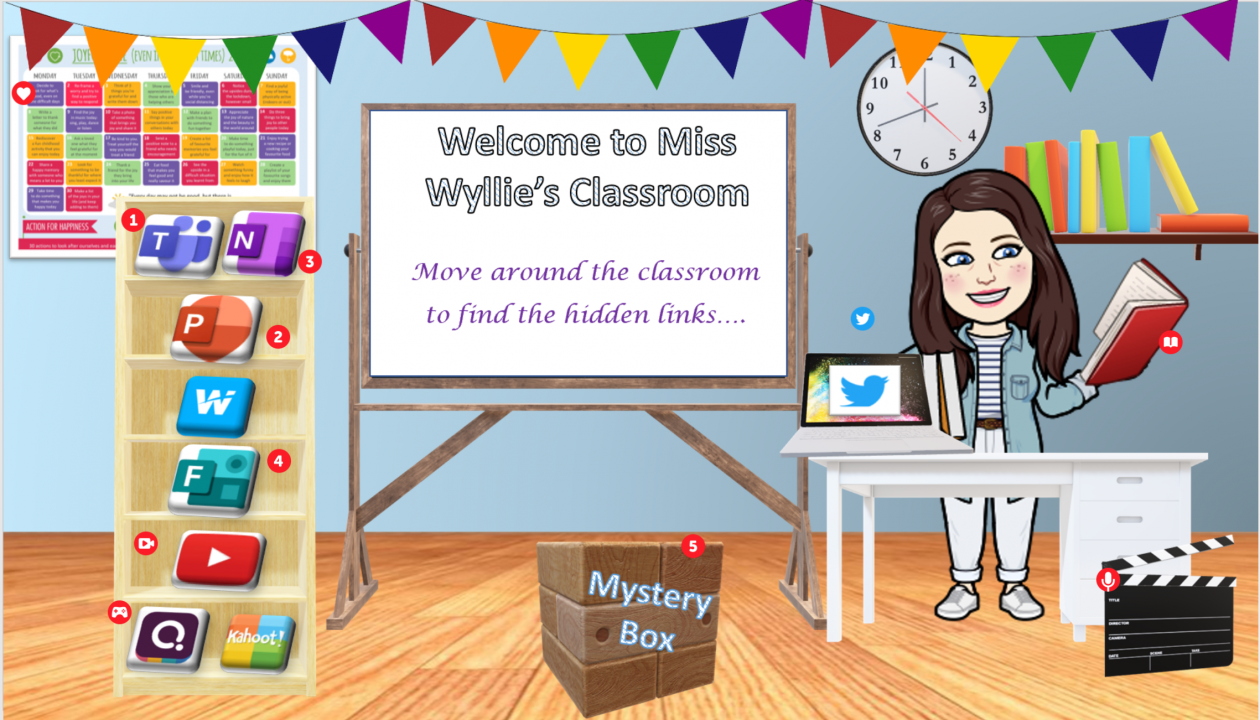
 . Keep an eye on your
  .
. 

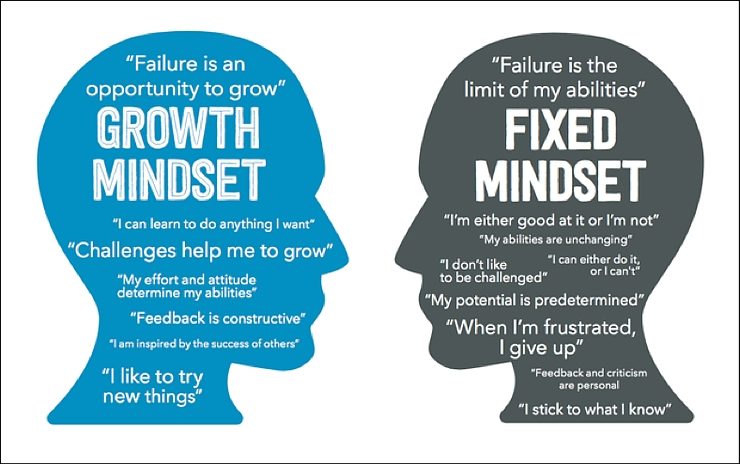

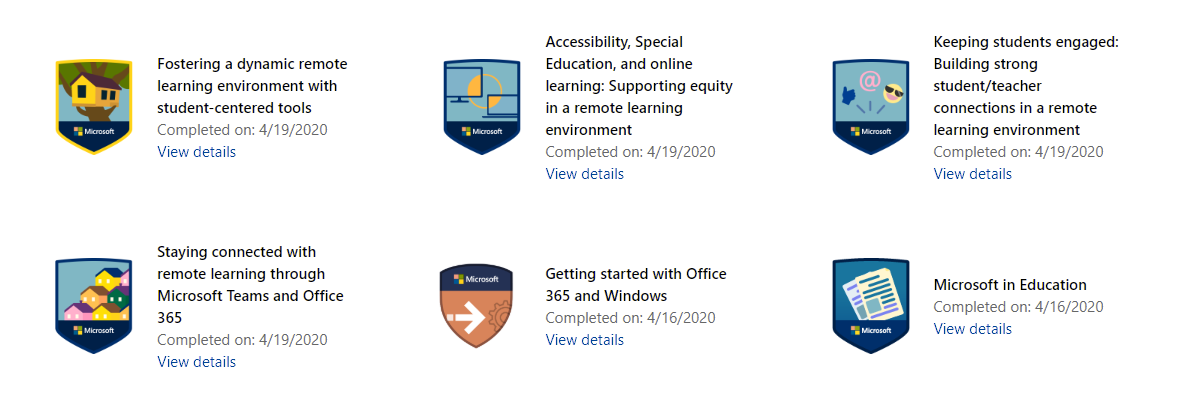

 I am Shelley a Business Education Teacher in the Scottish Borders. This is my first year as an MIEExpert and a Microsoft Trainer and I am very passionate about digital technologies. Due to the nature of my subject in School I am fairly comfortable with using Microsoft software and I have
 been using Microsoft Teams for about 3 years now, so the transition to remote learning for myself has been quite seamless.
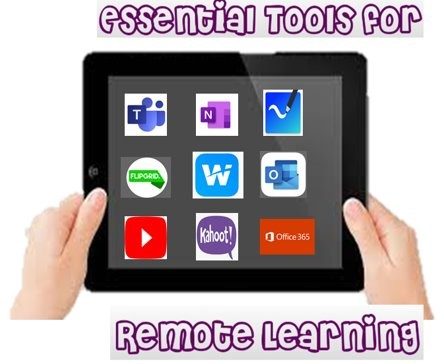
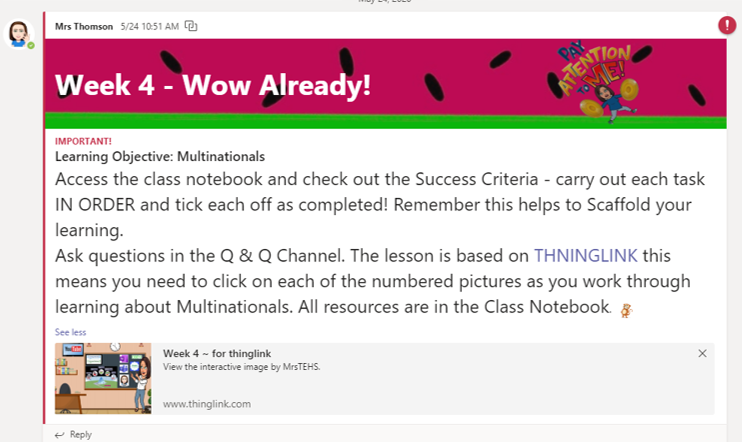
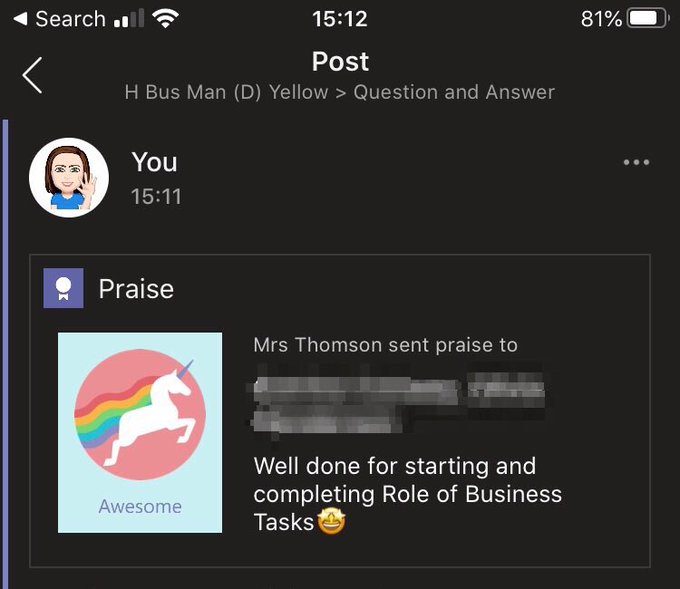
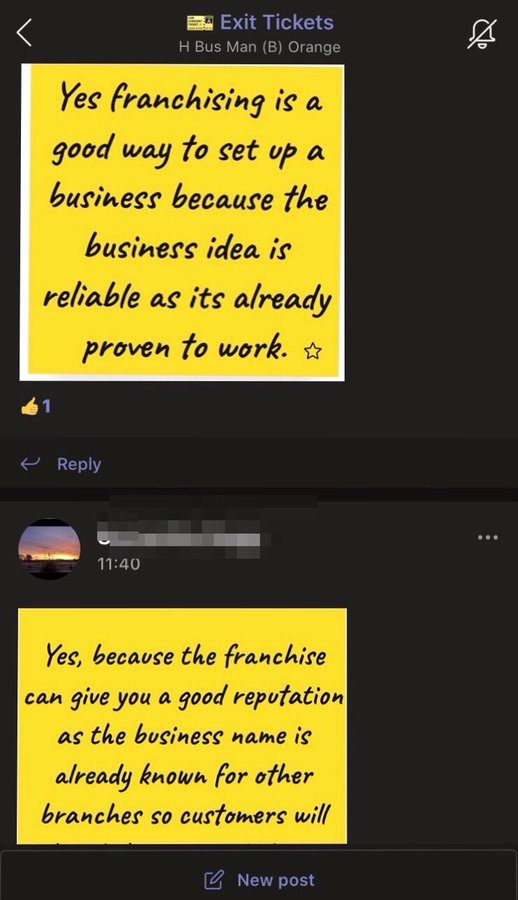
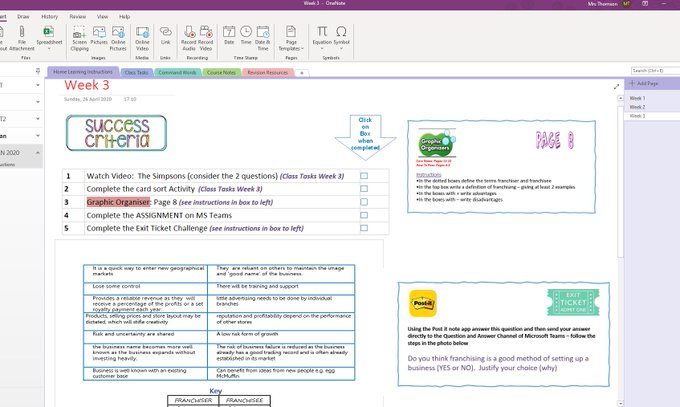
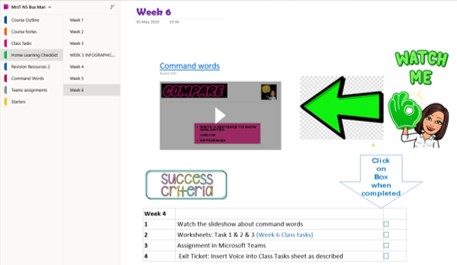


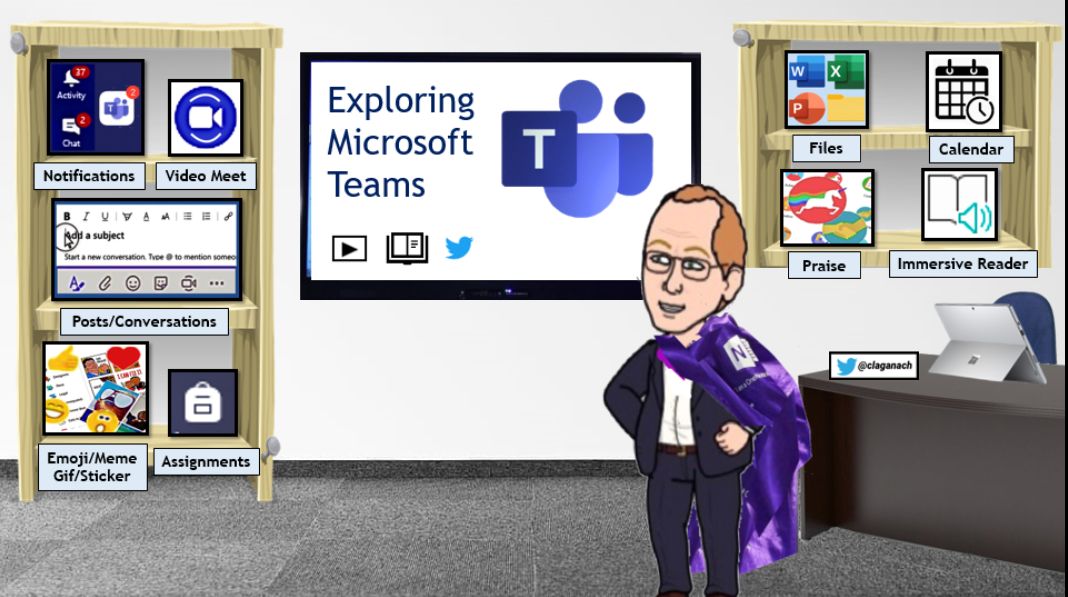

 What you need to set this up in Microsoft Teams
 How to set up you virtual classroom image in PowerPoint
 How to remove the background from an image
 How to share your Interactive Virtual Classroom in Microsoft Teams
 Want to find out how others are using interactive virtual classrooms in Microsoft Teams?
 Definitely spent longer than i should have on this…

 Want to add even more interactivity?

 (@AJOBPickard)
  Malcolm Wilson
  (@claganach)
  I’m a primary school teacher, passionate about digital learning but by no means an expert.
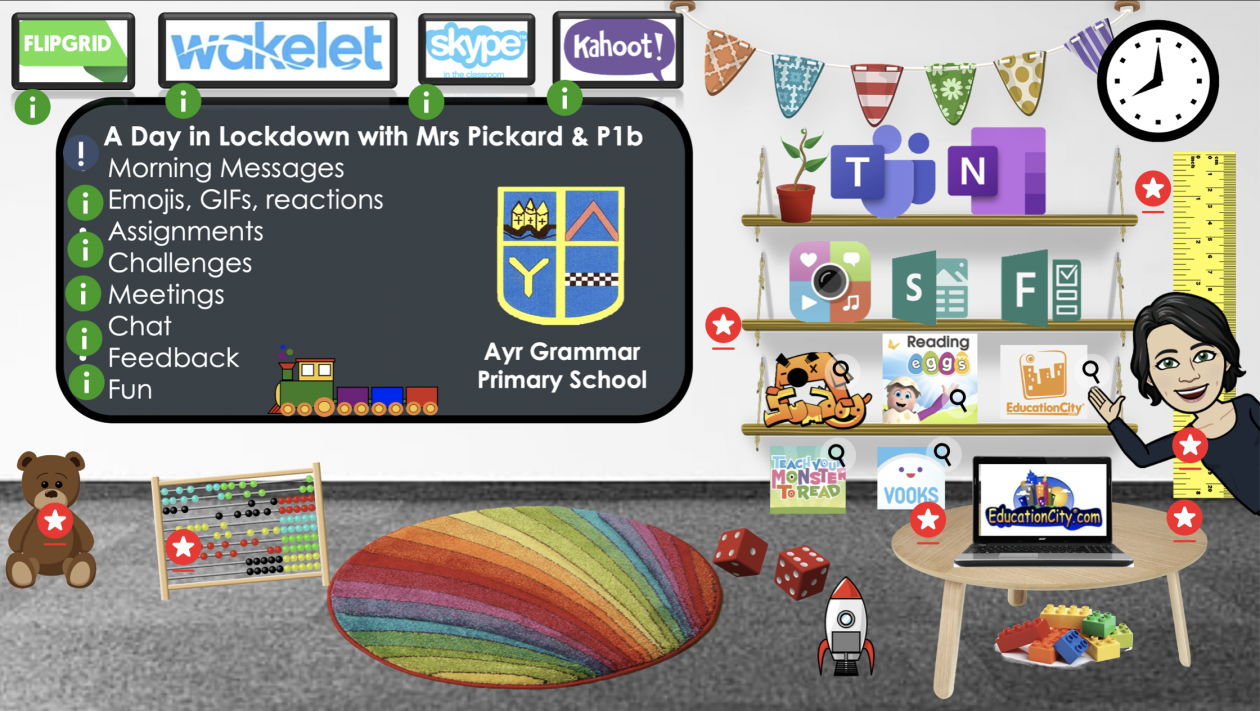

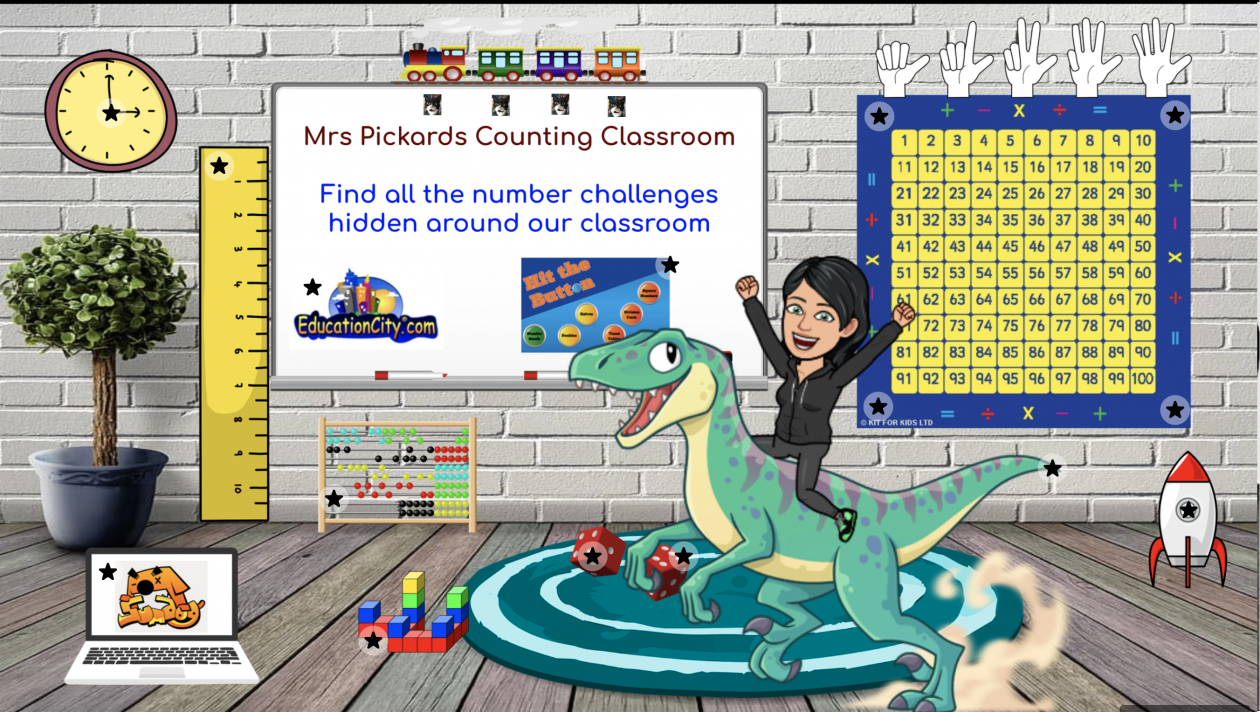
 I used this app to help
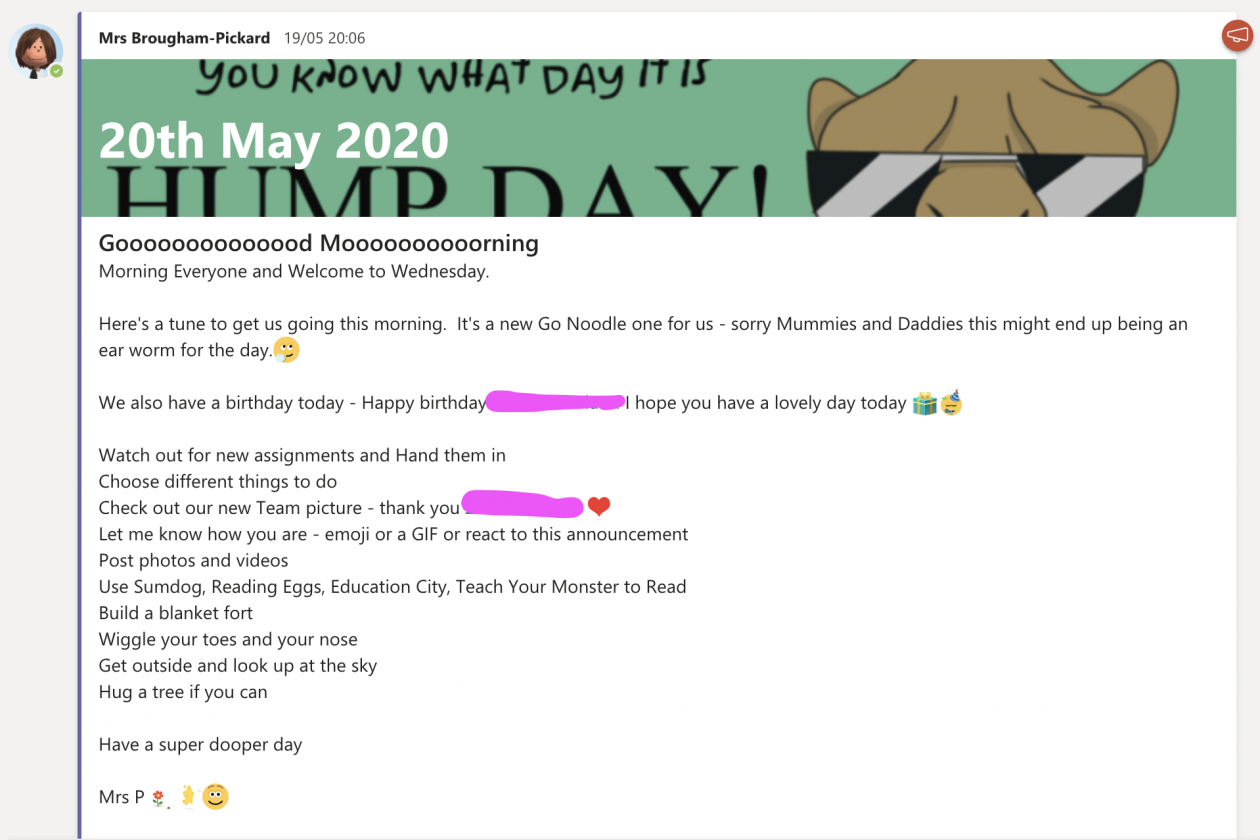 The responses in the beginning:
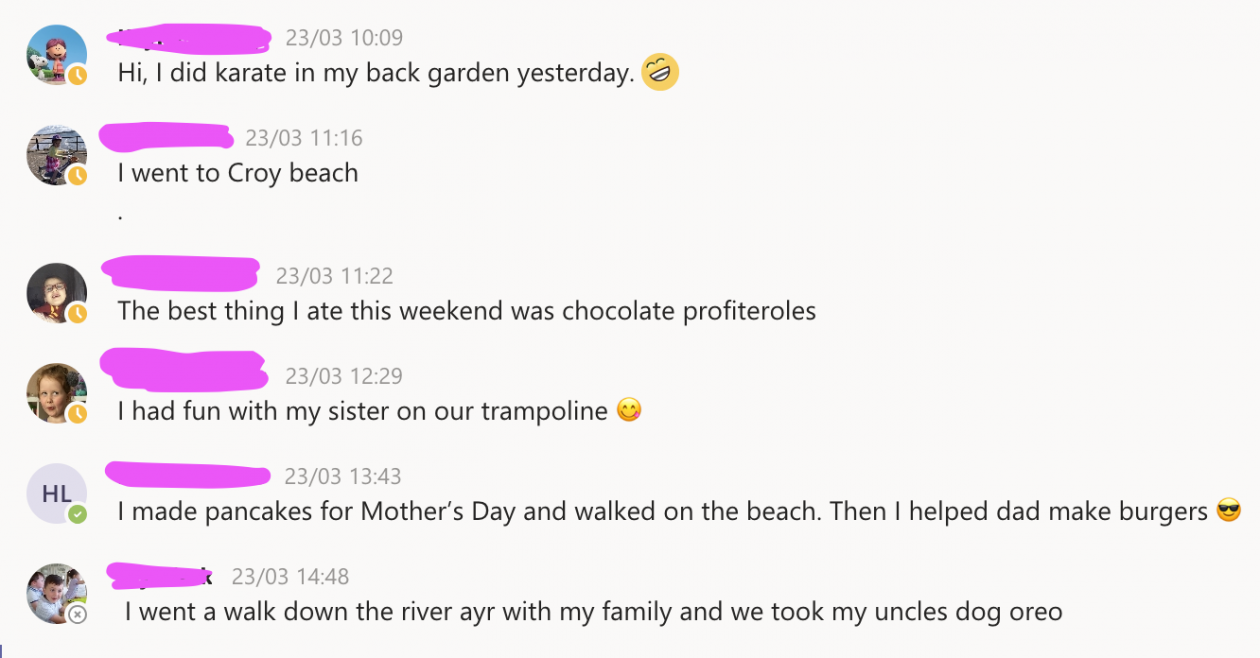
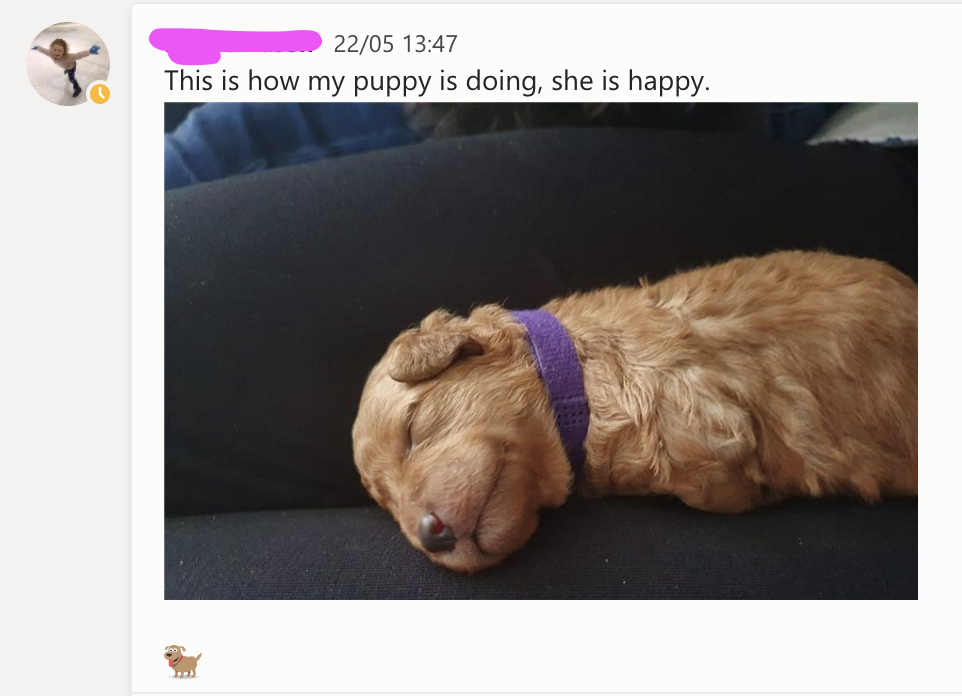
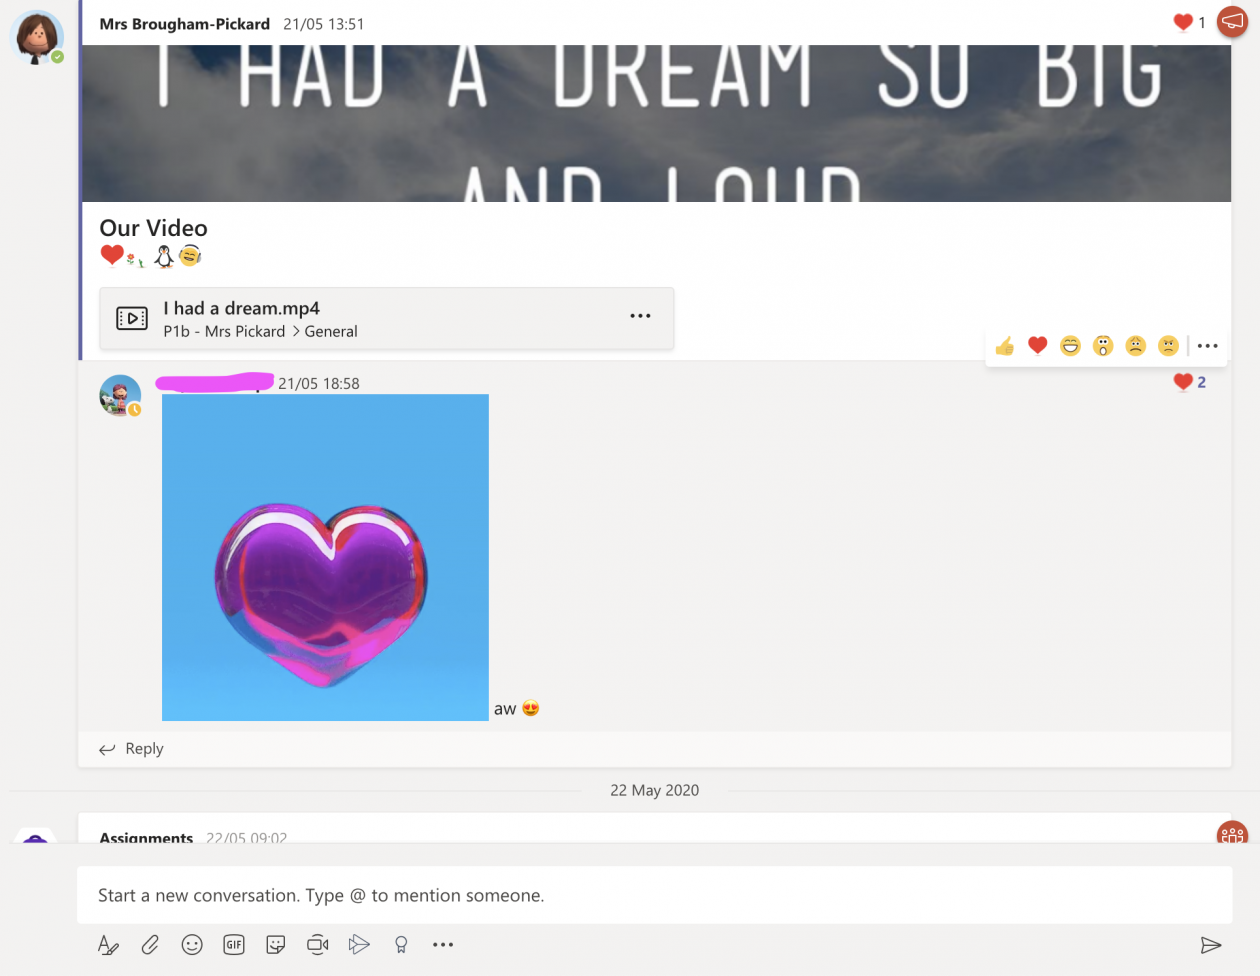
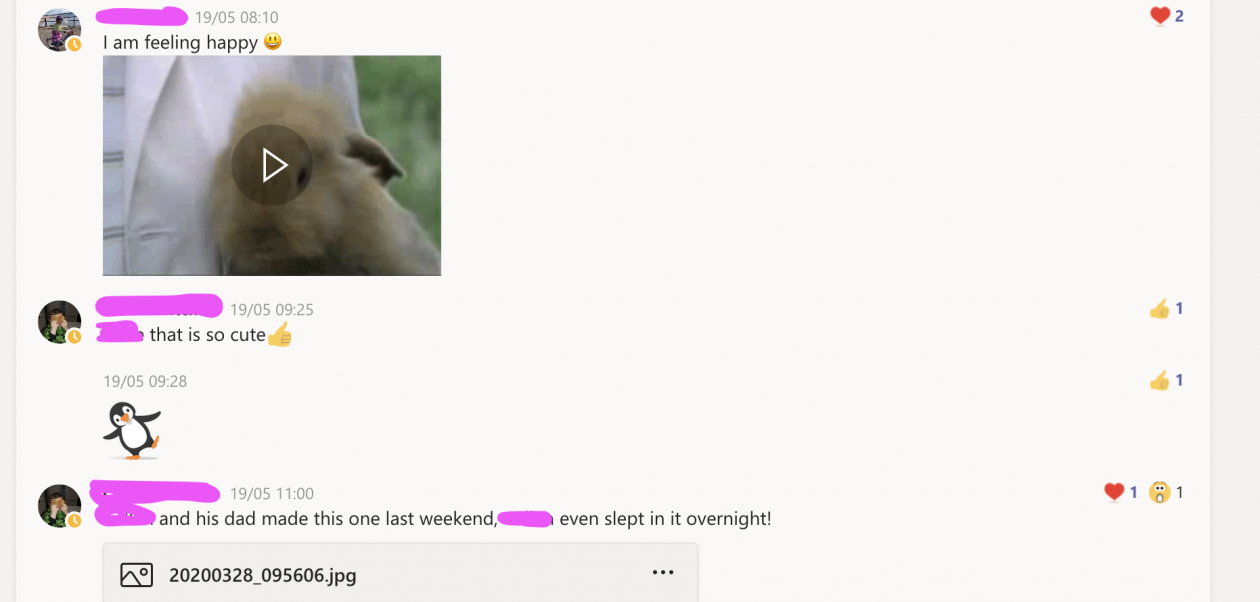


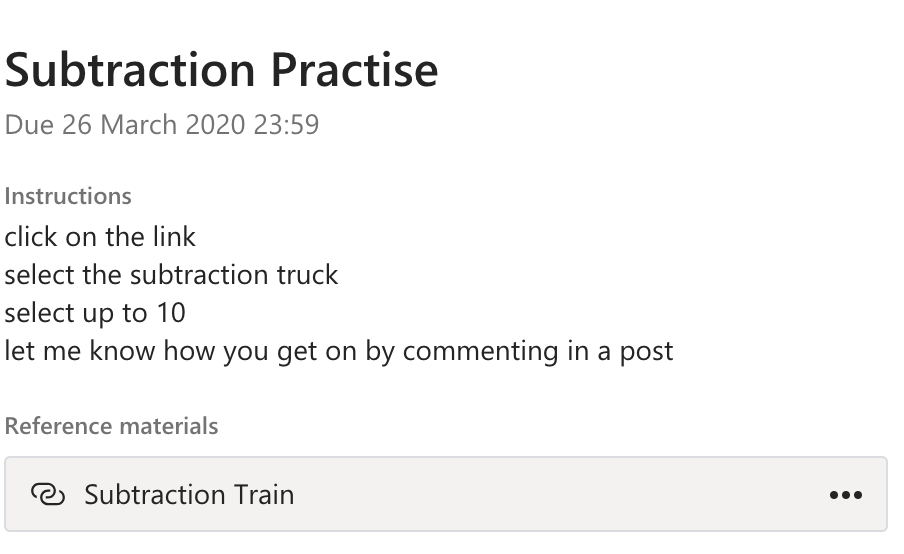
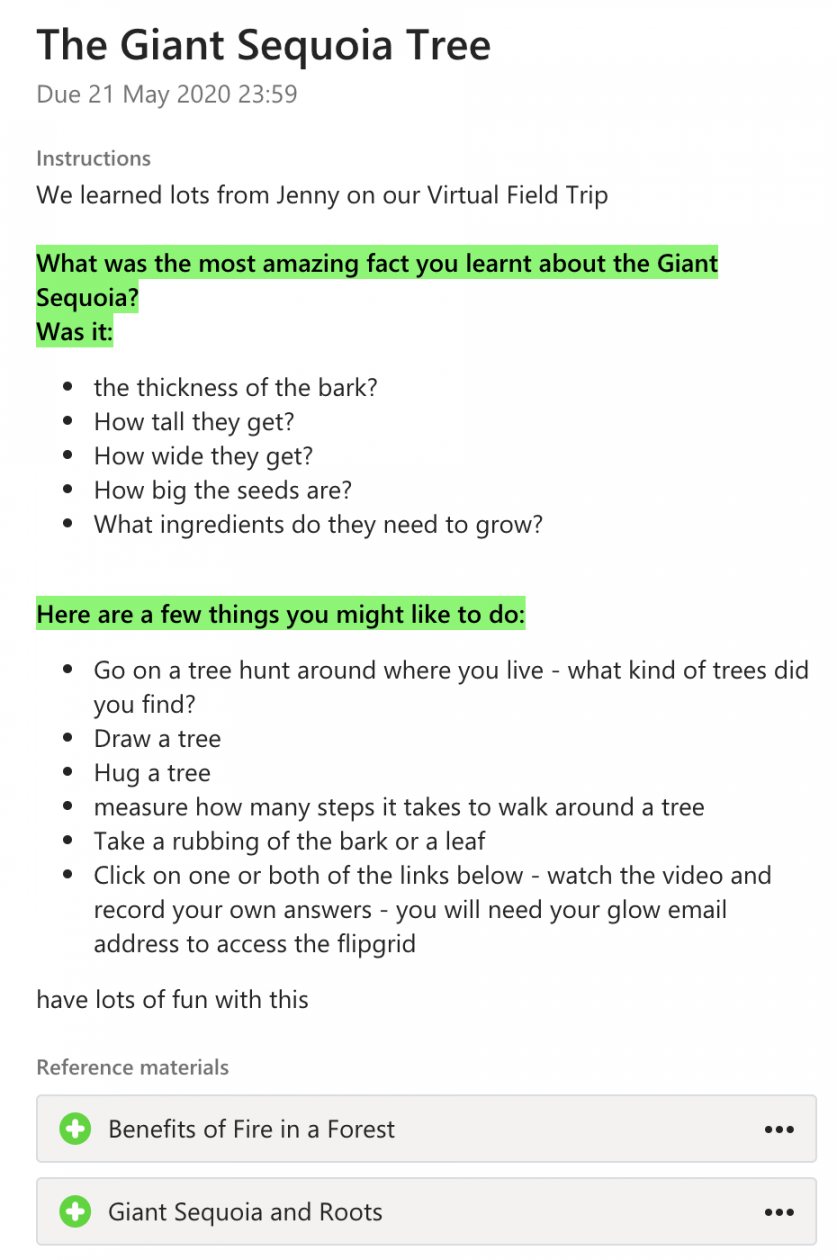
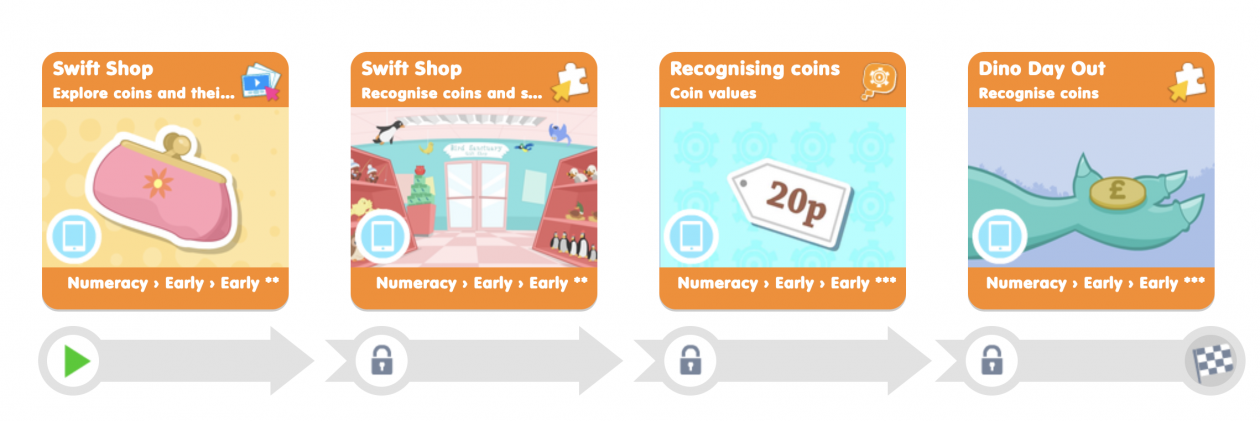

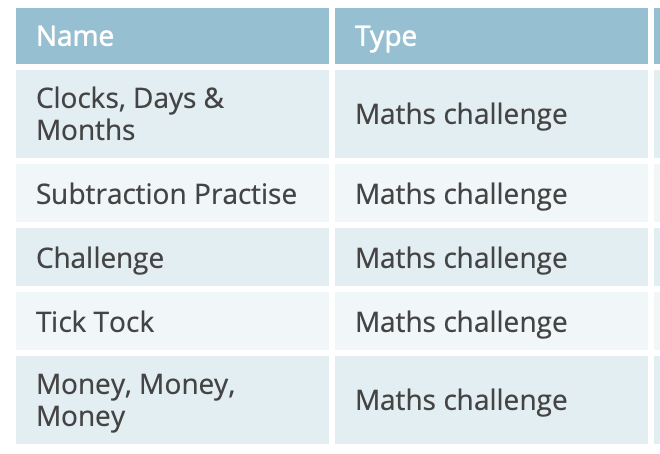

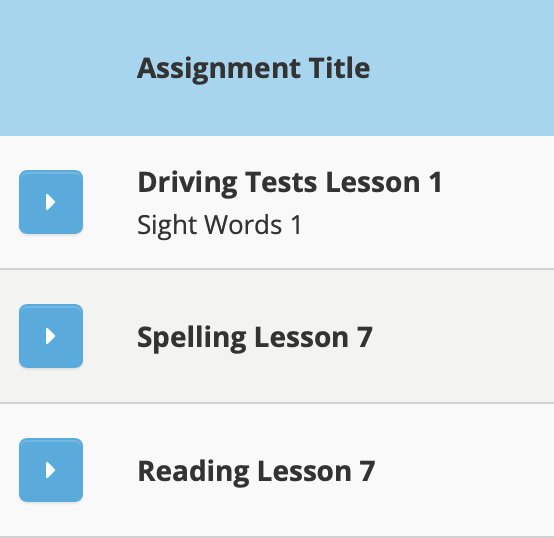

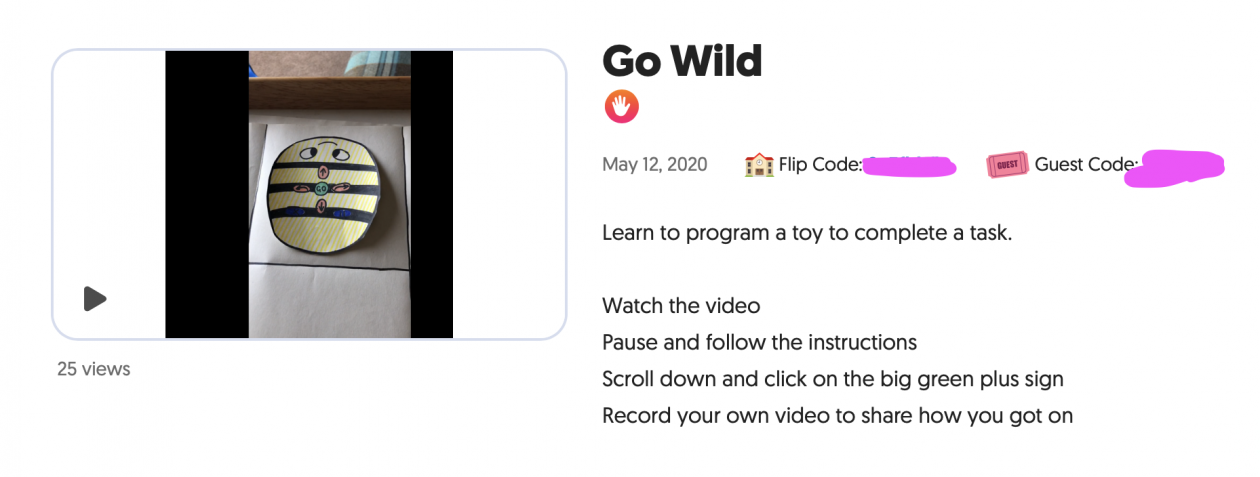
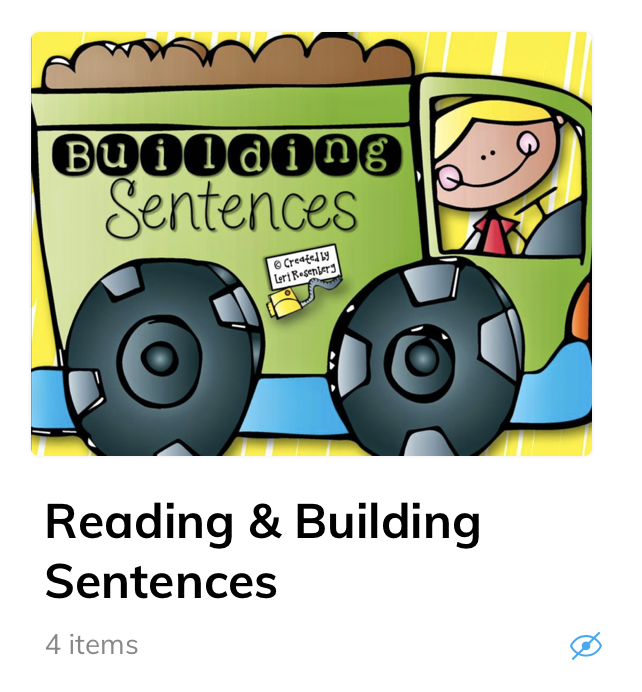
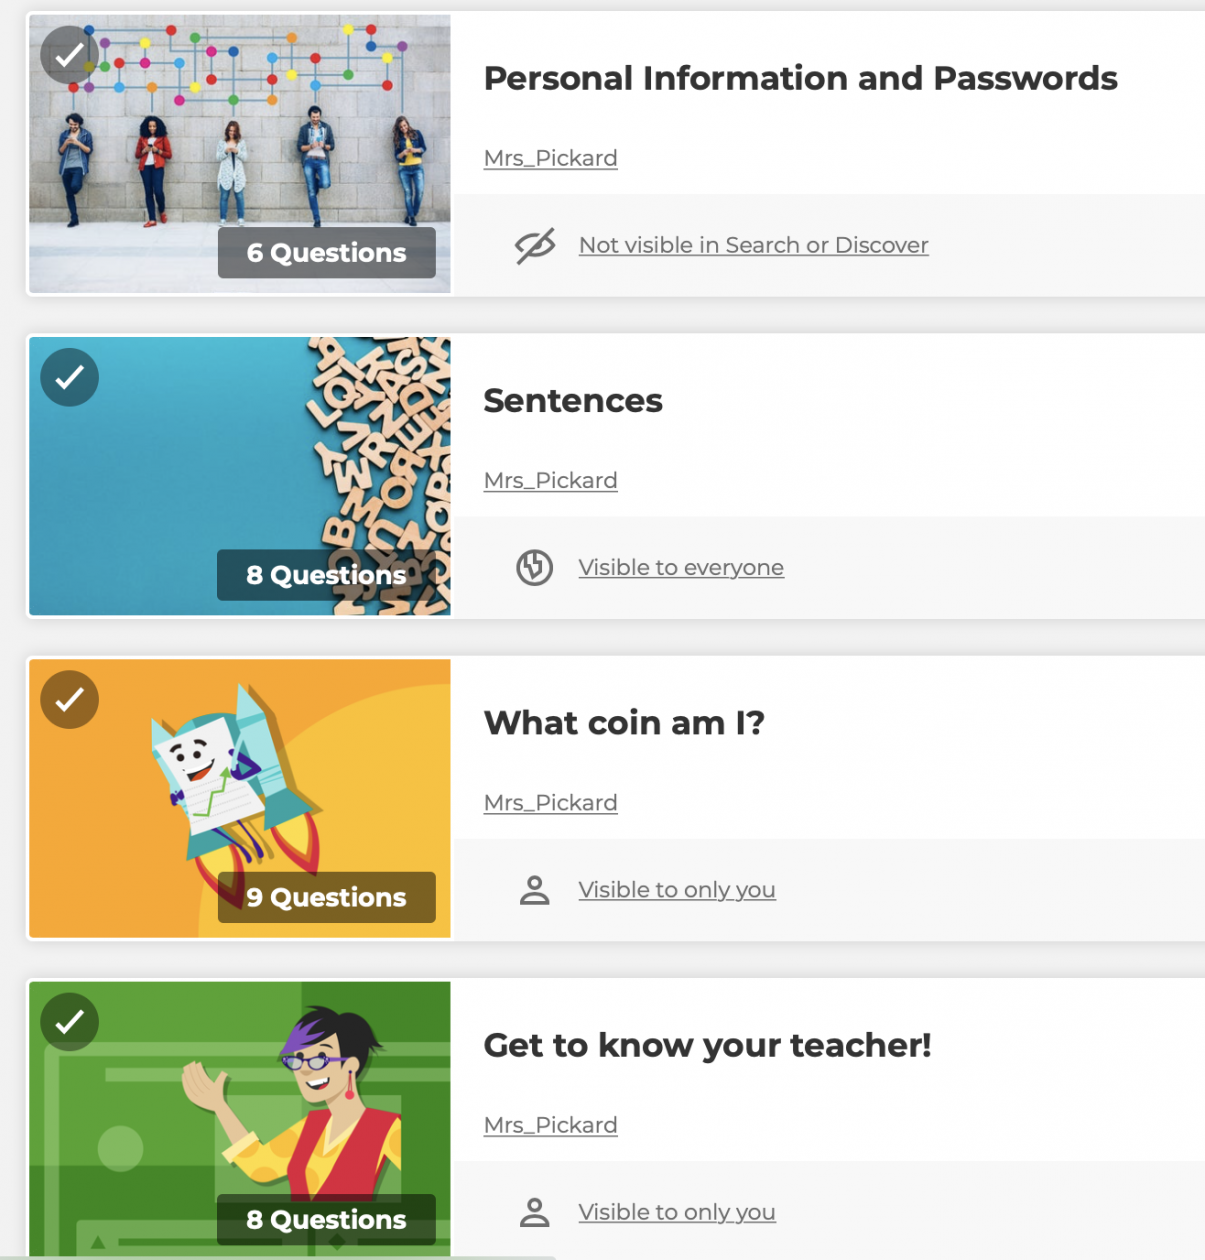
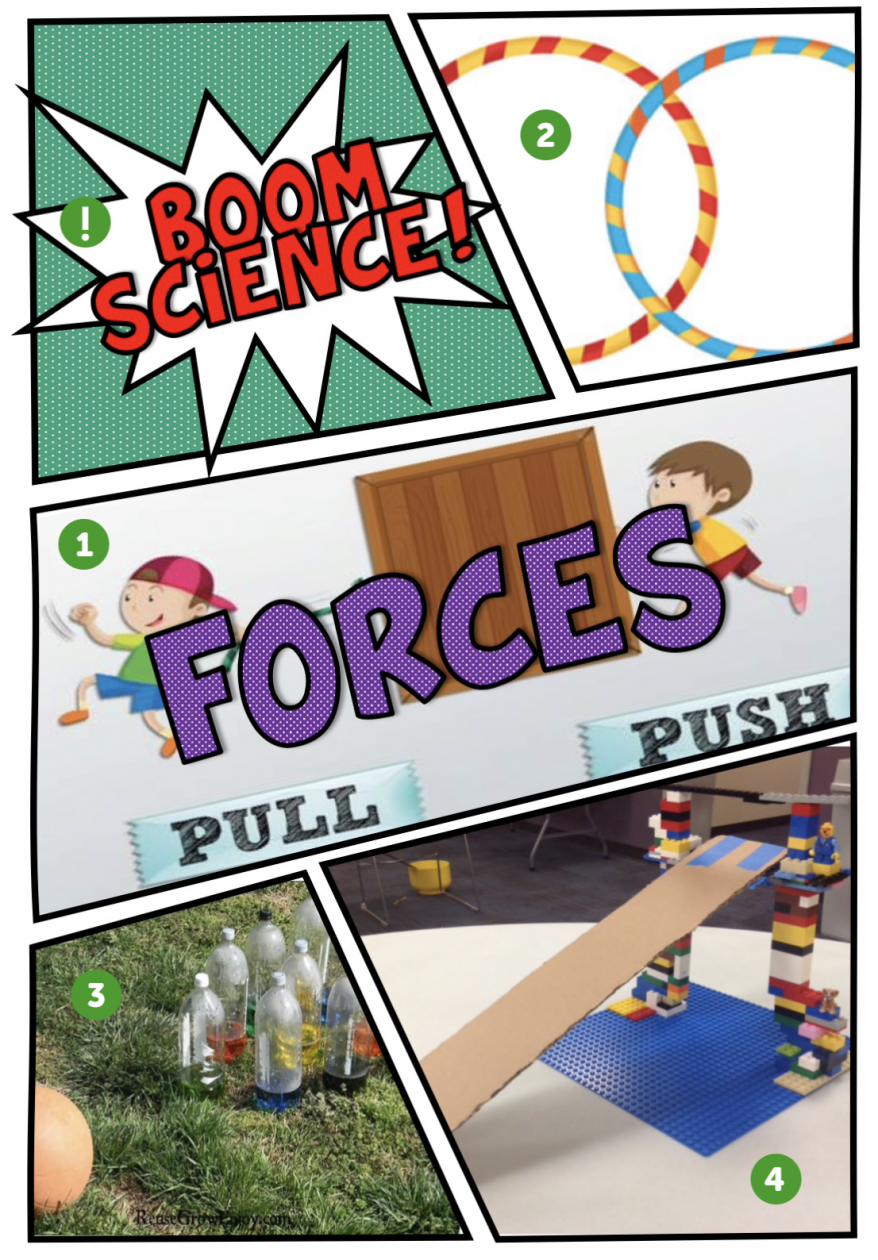
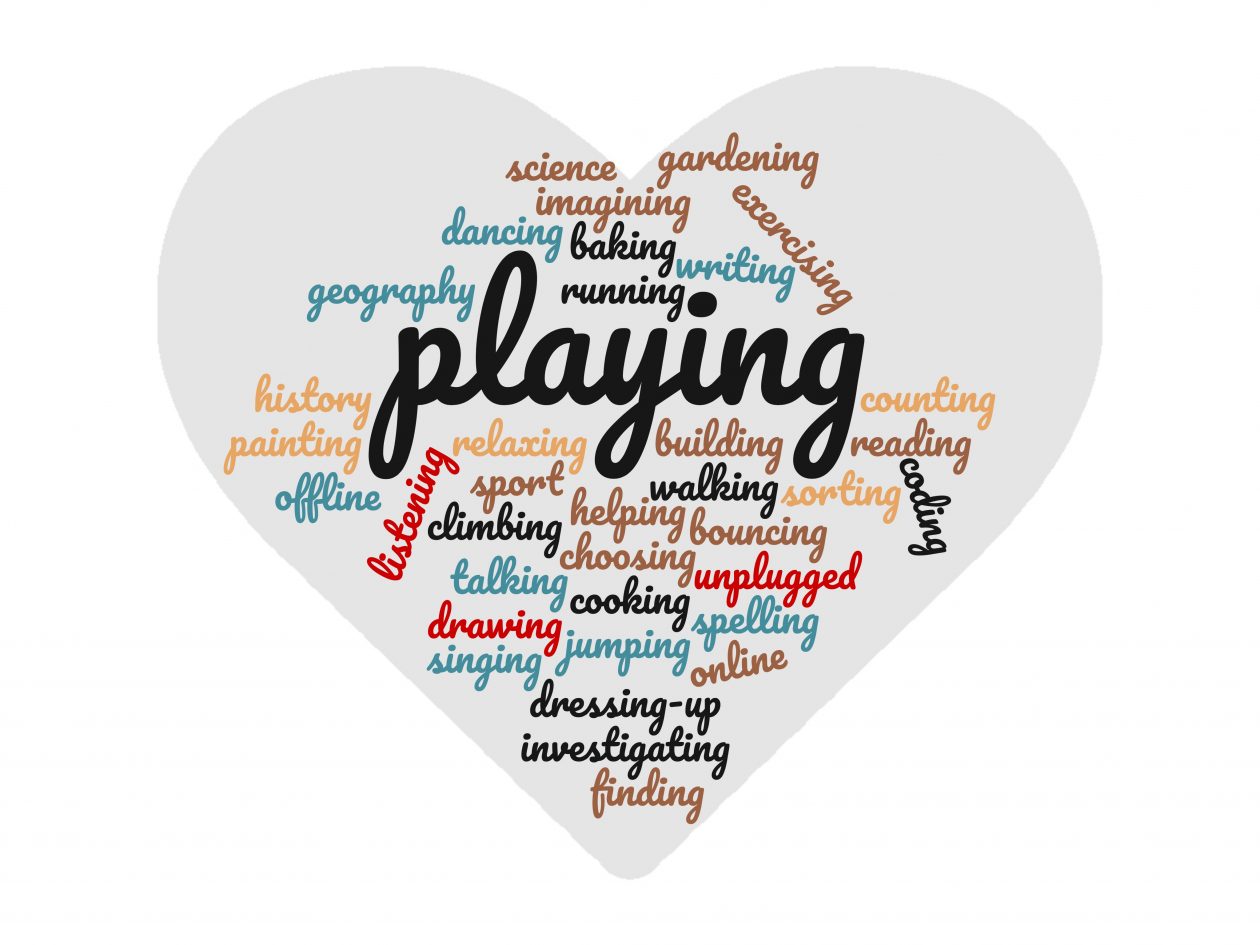


 Amanda Pickard