Oh my goodness, what a right old mess the UK has gotten into over this years school exams. Cancelled exams, statistical models, algorithms to ensure that the dreaded “grade inflation” didn’t happen all conspired to make what can only be described as an omnishambles.
Last week, the Scottish government did a swift U-turn on their results which has put pressure on the rest of the UK to do the same. As I write this a news alert has just popped up on my phone saying the PM has confidence in Education Secretary Gavin Williamson and Ofqual. Back in “normal” times that language was a signifier of a resignation or a sacking, however these days it may well mean that the PM does have confidence in his minister, and the agency despite the mixed messaging from them both over the weekend.
Perhaps one positive thing to come out of this mess is the start of a public debate about statistical modelling, the development and use of algorithms and the implicit and explicit bias that they almost always promote.
However, this is a very messy business and there has been a huge amount of human complicity and error here too. In was pretty obvious in March that these exams would not go ahead.
Students themselves have (quite rightly) been very vocal, and visible in their anger, dismay and outrage at the overriding ‘logic” of the bigger pattern and the curve taking precedence over them as individuals. w.
The blame games have already started, with opposition parties seeing huge political capital to be made. Calls for public inquiries , discussions about what to do next year are all I fear detracting from what is the fundamental issue – our over reliance on exams.
If we had more continuous assessment and less reliance on final exams, if/ when another pandemic strikes or covid-19 has another spike, we wouldn’t have to worry about exam results or models to moderate grade inflation. Students work could be judged on their merits, there would be confidence in the marking through a shared learning outcomes (which if I am not mistaken do already exist). A more holistic view of students as people, with ideas, with agency, with the ability to express. share and reflect on their views would emerge.
We could allow students to exploit digital technologies to develop their portfolios, to share their work more openly, to develop more cross curricular activity, to develop agency and critical thinking skills. Much of this does happen in schools but still, the only thing that really counts are those final exams. That incredibly stressful, unfair and to be honest quite archaic way of testing memory not knowledge and understanding.
It’s said by many commentators that our current PM is a “crammer”. Had jolly japes at Eton, crammed for exams and through his loquacious use of slightly arcane language (see what I did there!) got the grades and the interview patter to get into Oxford and sustain his career in politics and journalism. The final result is what matters – Brexit, the last UK election, the ‘war’ on covid. . . . unfortunately we all have to suffer the chaos of the this period of uncertainty as we rumble from disaster to disaster.
We could change the way we assess our children as they leave school. Teachers already have the skills, knowledge, understanding and technology to do it, we just need to rethink time, space and place for on going assessment. It would be cheaper and more effective imho to spend money on that than on a public inquiry into what has and is still happening with this years results.
I have quote above my desk from a post I saw on social media early on in lockdown, it says “in the rush to return to normal, use this time to consider which parts of normal are worth rushing back to” (attribution Dave Hollis). I find it so sad that we seem to be rushing headlong back into exams instead of seriously contemplating the alternatives. Is this not is the perfect time to change that old “normal” to a far more equitable “new normal” for assessment?
The EPQ is
not a new qualification but discussing it with Nick Brown,
Head of Languages at Lincoln Castle Academy, I started to understand its real potential
to promote languages…
I first came
across the EPQ at my previous school. Like in many schools, it was used as a
way to enrich the curriculum in the VI Form. As such, it is a way to get
learners to get a Level 3 qualification as well as develop their research
skills and engage with content that is within and beyond the curriculum.
Full details
about the qualification can be found hereand the Future Ready website but the main feature of the qualification is that, following their own in-depth
study, students are asked to produce a project with ONE of the following
outcomes:
A dissertation
An investigation or a field study
A performance
An artefact
The work submitted for assessment must be produced in
English but-and this is VERY important for language teachers-the research and supporting
notes can be in ANY language, which would naturally occur by listening,
speaking, reading and note-taking in the language.
If the project is used to complement A Level teaching and
learning, the topics can be inspired by some of the A Level work, provided it
does not replicate their Independent Research Project (IRP).
The project can also allow students to explore their cultural
heritage or the cultural heritage of other people in the community as well as
offer them an opportunity to pursue an interest outside of the curriculum. This
could be of particular interest for EAL students, as a way to celebrate their
cultural heritage, enhance their literacy in English as well as gain a
recognised Level 3 qualification.
Examples of projects for MFL could include:
Has French cinema been a major influence on the world stage?
(dissertation-extension from A Level film study)
Is Colombian Spanish a better dialect than other forms?
(dissertation)
What trends can be seen in the use of slang words by modern
day German teenagers? (investigation/field study)
Interpretation/Performance of a play
Short film in the style of a specific director (artefact)
Self-published book of new translations of poems (artefact)
If you would like to register your interest in the Extended
Project Qualification (EPQ) or find out more information about MFL-focused
titles, click here.
And there is more….
The EPQ is also available for KS4
pupils as a Higher Project Qualification (HPQ, Level 2 qualification) and a Foundation Project
Qualification (FPQ, Level 1 qualification). Like the EPQ these qualifications aim to develop learner’s
transferable skills and preparing them to the world of work by making them more
organised and independent. More details here.
In the face
of “lost” teaching time during lockdown, the proposals aim to free up teaching
time and, in some instances, reduce what needs to be taught and take account of
any public health restrictions relating to coronavirus (COVID19) that might be
in place during the next academic year.
A
“recovery” curriculum?
There have
been lots of discussions about how current Year 10 and Year 12 pupils have been
affected by the pandemic in the preparation for next year’s exams as they have had
limited access to face-to-face teaching since the end of March. In particular,
the debate has been around the need of a possible “recovery” curriculum or at
the very least a “responsive” curriculum to deal with the knowledge gaps that
may have developed and that could hinder students’ further progress. This has
highlighted the differences between school settings and the pressure on some
schools to narrow the curriculum for some pupils to ensure standards in Maths
and English were not put at risk.
Consultation
about assessment NOT Curriculum review
What this
consultation is not, is some kind of a statement about the importance of
subjects and their respective content and skills. However, you would be
forgiven for believing this was the case, reading some of the online debates it
has created.
Suggestions
for Languages A Level and GCSE 2021 exams
Whereas no modifications
have been put forward for A Level, the proposals for Modern Languages GCSEs are
quite controversial : the Speaking examination would be replaced by a teacher “endorsement”
for Speaking but it would not actually count in the exam, with the overall grade
only taking Listening, Reading and Writing into account.
Although
there is no denying that cancelling speaking exams would result in gained
teaching time, this proposal also causes a number of issues:
Students
do usually well in speaking
even though it can be stressful for some ;
There would
be a noticeable imbalance in the overall grade between the productive
and receptive skills ;
Although
speaking would still be taught, it may lose its priority in the face of further
time constraints and the pressure of imposed subject targets ;
The class
focus moving away from speaking would particularly affect pupils from
disadvantaged backgrounds who may not have opportunities for further
practice ;
The decision
would most likely impact on A Level recruitment for 2021-22 as the perceived
success in speaking the language is key for motivation and enjoyment. However, given
that the basis for the decision to carry on with languages for many students is
still “success” measured by exam outcomes, ensuring a fair exam and best
outcomes might be just as important for A Level recruitment ;
There is also
a worry that dropping the speaking exam could have a negative impact on attitudes
towards speaking and languages in general in the future.
So, what
is the way forward?
Look at the coverage
of topics? The teaching of the Social Issues topic is usually kept at the
end of the course and maybe could be scrapped to make up for lost curriculum
time during the pandemic.
Go the
“Welsh way”? Keep the
assessment standards in all 4 skills and at the same level but make amendments
such as streamlining the coverage of some of the topics or skills assessed. For
instance, no translation in the reading paper or no Role-Play and Photocard in
the speaking exam. I would still be against using dictionaries in any of the
exams as I feel this could be very distracting for students.
We will
all agree that students must not have their qualification devalued and it is
important that the standards remain the same even if some aspects of the assessment are
simplified. For this reason, I believe that the overall standard of GCSEs in
modern languages cannot be maintained without any speaking being counted at all
in the overall mark.
So you have just started using Microsoft Teams with your primary school class – now what?
Microsoft Teams can be described as an all-in-one Swiss-Army-Knife online digital tool – with facility for classroom conversations, shared space for collaborative Word documents, PowerPoint presentations, Excel spreadsheets, assignments tool for easily setting tasks for individuals, groups or the whole class (and providing feedback) and OneNote Class Notebook multi-purpose digital ring-binder, all made more accessible to all learners with Immersive Reader Learning Tools.
That might make it sound overwhelming for your class, so…
Start small – make connections
Don’t try and do everything at once!Microsoft Teams provides many features which can be used with your class but you don’t need to use them all right away. The Posts/Conversation area of a class Team is the first part users will see when they log into Teams, whether via browser, desktop app on computer/laptop, or mobile device smartphone/tablet. So this is the place suggested to start.
In the Posts tab you can share text, images or video.
So you can share information with your class either as:
Text (and where pupils can use Immersive Reader in the browser to read it aloud (pupils just click on the 3 dots to the right of the message and choose “Immersive Reader”);
Add a link to a web resource you wish the pupils to use;
Share a picture of a visual diagram of the tasks (as you might do in your classroom) – just click on the paperclip icon to upload a picture;
You might create a short video with your voice (so it’s familiar to your pupils) and the camera pointing at a piece of paper on which you are writing, or a book, picture or object such as classroom toy.
Set up channels in your class Team
When you first create a Team for your class you will automatically get a channel called the general channel. By default everyone in your class will be able to post there. And at the beginning that might be okay as everyone starts to use it.
However often you might find that you want to provide another channel within the Team for general chit-chat for the pupils and you as the teacher change the settings so that the main general channel can only have content added by you. So once you’ve set up additional channels then go into the Team settings and switch off the facility for pupils to be able to post there so that only you can post in the general channel.
You can set up channels for different areas of learning, perhaps by curricular area or for a specific topic or a group. This can help keep conversations related to each area in their respective spaces and not all jumbled together.
It’s suggested to create a channel for your class to have friendly chat so that the general channel does not get cluttered there (telling them that’s what it’s for but that you can still see it). And then restricting them from posting in the general channel. As a member of staff in a class in Microsoft Teams you are a Team Owner
Here’s how you can add an additional channel for class chat where pupils can post.
Go to the list (or tiles) showing all of your teams in Microsoft Teams
Click on the 3 dots (ellipsis) … to the right of the team name
Click “Manage channels”
Click “Add a new channel” (and name it something like Class Chat or Blether Station) and click done.
Primary teacher Roddy Graham shared his ideas for how he’d structured his class in Microsoft Teams so that there were a number of specific channels set up for specific purposes. Choosing the channels to have for your class depends on you and your class so getting the balance between too few and too many is something which only you and your experience with your class can determine. As Roddy Graham explained “Too few mean people aren’t sure whether to post something or not, or it can get too clogged up with random things. With children using these, it may take time to work successfully but here’s some channels I’m setting up for my pupils to use and why.” Here’s Roddy Graham’s channels for his class, along with the explanations for the purpose of each:
“ The Library – a place to talk about books being read at home and share any related learning they do. The Gym Hall – a place to share any physical activity they do, including home fitness or games. Ask the Teacher – a place to ask non-learning related questions, possibly things that are worrying them and they need a bit of reassurance. #NoFilter – a place to share photos of how they are spending their days so their classmates can view Taskmaster – inspired by the TV show so a place to share a fun challenge/daily task for class to tackle Literacy and Maths Tool Boxes – a place to share support resources for tasks set – websites, videos, documents The Playground – a place where the class can chat about anything they like, just as they would in their school playground. The teacher can keep track of everything pupils type (and they are told this)”
You may add additional channels as works for your class, perhaps for curricular areas, perhaps having one for pupils to offer support or share knowledge to other pupils (as teacher Carol Diamond called her channel “Tiny Teacher Talk – where they can ask each other how to do things/for hints/tips or share their knowledge about something which is their strength), or maybe a Weekly Reflections or Time Capsule Thoughts channel where pupils might share about their experiences during distance learning over the previous week,; or maybe a Fun Foto Friday, Talent Show or anything else which fits in with building the culture of your classroom community.
How can you keep your Microsoft Teams classroom organized?
Use channels for specific activities Admins only on general channel Set up a tab for week's schedule
Here’s how you can restrict who can post to the General channel like this:
Click on the 3 dots (ellipsis) … next to General channel
Select “Manage channel” from the menu
Click on “Only owners can post messages” – now only you (or other colleagues if you’ve added them as owners) will be able to post on your General channel of the team.
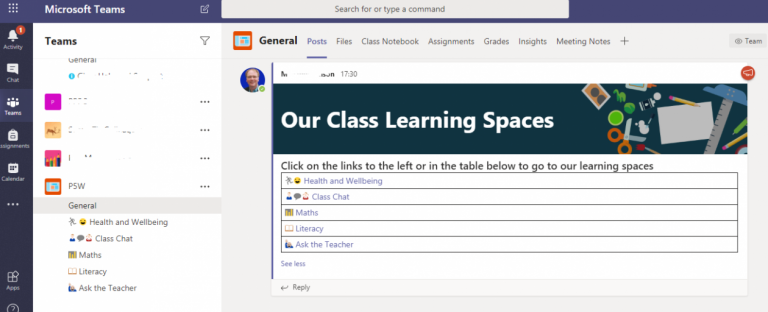
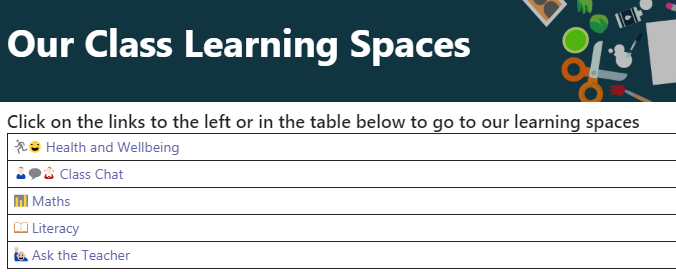
Once you have your channels set up you can create an announcement in the General channel of your Microsoft Teams class and add a table. Into the table add links to each of the channels (to get the link just click on the three dots beside each channel name and copy the link provided. Then go back to the text in your table, highlight the text and click on the link icon to paste the link you copied.
Whether it’s naming your channels in your class in Microsoft Teams, or when sharing information or activities in posts/conversations/announcements in your class in Microsoft Teams, or in names of sections and pages in your OneNote Class Notebook attached to your Microsoft Teams class then the addition of the visual cue of an appropriate emoji makes the text easier to identify in a list and also makes it more classroom friendly.
Click here for a blogpost about the use of emojis to support education – this contains lots of information about how these can support learning, as well as lots of examples of where they have been used. And if you’re wondering how you’d find just the emoji you need then that blogpost also contains a link to Emojipedia where you can type the word you want and a suggested emoji will be shown ready for you to copy and paste where needed.
Manage the settings of your class team
Once you’ve created your class space in Microsoft Teams it would be a good idea to manage the settings so that you can make choices about what you want your pupils to be able to do in your Team.
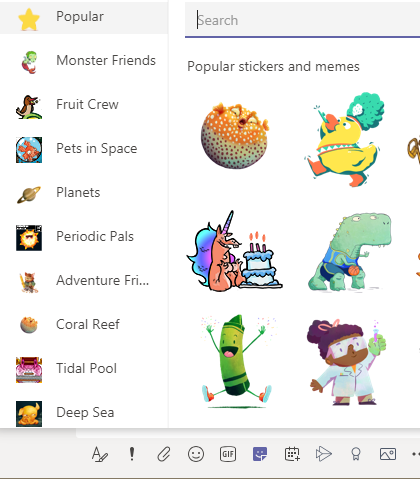
The choices are yours as you know your class best. Your level of familiarity with the tools available might make you decide to restrict what can be done by pupils at the outset and then enable features as you and your class become familiar with them. Or you might take the opposite view and leave everything enabled and only restrict an individual feature until you’ve had a conversation with the class about it, and responsible use. So you might want to disable the facility for pupils to share stickers, memes and animated gifs (you can switch them off and on at any time), you can make sure that pupils can’t add or delete channels, and you can ensure that pupils can only edit or delete their own posts in the posts/conversations. Teams manage members settings allows a teacher at any time to mute pupils, individually or collectively, to stop postings being able to be made temporarily for any reason.
Created this little reminder for pupils on how we keep our Teams learning spaces positive, helpful & productive during our period of distance learning – Planning to pop on our pages tonight so both pupils & parents can view. Happy to share if useful @HwbNews@MicrosoftTeamspic.twitter.com/ncOdC9jMBR
If you have older children, and you are looking for your class to co-create their own set of positive online expectations, then you might find helpful this School of Education Netiquette Guidelines from Chicago’s Loyola University as the starting point for a discussion to make the positive expectations explained within them re-interpreted in child-friendly language, making them specific to your class use of Microsoft Teams, and perhaps with associated visuals created by your pupils.
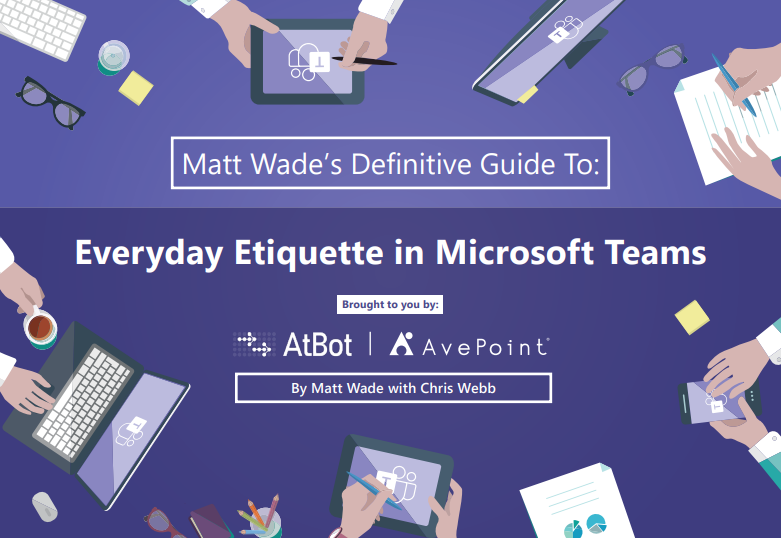
Everyday Etiquette for Microsoft Teams – a detailed guide, by Matt Wade and Chris Webb, to setting expectations around managing the use of Microsoft Teams with users. This is not aimed at primary school use of Microsoft Teams (and some of the features such as private chat and video camera use in video meets don’t apply to the configuration in Glow) but may be helpful as prompts for a teacher to perhaps have pupils come up with their own class-friendly versions, dependent on their age and experience and how it’s wanted to be in their class.
Check-ins
So you may wish to have a way of having a check-in with your pupils, to find out how they are, to show they have connected in your online class in Microsoft Teams. You can make use of a Microsoft Forms check-in form which pupils can complete when they come into your class in Microsoft Teams – and as well as asking how they are (with responses which might be by clicking beside an appropriate choice of emoji face) you can perhaps incorporate a bit of fun, and involvement so that pupils look forward to completing it each time, by having a different light-hearted question each time. The less predictable and funnier the questions the more likely your pupils might be to look forward to completing it. And because it would be a form within Microsoft Teams it means it already keeps a note of who responded (without pupils having to type their name) for the teacher to be able to access in Microsoft Forms. Click here for a ready-made template in Microsoft Forms (on the Microsoft Education Support site) ready for you to click on “Duplicate” button and adapt your your own needs.
Building engagement
Teachers in their classrooms have always found ways to engage their learners, to ensure every voice is heard, to coax the reluctant participant, to check understanding, to provide opportunities for collaboration, to create the environment for every learner to demonstrate their understanding, to move learners forward and build on previous experiences.
An online environment doesn’t change these principles, but instead requires adapting different approaches using available digital tools.
Consider encouraging the positive use of praise stickers (a teacher can control through manage settings options whether these are enabled or disabled for pupils in their Microsoft Teams class) – they can be used from the posts/conversations by clicking on the Sticker icon below where you’d type a message. These can be handy to provide a more visual way of providing positive feedback without having to type – click here for a guide to how to use these, whether on mobile or desktop/laptop
20 Ways to Facilitate Online Class Participation – a post by Halden Ingwersen with 20 suggested tips which apply to any online digital platform and can be adapted for different age groups has been used as a starting point for the approach below. Some things may not apply for specific tools or age groups, but the general advice in Halden Ingwersen’s post remains consistent for when using Microsoft Teams with your primary class:
Be clear in what you expect from your class online;
Become familiar with Microsoft Teams as your class digital learning platform (you don’t need to know about every feature, but make the most of what you use and try to experience from the learner viewpoint);
Provide online spaces within Microsoft Teams for group work (that might be use of channels in Microsoft Teams where focus on specific pieces of work with groups of learners take place, or it might be a collaborative PowerPoint presentation or Word document in Teams files, or a multimedia page in the collaboration spade within the OneNote Class Notebook integrated in your Microsoft Teams class, or at its simplest it might just be using the posts/conversations ensuring the starting point for each conversation group is followed by replies to their group’s task rather than a new conversation);
Share your plan with your class, which might be co-created with your learners or an outline you present of new learning which is going to be covered;
Make sure it’s easy for learners to find their tasks – aim to be consistent as to where learners can expect to find your plan for what’s expected, and provide links or clear steps to find something new.
Provide feedback in conversations/posts – in Microsoft Teams conversations within posts respond with encouragement as you would if you were face to face in the classroom, helping build the reassurance of your learners that you are listening to what they are saying – in the text-based nature of the posts/conversations there is no opportunity for a nod or a smile, but you can encourage through the use of thumbs-up to quickly acknowledge responses
Microsoft Teams has built into it the accessibility tool Immersive Reader Learning Tools. To access in conversations/posts a pupil simply clicks on the three dots … (ellipsis) to the right of any message in the conversations/posts in Microsoft Teams then selects “Immersive Reader.” This will let the user then hear the text played as spoken audio while the individual words are simultaneously highlighted in turn as they are spoken aloud. The pupil can change the background colour to help make it more easily distinguishable to suit the pupil (which only that individual will see, no settings here affect other users) and change the size of text, font, and spacing out of letters on the page. You can even break words into syllables and highlight in different colours nouns, verbs, adjectives and adverbs (all automatically). And you can switch on picture dictionary which will let a user click on any unfamiliar word and show a Boardmaker image (where available) and hear that word spoken aloud. For pupils where English is not their first language they can also use the inbuilt translate feature to translate individual words or the whole text of any message in conversations/posts in Microsoft Teams.
Connectivity woes or technical hiccups!
Every online platform hiccups from time to time: you might get error messages, things don’t update, you can’t upload files, you can’t share what you need to share – and you can probably add to that list!
Teams provides the facility for you as the teacher to present to your class. Don’t feel under pressure to use this video meet facility right away. And take on board safeguarding and employer requirements in use of such a tool, as well as being mindful of your professional teaching association advice. If this is for you, and you want your pupils to have the familiarity of seeing you and hearing your voice then click on this link for specific step-by-step guidance to setting up a video meet in Teams for your class. If you wish to have only your voice in the video meet then you might instead opt to have the camera pointing at an object (piece of work, paper on which you’ll demonstrate a teaching point, or maybe a piece of writing you’ll discussing together, or perhaps a class toy/character figure!
The files area within a Microsoft Teams class lets pupils within that class work collaboratively (whether real-time or asynchronously). As you would with a face-to-face class the teacher sets the expectations and roles of different groups within a class so that each pupil knows who will work on which document and with whom. No setting changes or permissions need to be made. Everything saves automatically. Pupils can create collaborative real-time PowerPoint presentations, or Word documents, or Excel spreadsheets. They can be uploaded from a device or just click “new” to start one right away in the Files folder/tab in your Microsoft Teams tab. Click on this link for a how-to guide about using Office 365 to create a collaborative Word document in Glow – this is the same process in Microsoft Teams just by clicking on the Files tab in your Microsoft Teams class, with the benefit that the permissions are already set to let anyone in the class collaborate with no need to specify usernames.Click on this link for a guide to creating a collaborative PowerPoint Online and click on this link for guide to creating a collaborative Excel Online spreadsheet. This is the same process in Microsoft Teams just by clicking on the Files tab in your Microsoft Teams class, with the benefit that the permissions are already set to let anyone in the class collaborate with no need to specify usernames
Assignments
Microsoft Teams includes the option to assign pupils activities, whether tasks for completion by specific dates or to assess understanding of individuals. This can be used to share assessments or quizzes, or share documents to a whole class in such a way that each pupil receives a copy ready for them to edit and submit on completion back to the teacher for feedback, without the rest of the class seeing it. Click here for a guide to making use of the assignments feature of Microsoft Teams.
OneNote Class Notebook
OneNote Class Notebook is built into Microsoft Teams. OneNote Class Notebook is like a digital ring-binder with cardboard colour dividers, and within each section you can have as many pages as you like. Each page is a freeform page which can be any size you wish, and become like your classroom whiteboard, where you can add a very wide range of content (including images, audio, video, documents, presentations, embedded Sway presentations, embedded Forms, and you can freehand draw or write just as you would on your classroom whiteboard. It all saves automatically and is accessible on any device so you can move from working on your smartphone on the OneNote app to working in the browser on a laptop (and other devices).
A OneNote Note Class Notebook already comes with the permissions for your pupils to access and collaborate on anything in the collaboration space, so you’ve no setting or permissions to worry about if you wish a group of pupils to work on something together, just create the page and tell them who’s working on it. In addition to these collaboration spaces a OneNote Class Notebook also has a section which the pupils can see, but on which only the teacher can add or edit content – handy for sharing what you might have shared on your classroom whiteboard. This is called the library space. There is also a teacher-only section which can be enabled (so you can create content ahead of time and move into the library when you wish pupils to make use of it. And the OneNote Class Notebook within Microsoft Teams also has individual sections for each pupil – which only you as teacher can see and that individual pupil (other pupils can’t see anyone else’s sections).
And if that wasn’t enough, OneNote Class Notebook built into a Microsoft Teams class also has Immersive Reader Learning Tools built in providing accessibility options for all learners.
Gathering feedback, taking quizzes to reinforce learning, or undertaking surveys of views are all the kinds of classroom activities which are ideally suited to the use of Microsoft Forms. Microsoft Forms are built right into Microsoft Teams, either in short-form quick polls with few questions added right inside posts/conversations in Microsoft Teams, or assessments or surveys as simple or as complex as you like created in Microsoft Forms and a link shared in conversations/posts in Microsoft Teams, or assigned to the class using the Assignments feature of Microsoft Teams. Whichever way Forms are assigned to the pupils the teacher then can see the results in one place, and can even be set up to be self-marking or to provide automated feedback depending on answers provided by pupils (using the branching feature of Microsoft Forms. Click here to find out more about Microsoft Forms
Asking questions is one of the most important things a teacher does on a daily basis. Teachers ask thousands of questions per week in their classroom and are fully aware that not all questions are equal. It requires great skill and precision for a teacher to ask the right question at the right time. Getting to this stage of asking the right question at the right times takes practice, purposeful practice because not all practice is equal either.
Why do we use questions?
Teachers use questions for a number of reasons but good questions get pupils to think and think hard. Checking for understanding is a key skill to also develop and the best way to do this is to use questions which move from closed to open questions. Beginning with knowledge recall questions a teacher can skilfully move to more open questions and really get the students to think hard.
Similarly, questioning allows you to deepen and develop your students understanding by using strategies such as probing (I particularly like ‘Probe Them Like Socrates’ from Making Every Lesson Count). This provokes our students to think hard and thinking is one of the true essences of learning, especially given that ‘memory is the residue of thought’.
Questioning also ensure that students undertake most of the cognitive work in the classroom and Doug Lemov beautifully writes about ‘ratio’ defining it as the balance of cognitive work shared by students and the teacher. This idea brings to light Lemov’s techniques of ‘no opt out’, ‘100%’ and ‘no hands up’ all of which will contribute towards developing a business like and productive classroom culture.
Finally, questioning does a lot to help build the classroom culture that is conducive to a positive learning experience. By incorporating and insisting on some of the techniques put forward by Lemov a teacher can really build an inclusive culture where it is ok to get it wrong. Getting it wrong is a cornerstone of questioning which allows the teacher to identify misconceptions and misunderstanding which could prompt them to reteach material.
The discussion of classroom culture through the use of questioning brings me onto my last point. Shaun Allison and Andy Tharby write in Making Every Lesson Count:
Questioning and class discussion help you form and maintain your classroom culture. Do you expect students to answer in subject-specific language? Do you accept incorrect or incomplete answers, or do you expect a high level of correctness? Do you expect them to listen respectfully to each other and to respond sensitively?
Allison & Tharby, Making Every Lesson Count
What does Rosenshine say?
Barak Rosenshine says in his 2012 paper that ‘less successful teachers ask fewer questions’ and that ‘most effective teachers also ask students to explain the process they used to answer the question’ showing that skilful teachers probe and dig deeper. This is vital if we want to make the invisible visible and get to grips with what our students actually know and can confidently tell us. I like to cite Rosenshine because of the language he uses, i mean who doesnt want to be one of his ‘most effective’ teachers? with this in mind then, you must ask a lot of questions.
Asking the right questions
In The Teaching Delusion Bruce Robertson writes ‘the questions you ask should be ones which students have a reasonable chance of answering’. So before asking questions make sure that you have taught the students something which they might have access to from their long term memory. Bruce also discusses the concept of ‘good’ or ‘bad’ questions and instead tries to focus his readers on thinking about ‘what makes a good question?’. Bruce suggests that we keep in mind the Goldilocks principle which is to ‘ask questions which are appropriately challenging – not too easy and not too difficult’.
As alluded to earlier we must carefully consider our questions based on what we have taught. We cannot think about something we do not know anything about so asking a student a question hoping that they know will be like trying to find a need in a haystack in the dark!
Questioning ideas
Now that we are in full agreement that asking a lot of questions is good for the soul how do we go about asking the right questions in the right way. A few ideas that I like are ‘ Wait Time’, ‘Probe Them Like Socrates’, ‘No Opt Out’, ‘No Hands Up’ and ‘Pose, Pause, Pounce, Bounce’. All of them contribute to an inclusive classroom culture whose foundations are built on the ratio of students thinking a lot harder than the teacher. Why? because the teacher will have planned their questions before hand, of course.
No Opt Out – This is one of my favourite Lemov Techniques from Teach Like a Champion. This is where you don’t allow students to say “i don’t know”. You either probe or rephrase your question or revisit them before your period of questioning is done. The simple act of returning to them after their peers have given an answer ensures a culture of high achievement and that they verbalise what has been said, given them a better understanding of what is being discussed.
Wait Time – In 1972 Mary Budd Rowe investigated the amount of time teachers left between asking a question and requesting an answer. She found that most teachers leave just 1 second, even today teachers wait for too short a time. I am guilty of this. Mary Budd Rowe found that if a teacher waited for just 3 seconds there were a number of positive changes in the classroom including better responses from the students. This technique is the easiest to implement, all you need to do is count in your head 3-5 seconds after asking a question. You’ll be amazed at how much better the responses are from the students after some thinking time.
Probe Them Like Socrates – In Making Every Lesson Count Shaun Allison & Andy Tharby propose this method of questioning and I love it. Socrates used this dialectic method of questioning when teaching the young men of Athens over 2000 years ago. Socratic questioning is still used today to challenge the accuracy and completeness of a students thinking. These six levels of questioning are considered important:
Getting students to clarify their thinking: Why do you say that? what do you already know about that? could you explain further?
Challenging and probing students about assumptions: is this always the case? do you agree or disagree with this?
Demanding evidence: why do you say that? can you give me an example of that?how do you know this?
Looking at alternative viewpoints and perspectives: what is the counterargument for…? what are the advantages/disadvantages of this?
Exploring implications and consequences: but if.. happened, what else would result? how does X affect Y?
Questioning the question: why do you think i asked that question?why was that question important?
Pose, Pause, Pounce Bounce – I first came across with in Ross McGill’s 100 Ideas for Secondary teachers: Outstanding Lessons. This technique is when you pose a question, pause for 3-5 seconds (or even longer if you deem it appropriate), pounce on a student to answer (Cold Call) and then bounce their response to another student (can you go further? do you agree/disagree?). You can keep this going and have a number of students respond to each others answers. Ross writes more about it here on his Teacher Toolkit blog.
Asking questions is one of the most important things a teacher does on a daily basis. Teachers ask thousands of questions per week in their classroom and are fully aware that not all questions are equal. It requires great skill and precision for a teacher to ask the right question at the right time. Getting to this stage of asking the right question at the right time takes practice, purposeful practice because not all practice is equal either.
Why do we use questions?
Teachers use questions for a number of reasons but good questions get pupils to think and think hard. Checking for understanding is a key skill to also develop and the best way to do this is to use questions which move from closed to open questions. Beginning with knowledge recall questions a teacher can skilfully move to more open questions and really get the students to think hard.
Similarly, questioning allows you to deepen and develop your students understanding by using strategies such as probing (I particularly like ‘Probe Them Like Socrates’ from Making Every Lesson Count). This provokes our students to think hard and thinking is one of the true essences of learning, especially given that ‘memory is the residue of thought’.
Questioning also ensure that students undertake most of the cognitive work in the classroom and Doug Lemov beautifully writes about ‘ratio’ defining it as the balance of cognitive work shared by students and the teacher. This idea brings to light Lemov’s techniques of ‘no opt out’, ‘100%’ and ‘no hands up’ all of which will contribute towards developing a business like and productive classroom culture.
Finally, questioning does a lot to help build the classroom culture that is conducive to a positive learning experience. By incorporating and insisting on some of the techniques put forward by Lemov a teacher can really build an inclusive culture where it is ok to get it wrong. Getting it wrong is a cornerstone of questioning which allows the teacher to identify misconceptions and misunderstanding which could prompt them to reteach material.
The discussion of classroom culture through the use of questioning brings me onto my last point. Shaun Allison and Andy Tharby write in Making Every Lesson Count:
Questioning and class discussion help you form and maintain your classroom culture. Do you expect students to answer in subject-specific language? Do you accept incorrect or incomplete answers, or do you expect a high level of correctness? Do you expect them to listen respectfully to each other and to respond sensitively?
Allison & Tharby, Making Every Lesson Count
What does Rosenshine say?
Barak Rosenshine says in his 2012 paper that ‘less successful teachers ask fewer questions’ and that ‘most effective teachers also ask students to explain the process they used to answer the question’ showing that skilful teachers probe and dig deeper. This is vital if we want to make the invisible visible and get to grips with what our students actually know and can confidently tell us. I like to cite Rosenshine because of the language he uses, I mean who doesnt want to be one of his ‘most effective’ teachers? With this in mind then, you must ask a lot of questions.
Asking the right questions
In The Teaching Delusion Bruce Robertson writes ‘the questions you ask should be ones which students have a reasonable chance of answering’. So before asking questions make sure that you have taught the students something which they might have access to from their long term memory. Bruce also discusses the concept of ‘good’ or ‘bad’ questions and instead tries to focus his readers on thinking about ‘what makes a good question?’. Bruce suggests that we keep in mind the Goldilocks principle which is to ‘ask questions which are appropriately challenging – not too easy and not too difficult’.
As alluded to earlier we must carefully consider our questions based on what we have taught. We cannot think about something we do not know anything about so asking a student a question hoping that they know will be like trying to find a need in a haystack in the dark!
Questioning ideas
Now that we are in full agreement that asking a lot of questions is good for the soul how do we go about asking the right questions in the right way. A few ideas that I like are ‘ Wait Time’, ‘Probe Them Like Socrates’, ‘No Opt Out’, ‘No Hands Up’ and ‘Pose, Pause, Pounce, Bounce’. All of them contribute to an inclusive classroom culture whose foundations are built on the ratio of students thinking a lot harder than the teacher. Why? because the teacher will have planned their questions before hand, of course.
No Opt Out – This is one of my favourite Lemov Techniques from Teach Like a Champion. This is where you don’t allow students to say “i don’t know”. You either probe or rephrase your question or revisit them before your period of questioning is done. The simple act of returning to them after their peers have given an answer ensures a culture of high achievement and that they verbalise what has been said, given them a better understanding of what is being discussed.
Wait Time – In 1972 Mary Budd Rowe investigated the amount of time teachers left between asking a question and requesting an answer. She found that most teachers leave just 1 second, even today teachers wait for too short a time. I am guilty of this. Mary Budd Rowe found that if a teacher waited for just 3 seconds there were a number of positive changes in the classroom including better responses from the students. This technique is the easiest to implement, all you need to do is count in your head 3-5 seconds after asking a question. You’ll be amazed at how much better the responses are from the students after some thinking time.
Probe Them Like Socrates – In Making Every Lesson Count Shaun Allison & Andy Tharby propose this method of questioning and I love it. Socrates used this dialectic method of questioning when teaching the young men of Athens over 2000 years ago. Socratic questioning is still used today to challenge the accuracy and completeness of a students thinking. These six levels of questioning are considered important:
Getting students to clarify their thinking: Why do you say that? what do you already know about that? could you explain further?
Challenging and probing students about assumptions: is this always the case? do you agree or disagree with this?
Demanding evidence: why do you say that? can you give me an example of that?how do you know this?
Looking at alternative viewpoints and perspectives: what is the counterargument for…? what are the advantages/disadvantages of this?
Exploring implications and consequences: but if.. happened, what else would result? how does X affect Y?
Questioning the question: why do you think i asked that question?why was that question important?
Pose, Pause, Pounce Bounce – I first came across with in Ross McGill’s 100 Ideas for Secondary teachers: Outstanding Lessons. This technique is when you pose a question, pause for 3-5 seconds (or even longer if you deem it appropriate), pounce on a student to answer (Cold Call) and then bounce their response to another student (can you go further? do you agree/disagree?). You can keep this going and have a number of students respond to each others answers. Ross writes more about it here on his Teacher Toolkit blog.
The NQ support materials for Gàidhlig, Gaelic(Learners) and subjects and courses through the medium of Gaelic, previously hosted on the Education Scotland National Qualifications website are now available on our professional learning community for Gaelic education on Yammer.
It should be noted that these resources no longer fully match the SQA course specifications. However, they do provide a range of useful support on approaches to effective learning, teaching and ongoing classroom assessment, should teachers wish to use them. You will find these resources here.
A glow login is required to access Yammer and membership of the group is also required.
Supporting the development of literacy in the classroom with GarageBand iPad app
GarageBand is an iPad app which has a host of uses for recording audio, which can include music in a host of different ways. But here’s how GarageBand can be used specifically to support the development of literacy in the classroom.
The how-to guide below provides the steps for learners recording themselves speaking using the GarageBand app on an iPad. A teacher can vary the steps depending on the purpose of the activity – so learners may start off needing to write a short story, or a poem or a conversation between characters, a report, or whatever is undertaken in the class.
It may be that learners have to retain key information, and the process of working sufficiently with a piece of text in order to prepare for recording it, then going through the recording process, then manipulating that recording (refining or editing or adding backing tracks), then sharing and listening to that recording, may help the learner engage more fully with the text, absorb it and make it their own, so they may be better able to recall that information if required to support their learning.
The outcome is that this chosen piece of writing is to be made into an audio recording to be shared with others. Whether that’s simply played back in class or shared with a wider audience online as determined by the learners and their teacher.
Knowing that their work will have a wider audience than their teacher changes the dynamic for the learner.
The resulting recording can have unwanted silences or other sounds edited out as described below, before the audio recording is shared with others.
Or as exercise in listening one group of pupils might record the words of a well-known piece of text being studied in class, but with the words in the incorrect order for another group of learners to use GarageBand to move the recordings of the words around until they are in the correct sequence.
So how do you use GarageBand to record and edit the spoken word? Follow the steps below, and then adapt the activity to suit the learning needs.
Recording learners speaking using the GarageBand iPad app
1. Click on + at top right in GarageBand Recents screen to begin a new recording
2. Choose Tracks tab along the top
3. Slide from the screen left to right until you see Audio Recorder choice
4. Now click click on + at top right
5. On the next screen click to the right of Section A where it says 8 bars to change to automatic by changing the slider to show on position for automatic
6. Switch off metronome icon so it does not show blue
7. Click on the input settings icon to the left beside the word “IN” and slide the button to the right beside the word “Automatic” to switch this on
8. Switch the view to show the tracks by clicking on the icon to the top left next to the down arrow
9. Then click record red button, wait for the audible clicking and on-screen countdown before speaking.
10. Once you have finished speaking, press the white square stop button to halt recording.
11. Press the white triangle play button to play back what you recorded.
12. Double-clicking on the blue audio track will reveal a range of choices for editing that recording, whether cut, copy, delete, loop, split, rename or (from the settings option) adjusting the speed or even reversing the recording.
13. To edit out unwanted silence or noises between speaking then when you double click the track, slide the timeline arrow above the track to before the unwanted sound, choose split from the menu when double-clicked on the track, and pull downwards on the scissors icon which will appear. Repeat this to split after the unwanted part of the recording, then double click this unwanted section and cut it or delete it.
14. Using this process you can cut and paste sections, phrases or individual words or sounds and move elements around.
15. Click and hold any track and choose to redo if wanted
16. Once you’re happy with your recording then click on the downwards pointing arrow at the top left and choose “My Songs” to save this recording and return to the list of any other recordings
17. To name this recording simply hold your finger on the recording icon for the recording you’ve just made and choose rename from the menu, give it a new name and click done.
18. To share this recording elsewhere or with others then hold your finger on the recording icon for the recording you’ve just made and click on the sideways arrow until you see share as an option and click on that.
19. Choose “Song” so that this will convert the GarageBand file into an audio recording which can be played back by others without the need for the GarageBand app.
20. Select the level of quality you wish than click “share” so that you can then choose how you wish to share it, whether by airdrop to another iPad or saved somewhere else of your choosing.
21. You can even save it to this iPad just into iPad Notes so you can keep it beside typed text without having to have an internet connection to share elsewhere – you can still share this note and the recording later elsewhere.
Do you want to add background music to the audio recording of spoken text?
GarageBand has a host of inbuilt musical instruments available from which to choose to create a musical backing track to your audio recording of the spoken text. You don’t have to add this but it can add another dimension to the recording, especially if the recording is to be shared elsewhere. Also, as the musical background track is being added, the learner once more listens to the text to which the background track is added each time adjustments are made.
You don’t need to be able to play the chosen instrument, or know much about music, since GarageBand includes options for using neat auto-creation wizards. For this guide the steps will show how to add a guitar backing track.
How to add a guitar backing track to audio recording of spoken text
Open the audio recording of spoken text you previously created in GarageBand
Ensure you are viewing in track mode (click on the track icon to the top left next to the downwards pointing arrow).
Click on the + symbol to the bottom left to add another track.
4. Slide from left to right until the guitar choice appears on screen
6. Now click on the icon which looks like a volume control dial at the top right
7. Click on the “Autoplay” dial so that the choice dot aligns with number 4 (you can make a different choice as you wish).
8. Try out creating music simply by clicking in turn on each chord to hear how it might sound. When you are ready to record the music simply click on the red record button, wait for the countdown, and then start playing your choice of chord buttons – note that you will hear the previously recorded audio recording of spoken text played back so that you will be able to match your guitar chords playing with this recording, and click on the white square stop icon to finish recording.
9. You can click on this guitar track to choose from the menus as to whether to delete and try again, or split and cut elements. You can adjust the relative volume of this track by sliding from the left and adjusting the volume control there.
10. Once ready to save and share this recording click on the downwards facing arrow at the top left
Looking to learn how to use more features of GarageBand iPad app?
Click on the link below for a free online manual on the Apple support site which guides you through every aspect of using the GarageBand app on an iPad
The video below “Beginner’s Guide to GarageBand for iPad” on the excellent Technology for Teachers and Students YouTube channel provides an introduction to using GarageBand on an iPad, including a host of tips and suggestions for using different features of the app.
Apple Teacher classroom-specific guide to using GarageBand
Click on the link below to sign up for the free Apple Teacher programme. This comprises standalone modules, one of which covers the use of GarageBand in a classroom setting
Lots of great things on the @impactwales twitter account, often in nice ‘sketch’ format. Here are some ways to have your pupils work on retrieval practice.
I’ve been reading a few things about inferential comprehension. Many of the articles I’ve read lead to similar conclusion, it’s a knowledge thing, rather than a practice/skill thing. This article sums up many of the ideas.
Feedback is one of the most cost effective ways to ensure pupil progress. There are lots of ways to do this, and there are some articles which suggest marking of books is the least time effective way of delivering feedback. There is an article from TES about effective feedback here and there are ideas for providing feedback here.
A really interesting article about school’s use of social media and parental engagement which may be connected to it. Our school has improved it’s use of twitter over the past 12 months and all staff are engaged with it. I think our children could have more of a ‘say’ in it’s use and maybe that is something that our Community Council could discuss.
Our parents have engaged with it. The numbers, likes, replies etc are there for all to see, and it’s grown over the year. I’m no entirely sure what Local Authorities/Government agencies/Governments are after when they use the term ‘Parental engagement’.
Is it that we’d like parents to ‘support’ their child by making sure they do any homework we set each night (and maybe not letting their child go to dance, football, scouts etc)?
Is it that we’d like parents to raise money for the school (although I’m of the opinion that school should be funded well from our taxation systems, not from the hard work of volunteers)?
If parental engagement with school is so vital, what should our outside agencies do through a mixture of support and ‘punishment’ to ensure it happens? (Parents were fined at one point for taking a term time holiday- was that an effective punishment?)
Making Magic move Animations to demonstrate learning – the iPad presentation creation app Keynote has a Magic Move tool which gives you the option to make objects appear to move around the screen when the presentation is set to play. So learners can readily create animated videos on an iPad using images which move, rotate, resize, rotate or change opacity – and these videos can be created to demonstrate a process or a sequence in any curricular area.
An iPad provides the facility to screen-record a video of whatever is shown on the iPad screen so that a Keynote presentation can be recorded as a video
Steps to using Magic Move in Keynote
Open Keynote app on iPad and create a slide where you’ve added objects
Click on the slide to which you are going to add a Magic Move transition, and click on the slide again, then click Transition.
Click on “Magic Move” and choose “Yes” when you’re asked to duplicate the slide.
Adjust the position, size, orientation or opacity of the objects on the duplicate slide.
Click on the original slide in the slide navigator, then tap “Magic Move” and choose “Options” to set the duration for the transition, whether to start the transition automatically or when you click on a slide.
Click on “Done” in the toolbar.
You can now preview your animation and adjust as required.
See the Sway presentation below for a host of how-to guides and examples shared by others where the Magic Move feature has been used.


 Text (and where pupils can use Immersive Reader in the browser to read it aloud (pupils just click on the 3 dots to the right of the message and choose “Immersive Reader”);
 Add a link to a web resource you wish the pupils to use;
 Share a picture of a visual diagram of the tasks (as you might do in your classroom) – just click on the paperclip icon to upload a picture;
 You might create a short video with your voice (so it’s familiar to your pupils) and the camera pointing at a piece of paper on which you are writing, or a book, picture or object such as classroom toy.
 When you first create a Team for your class you will automatically get a channel called the general channel. By default everyone in your class will be able to post there. And at the beginning that might be okay as everyone starts to use it.
 The Library – a place to talk about books being read at home and share any related learning they do.
 The Gym Hall – a place to share any physical activity they do, including home fitness or games.
 Ask the Teacher – a place to ask non-learning related questions, possibly things that are worrying them and they need a bit of reassurance.
 #NoFilter – a place to share photos of how they are spending their days so their classmates can view
 Taskmaster – inspired by the
  Literacy and Maths Tool Boxes – a place to share support resources for tasks set – websites, videos, documents
 The Playground – a place where the class can chat about anything they like, just as they would in their school playground. The teacher can keep track of everything pupils type (and they are told this)”
 Use channels for specific activities

 Once you have your channels set up you can
 . Thank you
 (@MrSteensonBusEd)

 Reassurance from their teachers+lesson links
  Exercise important message for healthy minds
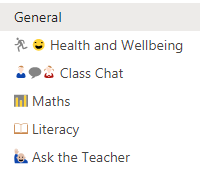 Whether it’s naming your channels in your class in Microsoft Teams, or when sharing information or activities in posts/conversations/announcements in your class in Microsoft Teams, or in names of sections and pages in your OneNote Class Notebook attached to your Microsoft Teams class then the addition of the visual cue of an appropriate emoji makes the text easier to identify in a list and also makes it more classroom friendly.
 Facility to mute activity in posts at weekends or holidays
 Share your class expectations

 Building engagement


 Accessibility and Inclusion
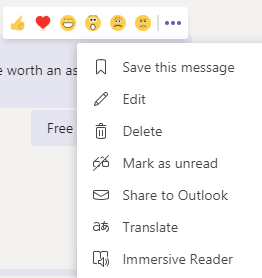

 Want to present to your class?
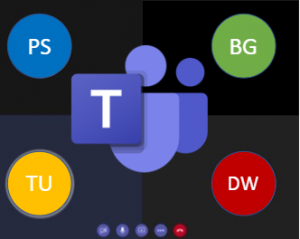
 Collaborative documents

 OneNote Class Notebook is built into Microsoft Teams. OneNote Class Notebook is like a digital ring-binder with cardboard colour dividers, and within each section you can have as many pages as you like. Each page is a freeform page which can be any size you wish, and become like your classroom whiteboard, where you can add a very wide range of content (including images, audio, video, documents, presentations, embedded Sway presentations, embedded Forms, and you can freehand draw or write just as you would on your classroom whiteboard. It all saves automatically and is accessible on any device so you can move from working on your smartphone on the OneNote app to working in the browser on a laptop (and other devices).
 Microsoft Forms for assessment or surveys
 (@andrewkbailey13)


 4.
4.  5.
5.  7.
7.  8.
8. 
