Sharing video content with learners can be tricky for a number of reasons – first, the files are often so big that they take up a lot of storage on your online learning platform (website/app/teams etc). Moreover, if you are staring a recording of you reading a story, there are copyright issues that may affect it. Also, you just might not want your video visible to the whole world.
The below video tutorial looks at the best way of hosting your videos privately and posing them to a specified group of people (e.g. your class)
I really hope it’s helpful.
I am starting to build and grow my YouTube channel with more regular content and would really appreciate a subscribe on the channel. If you could ‘like’ any videos that you find helpful, it will help me tailor my videos to things that will help you.
The media really is giving teachers a bashing just now during the COVID-19 lockdown, with many outlets saying that we are not doing anything. I know that’s not true. The amount of incredible online content and learning experiences that are being produced on a daily basis is incredible, and teachers have really risen to the challenge of keeping learners engaged online.
One way that can make this more simple and engaging for children is to use the free quiz app, Kahoot, to play quiizes and assign challenges for your learners – and the best thing is, you can share these quizzes on ANY platform that you are using to share learning – be it a school website, app, Microsoft Teams, Google Classrooms, Zoom etc. However you are engaging your learners, Kahoot is free and readily available.
Here is a short video tutorial about how to get the most out of Kahoot and really engage your learners.
Take care and stay safe
Please do get in touch via Twitter if there are any tutorials that you’d like me to create or questions that I may be able to answer.
Glow is a really powerful platform for connected learning, however we still often don’t engage as well as we could – I myself am guilty of that.
With COVID-19, suddenly we have been forced to reconsider everything we know about delivering learning experiences and are turning to online platforms.
Many schools are considering using Teams (who aren’t already) after the holidays, but not all staff and pupils feel confident in using it. I have, therefore, created tutorial videos for teachers and pupils on Twitter, and will share below so that they are all in one place.
Please take care and stay safe.
Donald
For Teachers
Setting up Teams for your class on Glow
You will need a glow account in order to do this.
Sign into Glow at glow.rmunify.com and follow the below tutorial to add ‘Microsoft Teams’ to your launchpad, find your class’ login details (you will need to find a way to send these out to pupils) and set up your team.
The video also shows some of the features of Teams that you will be able to use to support children with their learning.
When changing passwords for the children, I would recommend using one password for everyone and ticking the box which allows them to change their password. This is an excellent way to start a conversation about the importance of keeping passwords safe and secure.
If you forget to tick the box allowing pupils to change their password, don’t worry as I will cover how pupils can change their own password in my tutorial for them.
The official Glow quick-start guide can be found here
If any of your pupils do not have a Glow account, this needs to be set up on SEEMIS Click and Go. Your school admin or SLT should be able to do this.
This video is an in-depth look into using Teams. I have tried to keep it as simple as possible, so for more advanced features please check out some other readily available tutorials on Teams. This looks at an overview of what the Teams experience will be like for you and your class, with a demonstration video meeting as well.
Use the timecodes below to skip to the relevant sections.
Video Timecodes.
1. Join or Create a Team (1min 18s) – find out how to create your own class team or join a team.
2. Activity and Chat (3 mins 02s) – Take a look at the ‘Activity’ and ‘Chat’ options in the left-hand menu.
3. Assignments and Quizzes (3 mins 55s) – Learn how to set assignments and create quizzes for your class team all within the application in the left- hand menu.
4. Calendar and Meetings (4 mins 43s) – Learn how to create meetings for your class (video lessons) using the calendar option on the left-hand menu.
5. Calls, Files, and Other Options (6 mins 31s) – Find out about the final left-hand menu options.
6. Inside Your Team (7 mins 15s) – Learn about all of the options you have inside your team page, such as hosting quick video meetings, text conversation, team files, applications, and giving out reward points.
7. Channels (11 mins 44s) – Learn about channels and how they are used.
8. Hosting a Meeting (12 mins 27s) – Take a look at what it is like to host a meeting with an on-screen mock meeting, and see the options that you have including sharing your desktop for the class to see PowerPoints etc while you’re talking.
9. How to Mute and Use Chat (16 mins 50s) – This is really underrated but so important in teams meetings in order to prevent glitching audio and nonsensical dialogue.
10. Pupils Sharing (18 mins 21s) – See how pupils are able to share their screen and examples of their work during a meeting (they can also upload to the files/conversation)
Using the Teams App – common troubleshooting
A common troubleshooting issue when signing in to the mobile & desktop app is using the full glow email extension. This quick video will talk you through using the Microsoft Teams app on any device.
Ideas for using Teams
For ideas about ways to get started using Teams, check out Malcolm Wilson’s blog post here and follow him on Twitter @claganach.
For Children
Please feel free to send the video links via your communication platforms to children that you want to support in accessing Glow and Teams.
Video 1 – How To Set Up Your Glow Account
URL to share with pupils: https://youtu.be/FCnTV0sBtn8
Video 2 – How To Set Up and Use Teams
(Make sure to set up your Glow account before watching this video; video 1 will help you with that)
URL to share with pupils: https://youtu.be/EoRLC6xjyeQ
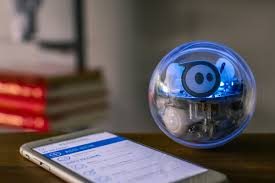
I love Spheros. They have so much potential to really enhance learning and teaching, and really provide you with opportunities to allow learners to apply their learning in different contexts. They are not cheap though, but they are so versatile that they are a really good investment.
Many schools and councils are purchasing Spheros, so hopefully this blog will be beneficial if you have/are getting Spheros and would like to know what you can do with them. Even if you aren’t planning on getting them, hopefully this blog will allow you to understand more about them, what they do and how they can enhance the learning of your children.
I think the New Yorker sums it up the best in their post: “Spheros aren’t just fun; they are also an excellent teaching tool. Students have begun using them to learn everything from geometry to genetics. They can code them, too, to take a first step into computer programming.”
Spheros are programmable toys, similar to Beebots but with far more capability and potential. In a computer programming context, children can apply their learning of code to make the Sphero perform a variety of actions, such as: drawing shapes, completing mazes, and even to interact with their surroundings. Movement with spheros isn’t as simple as ‘move forward’ for a set number of steps. Children have to apply an understanding of angles, speed and time in order for the sphero to move. They can develop an understanding of the link between speed, distance and time to accurately program their device to move as intended.
Spheros aren’t just for older learners though – there is so much potential for younger learners to use the ‘draw’ feature to manipulate the device. D&T activities are also notable, as children can design devices that are powered by the Spero – such as a racing car that is driven by the sphero, or even a helicopter whose rotary blade spins as the sphero spins.
There are a variety of different Spheros available – most schools use SPRK+, however all are fantastic. You can see the full range here.
Below is a fantastic intro video that shows what Sphero Edu is all about:
Activities and Resources
Fortunately, getting started with Spheros need not be daunting or tricky; there are a whole host of free resources to use with Spheros. A Sphero resource guide is available here although is based on the American K-12 system.
The best place to start is the Sphero Education Website. The activities tab allows you to find fully comprehensive lessons sorted by stage / subject. It should be noted that Spheros shouldn’t only be used for teaching computer science – there are so many applications across the curriculum that it really is worth browsing the activities site to see what you can do.
Another great resource is your local Apple store. Did you know that you can take groups of children there for FREE to learn how to use Spheros (you don’t even need your own devices as the store provides them!) . Go to the Apple Field Trip website for more info and to book.
Of course, the other place that I love to go for my ideas is Twitter. Loads of schools use Spheros really effectively. Just search for ‘sphero’ in your Twitter search bar, and you will find loads of schools using them and be instantly inspired!
We’ve actually only just purchased our Spheros in Mosspark, so I have only used them twice with learners.
In the first lesson/few lessons with spheros, I like to let the children get used to syncing, controlling and putting to sleep the Sphero. I often play ‘Sphero tig’ and other simple improvised games. Sphero tig is easy – one Sphero is it and sets their colour to green. The other Spheros are blue. If the tigger catches a Sphero, it turns red and waits until a blue Sphero frees them by touching them and flashing their light on/off 5 times. The children really enjoy this and it engages them instantly and allows them to quickly learn to control the Spheros through the ‘drive’ function.
You can follow our journey with Spheros by following @MossparkPS on Twitter. Here are some of our recent Sphero tweets including our instant hit, ‘Sphero Tig’:
I hope that the post this evening has been helpful and has given you ideas about how to get started with Spheros in your own classrooms.
As always, please connect with me on twitter: @mrfeistsclass. I love getting inspired by everything that you all do. Feel free to send me suggestions for future blog posts and tag me in Tweets showing how you are using Spheros or any digi tech to enhance learning!
I had an amusing experience at a recent digital-themed meeting. A colleague from another establishment sat down beside me before we started and said “You watch, there’s going to be at least one geek here who opens up their MacBook, takes notes on their iPad with their apple pencil, sets a reminder on their Apple watch and just talks about the importance of code. You wait. I didn’t wait – I took out my MacBook, opened up Good Notes on the iPad Pro with my apple pencil at the ready (and for good measure set a reminder on the apple watch). Sure enough, my role in the meeting was also to talk about what progression in ‘coding’ looks like in Early years and primary. I just loved that the colleagued just sighed and had a good chuckle about it.
Sure, I’m a geek and proud – and following on from that, today, I’m looking at another Apple product – Keynote – and why I use it over PowerPoint each and every time. I am not, however, saying it is better than PowerPoint. PowerPoint is a phenomenal and powerful tool, and many of the things that I describe below can be done using PowerPoint – however, as Glasgow is undergoing a digital transformation where learners will be working with iPads on a 1-1 basis I feel that its an important tool to really get to grips with. Hopefully, by the end of this blog post, you will have found new, creative ways to use Keynote (and perhaps PowerPoint) not just to create presentations, but as a tool for learning across the curriculum.
I will be focussing on the iPad (app version) of Keynote. The Mac version has additional features and a slightly different layout, but it is less likely that your learners will have macs instead of iPads…
Here is a breakdown of what I aim to cover in this post:
An overview of Keynote
Presenting from Keynote in the classroom
Creating a ‘links only’ presentation
Photo editing and making creative montages using ‘Instant Alpha’
1. An Overview of Keynote
What is Keynote?
Simply stated, like Microsoft PowerPoint, Keynote is presentation software. Apple says this about Keynote: “With its powerful tools and dazzling effects, Keynote makes it easy to create stunning and memorable presentations. You can even use Apple Pencil on your iPad to create diagrams or illustrations that bring your slides to life. And with real-time collaboration, your team can work together, whether they’re on Mac, iPad or iPhone, or using a PC. (view source)”
Getting started
Instead of using picture guides, there are lots of great YouTube videos available on using Keynote. Here is a series of videos that are very clear and just focus on ‘getting started’. Please note that the content is not created by me, but is publicly available on YouTube. If you like the videos, please support the creator, WCPS, by giving their videos a ‘like’, sharing their content and/or subscribing to their channel.
Creating a Keynote Presentation
One edit from the above video: to delete a slide or select options, tap on the slide icon (instead of hold) so that it highlights in blue and then tap again – this is easier than first holding.
You will notice that it still feels very much like a ‘PowerPoint’ at this stage, and it is fantastic to use. Keynote and PowerPoint are also interchangeable – you can open your previously made PowerPoints in Keynote, and you can save Keynote presentations as PowerPoints if you wanted to use it on a school computer.
Adding Content
Modifying Content in Keynote
2. Presenting from Keynote in the classroom
Linking to the projector
There are different ways that you can link to a projector in class. The easiest is if you are lucky enough to have ‘Apple TV’ set up in your classroom and Wi-Fi – however, this is unlikely so I will skip over this.
Alternatively, you can purchase an iPad (lightning) to VGA adapter which will allow you to plug your device into the wire that normally connects your laptop to the projector. Apple’s own lightning to VGA adapter is very good, but unnecessarily expensive. There are much cheaper versions available on Amazon or similar. *Please note that I am not affiliated with any products I mention, and am only doing so to note examples, but am not recommending any of these products as better than any others.* A search on amazon for lightning to VGA brings up some good results – make sure that you do select one that has a lightning (not thunderbolt) connector and is compatible with VGA (it may also have an additional HDMI or other post – that is okay).
I do have my own adapter, but the school have also purchased some as they are well used not only for presentations, but for modelling how to do different things on the iPad that we are teaching the children (e.g. using Garageband, Book creator, Pages etc.)
Presenter mode
With the iPad connected to the projector with a wire, it takes away from the ‘portability’ of the iPad. Fortunately, Keynote has presenter mode through which you can not only control the Keynote from your phone/another iPad, but you can read your presenter notes on your second device while the students only see the presentation.
Using presenter mode is easy once you’ve done it once. The very first time that you connect the devices, you need to be using WiFi or cellular, but thereafter you don’t need to be connected to WiFi or cellular (I don’t know if this is true for two iPads though – I use my phone and my own iPad for this – my iPad is not connected to WiFi when I use it and does not have cellular.)
To use presenter mode, open the presentation on the iPad that you wish to display your presentation and also open Keynote on the device that you want to control the presentation from. I normally use my iPhone for this.
If you have previously paired your two devices, then follow these steps to remotely control your presentation.
If you can’t find the iPad that you wish to control (it won’t say ‘play’ if this is the case) click on ‘devices’ as below and then choose ‘add a device’. To add a device for the first time, you should make sure that they are both connected to the same WiFi or cellular connection – thereafter they do not need to be connected (at least, I’ve not had them connected after this point).
Once you’ve used presenter mode, I can guarantee you won’t want to present in any other way, especially if you use all of the extra features like presenter notes and the laser-pen simulator / drawing tools!
3. Creating a ‘Links Only’ presentation.
I did this as a workshop in Strathclyde University for student teachers as it is a fab tool. For older children, they could create interactive textbooks and study guides. In the past I’ve used it to create ‘branching narrative’ style interactive stories. There are lots of ways to use ‘links only’ and create links to external sources and also internal slides.
Here are some of the tweets prior to and from our #MPTechTeam trip to Strathclyde University:
Two of our #MPTechTeam wanted to share their ‘practice’ interactive branching narrative stories, created in Keynote, in preparation for their visit to Strathclyde Uni to work with student teachers! pic.twitter.com/NDUpYgZjPX
4. Photo Editing and Making Creative Montages using ‘Instant Alpha’
For years, I’ve been using photoshop for this very thing, but it is available on our iPads for free and is surprisingly powerful!
Truthfully, until ‘Everyone Can Create: Photo‘ came out, and I read through the chapter on using Keynote for photography – making scrapbooks and montages etc, I hadn’t even realised that this was a feature or just how amazing it was.
Instead of trying to describe the process, in the below tweet is a video of a simple creative montage in action on Keynote – whilst watching, just think about the ways that children could use it creatively for art & design, or advertising a product, or for bringing stories to life in literacy etc.
*Images used in this video are stock images purchased through Adobe Stock*
Nearly finished putting together this evening’s blog, but here’s a wee video that I’m using for part 4 about ‘instant alpha’ in Keynote. Just think about all of the amazing uses that it can have. Other great ideas in the ‘Everyone Can Create: Photo’ publication on Apple Books! pic.twitter.com/AtXitsLebm
Hopefully this has been a helpful insight into using Keynote and why I now use it for everything!
Sorry this blog is late, I had hoped to finish it before performing in Edinburgh today, however, that wasn’t to be! A great day though, with an audience in the tens of thousands our boys did phenomenally well – you can see what we were up to on the choir twitter feed or facebook page.
As always, please get in touch via twitter with feedback / suggestions etc
Over the last two weeks, I have been mainly focusing on the ‘Everyone Can Create: Music” publication, available for free on the apple book store – looking at how we can use digital tools (with a heavy focus on GarageBand for iPad) to achieve music experiences and outcomes. Whilst this week I am moving away from music, I would like to stick to the “Everyone Can Create” series, as one of the other publications in the series as I am currently reading each book, and they are fantastic.
This week we are looking at the most versatile tool available to us – the camera. Of course, “Everyone Can Create: Photos” is the publication that I will mostly be referencing today, however, a physical camera (potentially combined with a computer program) or any device with camera function will enable you to achieve much of what we will look at today.
The Camera – ways to meet EXA outcomes.
I think the value of the camera is often understated in education. Yet, it is a tool that can be used for so many different aspects of learning before we even begin to look at some of the amazing creative ideas outlined in ‘Everyone Can Create: Photos”. With iPads/tablets/phones/class cameras, children can photograph / document aspects of their learning that they are proud of for saving digitally and sharing electronically home. Children can capture aspects of peer performance that they like and use this for feedback. They can capture and edit images creatively, creating montages of their learning, or IDL posters. They can use them to capture images that will enable them to promote enterprise projects. Really, the possibilities are endless.
However, all of this is mostly about ‘capturing’. Photography itself is also an expressive art, and, considering this children can also create using cameras. Take the below EXA outcomes for art and design. All of these can be met through photography as well as by ‘drawing’ or ‘sketching’.
Let’s look at some of these to se how we can use the camera.
“…comparing and combining them (photos in this case) for specific tasks.” For this one, children could capture images on a theme, combine them in a collage-maker app, or in Keynote/Pages for a different task – e.g. poster / story etc.
“…line, shape, form, tone, colour…” edit images creatively in mark-up or the inbuilt editor, playing with saturation, hue, white balance, lighting.
“…to convey ideas, thoughts and feelings…” capturing ‘mood’ in photography, looking at composition, colour choice or more.
That’s just a very quick snapshot of some of the ways we could use cameras. It’s versatile, reliable, relevant and simple to use from nursery age right through to further and higher education.
Everyone Can Create: Photos
I do love this publication, and will be using it with my school camera club (see below for tweets from them) over the coming months.
The guide aims to teach us how to do the following, using a combination of the camera, photos, keynote and pages apps. Even if your school doesn’t have iPads though, I’d strongly recommend you check out this fantastic publication as it does have so many great ideas that could be taken and used on different software available in your school.
A personalised picture
A portrait from the past
A story in a single photo
A moment in motion (using the iPad to create slow shutter speed images)
A personalised collage (using Keynote and the mask tool)
A photo documentary (and thinking about photo journalism)
A portfolio of your favourite photos
As I say, I really rate this publication and will be using it with my school camera club and also in classes.
Mark-up with younger learners
Something I love to do with younger learners is not only capture images, but to edit and personalise them. The iPads have a fab built-in app called ‘mark up’, where children can add drawings to their pictures. This covers digital outcomes in addition to some of the above EXA ones, so well worth doing with your learners (and they love it!)
For the below demo, I will use a stock photo from Adobe Stock.
Take a photo using the ‘camera’ app, or open a previously saved photo from the ‘photos’ app.
Select the blue ‘edit’ icon in the top right hand corner
There are lots of different options now that can change the lighting etc – it’s great for older children to experiment with these and get a feel for what they do. For our younger learners using ‘Mark-Up’ though, select the ‘three dots’. Please note, I have additional applications in this option that may not be installed on your iPad so won’t appear by default.
Children can then add their own annotations/drawings to edit their image creatively. A cheap stylus is a bonus if you have one (or an apple pencil if you can!) but children can also just draw with their fingers!
Click ‘done’ when finished to save the image.
Other apps
There are, of course, lots of apps out there that work in a similar way to mark up, or that can be used for more advanced photo editing, but I love the sheer simplicity of mark up for our youngest learners, and have used it with P1+ in the past.
Other free apps I like to use are:
Keynote and Photoshop Mix (for creatively mixing images together)
PicCollage for children to select their favourite images and creatively put them together for display/sharing
Notes and pages for annotating images
Greenscreen apps (such as DoInk – although this is not free) for using the images as a background for a news report etc
#MPCameraClub
This year I have started a photography club in my school, mainly because a P7 wants to be a photographer when she’s older and I thought that this would be a great way to help her develop her skills – however, I’m finding that it is so beneficial and is developing such good creativity that I think it will be one I keep running for years to come! It is open to children in P7 only, and runs after school. The reason I mention it is that we will be starting to use the ‘Everyone Can Create: Photos” resource, mentioned earlier; but have been using the ‘camera’ creatively (funnily enough!)
I will add three of the tweets below detailing what we have done so far, but do follow us on twitter using #MPCameraClub – tweeting from @mrfeistsclass and @MossparkPS – to see more.
#MPCameraClub were set two challenges today:
1) take a photo of something obscure and show it to the group to see if anyone can work out what it is.
2) take pictures on the theme of ‘my world upside-down.
Lots of fun!! pic.twitter.com/QL5fmIGT3J
Let’s talk about ‘that’ experience and outcome; the one that is so rarely met in its entirety due to “Music Technology”.
I remember being introduced to Sibelius – a program for musical composition – when I was studying music, but rarely, if ever, did I get to use music technology creatively, let alone to experiment with (and therefor, learn through play) music. However, as technology has evolved, so has our ability to create and experiment with music through technology.
This term, I have planned a progressive music technology lesson series with P6 and P7/6, so look forward to blogging about how that goes towards the end of the term.
Everyone Can Create: Music
Being an Apple nut, I think it is always inevitable that I will talk about their products first – however, when it comes to music technology and education, I truly believe that they are leading the way. I was thrilled to be at a conference recently where they revealed Apple’s latest series of teacher guides: Everyone Can Create. Available in the Apple Book Store for free, these books cover teaching expressive arts with iPads, and how iPads can truly transform children’s ability to learn creatively.
I have already read ‘Everyone Can Create: Music’ and have really been impressed with it – indeed, I am basing the P7/6 and P6 lesson series for this term on it, and I can’t wait to explore the other ones.
Find out more about the ‘Everyone Can Create’ series here.
I couldn’t recommend the ‘Everyone Can Create: Music” enough, and I genuinely believe that it will transform your teaching, and confidence in teaching, music.
GarageBand
Everyone Can Create: Music is based on using GarageBand. I realise, initially it is a daunting app. I started using it a few years ago and quickly stopped as I didn’t get it. Now, however, I use it with P2 upwards. Once you get past the initial fear of what everything does, you soon realise that it is not only one of the best apps for creating and recording your own music, it is also right up there for creating a virtual band and playing instruments in a classroom. For children in councils/schools that are investing in 1-1 iPads, GarageBand becomes a tool for your children to enjoy exploring and understanding music as well as creating their own compositions. As there is a huge amount to GarageBand, next week I will do an in-depth guide to using GarageBand. In the meantime though, I recommend reading, or at least glancing through, “Everyone Can Create: Music”.
Audacity
Audacity is a free open-source program for PCs and laptops that (with a microphone or other input device, or by downloading and inserting audio [be aware of copyright laws when doing this]) allows you to record and edit your own music in multiple layers, or tracks. This allows children to better understand how music recording works.
It can be a bit tricky to get sued to at first, but there are many online guides to using Audacity.
Here is a great YouTube video on how to use Audacity for beginners by Mike Russell:
Others
There are other apps; a search for ‘apps for composing music’ for example bring these to you. Some that come highly recommended (I don’t know if they’re free/paid though) are in this blogpost
Sorry it’s been a short post today, but it is the first of a number that look at creativity on the iPads. Next week I will bring you an in depth guide to using GarageBand and look at how I’ve used it with children from P2 upwards.
One of the most powerful apps in education is Book Creator. It is a paid app, however, at £4.99 it is truly worth it. From sharing learning, to creating books and comics, to making videos and supporting children with ASN/EAL; book creator truly is the tool for the job.
Here is a quick PowerPoint presentation about how to create, read and share books in Book Creator:
Read to Me
Since November 2016 the ‘Read to Me’ tool has been one of the most powerful features (in my opinion) of this fantastic app. When it was launched, I had a new EAL learner with an ASD who was struggling to settle into the class. Her language barrier was a huge issue, and her ASD caused great anxiety in the mornings and after break/lunch. She didn’t want to have to try and speak to anyone as she became very anxious that she wouldn’t understand or be able to respond.
Until the launch of ‘read to me’ on book creator, she had a system where she would come in and read one of her bilingual books or try to use worksheets with pictures to learn new words. Whilst this worked to an extent, she did find it tricky as she couldn’t ‘hear’/pronounce some of the words. With the launch of ‘Read to Me’ in book creator, though, I knew that we were on to a winner. She built her own dictionary on book creator by drawing (with the pen tool) a picture of the word that she was learning, and typed the word that she chose from her worksheets, class work or dictionary. E.g. if she had the word ‘tree’ she would draw a tree, type the word tree and then move on. This would have been the same as what she had already been doing on paper, however, she couldn’t easily pronounce the words previously without myself or a member of support staff sitting with her and reading the words, and this was something that made her feel uncomfortable as she didn’t like that the children could hear her learning new words. With the ‘Read to Me’ function, she was able to put on headphones and listen to all of her words each morning and after break/lunch.
This then became her routine – come into class before the line, get her designated iPad, put on her headphones, listen to the previous words and add new ones.
It worked!
She soon started writing small sentences that she wanted to use in class, like, ‘please may I go to the toilet?’ I remember the class getting so excited the first time she put up her hand and asked a question, and she was so proud.
I know this is a very specific example of a child with many needs, but, there are so many times in learning environments that book creator can be a hugely powerful tool. I wish that I had the ‘read to me’ function in the year that I taught a non-verbal child, as I imagine it would have transformed the way that he could communicate with me and the other children.
One of my colleagues is currently using book creator with her class and said that the children are very good at using the ‘read to me’ function to check their learning. She noted comments such as “no, that doesn’t make sense” when they hear it being read back to them.
Design and layout
Creativity is a huge aspect of learning, and applications that are fairly static and don’t allow much creativity really don’t engage our learners as much as those that do. Book creator allows children to design every page as they want; from the background colour, to the positioning and size of text boxes, to adding their own drawings, or inserting media it really is powerful, and children want to create their own books using it – I’m yet to find a child that hasn’t engaged with it.
The design and layout options are really simple to use and navigate between, and are noted in the Presentation at the top of this post.
Sharing
Children can save their work to their iPad’s book store, as a PDF for printing, or even as a video file that could be put onto the school twitter feed, saved to their Glow OneDrive or even emailed home.
Let me know!
Book Creator genuinely does excite me, and I’m looking forward to sharing its potential with my colleagues in a CPD training this week. If you already use Book Creator, or will be starting to use it, please send me a tweet and let me know how you use it with your learners, as I love being inspired by the Twitter community!
 I had an amusing experience at a recent digital-themed meeting. A colleague from another establishment sat down beside me before we started and said “You watch, there’s going to be at least one geek here who opens up their MacBook, takes notes on their iPad with their apple pencil, sets a reminder on their Apple watch and just talks about the importance of code. You wait. I didn’t wait – I took out my MacBook, opened up Good Notes on the iPad Pro with my apple pencil at the ready (and for good measure set a reminder on the apple watch). Sure enough, my role in the meeting was also to talk about what progression in ‘coding’ looks like in Early years and primary. I just loved that the colleagued just sighed and had a good chuckle about it.


 (@mrfeistsclass)


 Since November 2016 the ‘Read to Me’ tool has been one of the most powerful features (in my opinion) of this fantastic app. When it was launched, I had a new EAL learner with an ASD who was struggling to settle into the class. Her language barrier was a huge issue, and her ASD caused great anxiety in the mornings and after break/lunch. She didn’t want to have to try and speak to anyone as she became very anxious that she wouldn’t understand or be able to respond.
 This then became her routine – come into class before the line, get her designated iPad, put on her headphones, listen to the previous words and add new ones.
 Creativity is a huge aspect of learning, and applications that are fairly static and don’t allow much creativity really don’t engage our learners as much as those that do. Book creator allows children to design every page as they want; from the background colour, to the positioning and size of text boxes, to adding their own drawings, or inserting media it really is powerful, and children want to create their own books using it – I’m yet to find a child that hasn’t engaged with it.